Saltar al contenido principal

Nest Learning Thermostat 2nd Generation LCD Screen Replacement

Qué necesitas

  1. Nest Learning Thermostat 2nd Generation LCD Screen Replacement, Removal from Wall: paso 1, imagen 1 de 2 Nest Learning Thermostat 2nd Generation LCD Screen Replacement, Removal from Wall: paso 1, imagen 2 de 2
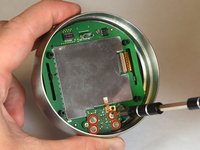
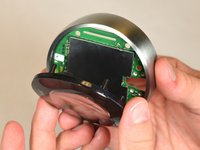
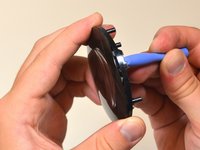
    • Grasp the display's metal outer ring with your fingers and pull directly away from the wall.

  2. Nest Learning Thermostat 2nd Generation LCD Screen Replacement, Open Display: paso 2, imagen 1 de 1
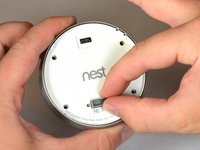
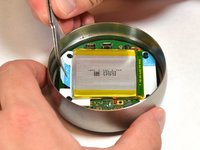
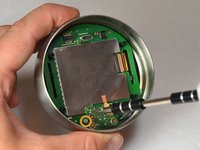
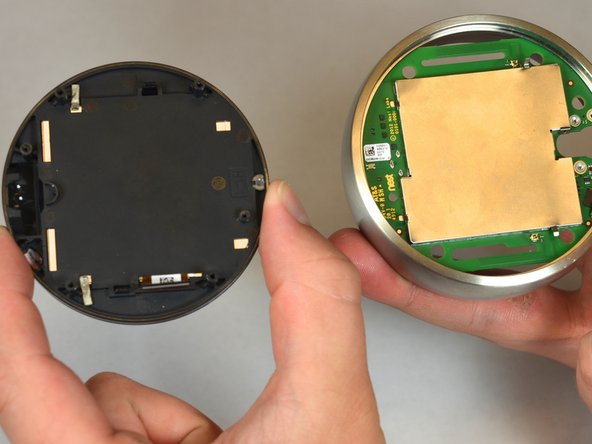
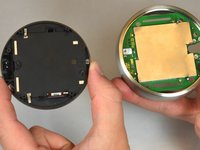
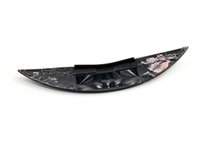
    • Turn the display over.

    • Remove the four 6 mm screws from the back of the display using a Phillips #0 screwdriver.

  3. Nest Learning Thermostat 2nd Generation LCD Screen Replacement, Remove the back of the display: paso 3, imagen 1 de 2 Nest Learning Thermostat 2nd Generation LCD Screen Replacement, Remove the back of the display: paso 3, imagen 2 de 2
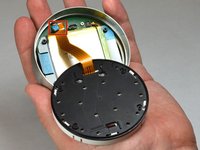
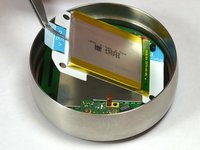
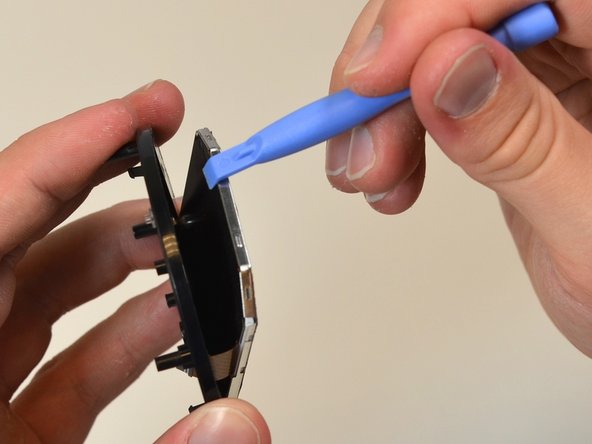
    • Pinch the gray 20-pin connector with your fingers and pull directly away from the display.

    • Do NOT pull too far as there is a ribbon on the back panel connecting the 20-pin connector to the display.

  4. Nest Learning Thermostat 2nd Generation LCD Screen Replacement, Disconnect the base connection ribbon cable.: paso 4, imagen 1 de 3 Nest Learning Thermostat 2nd Generation LCD Screen Replacement, Disconnect the base connection ribbon cable.: paso 4, imagen 2 de 3 Nest Learning Thermostat 2nd Generation LCD Screen Replacement, Disconnect the base connection ribbon cable.: paso 4, imagen 3 de 3
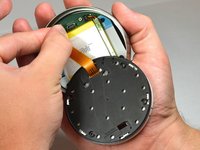
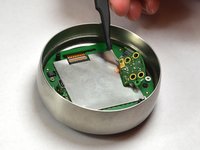
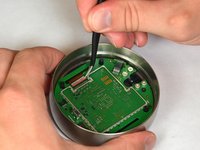
    • Locate the blue pull tab at the end of the ribbon which says, "1. Pull".

    • Grasp the tab with your fingers and pull directly away from the motherboard.

  5. Nest Learning Thermostat 2nd Generation LCD Screen Replacement, Lift battery from the base: paso 5, imagen 1 de 2 Nest Learning Thermostat 2nd Generation LCD Screen Replacement, Lift battery from the base: paso 5, imagen 2 de 2
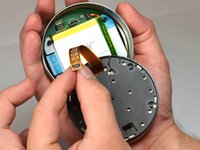
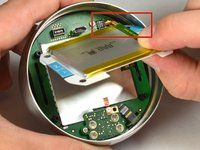
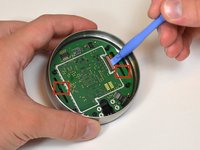
    • Locate the blue tab which says, "2. Pull".

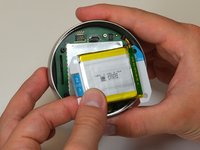
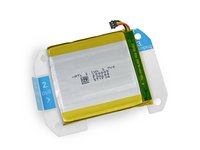
    • Use tweezers to pull the battery up and away from the display.

    • Do NOT pull too far, as the battery is still connected to the motherboard and must be unplugged.

  6. Nest Learning Thermostat 2nd Generation LCD Screen Replacement, Disconnect the battery from the motherboard: paso 6, imagen 1 de 2 Nest Learning Thermostat 2nd Generation LCD Screen Replacement, Disconnect the battery from the motherboard: paso 6, imagen 2 de 2
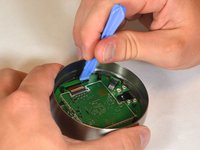
    • Locate the blue tab which says "3 unplug".

    • Grasp the battery with your fingers. Pull gently directly away from the display to unplug the battery from the motherboard.

  7. Nest Learning Thermostat 2nd Generation LCD Screen Replacement, Remove battery from the display: paso 7, imagen 1 de 3 Nest Learning Thermostat 2nd Generation LCD Screen Replacement, Remove battery from the display: paso 7, imagen 2 de 3 Nest Learning Thermostat 2nd Generation LCD Screen Replacement, Remove battery from the display: paso 7, imagen 3 de 3
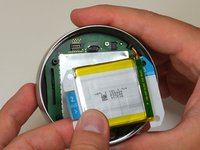
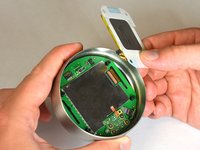
    • Grasp the battery with your fingers and pull directly away from motherboard to separate the battery from the display.

  8. Nest Learning Thermostat 2nd Generation LCD Screen Replacement, Locate auto-away sensor: paso 8, imagen 1 de 1
    • Locate the auto-away sensor.

  9. Nest Learning Thermostat 2nd Generation LCD Screen Replacement, Remove screws: paso 9, imagen 1 de 2 Nest Learning Thermostat 2nd Generation LCD Screen Replacement, Remove screws: paso 9, imagen 2 de 2
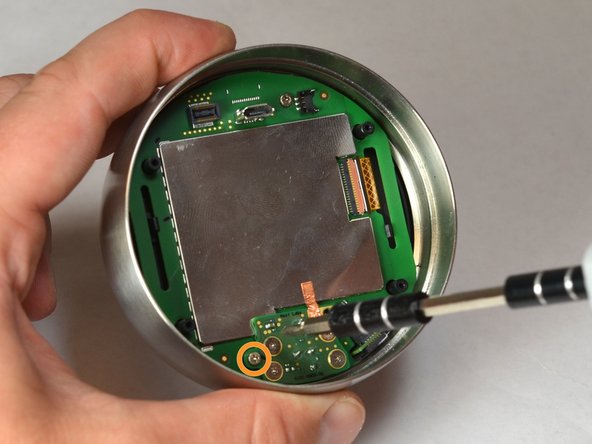
    • Remove the four 3mm screws with a #0 Phillips screwdriver.

    • Remove the one 4mm screw located at the edge of the auto-away sensor. Use a #0 Phillips screwdriver.

  10. Nest Learning Thermostat 2nd Generation LCD Screen Replacement, Remove auto-away sensor: paso 10, imagen 1 de 3 Nest Learning Thermostat 2nd Generation LCD Screen Replacement, Remove auto-away sensor: paso 10, imagen 2 de 3 Nest Learning Thermostat 2nd Generation LCD Screen Replacement, Remove auto-away sensor: paso 10, imagen 3 de 3
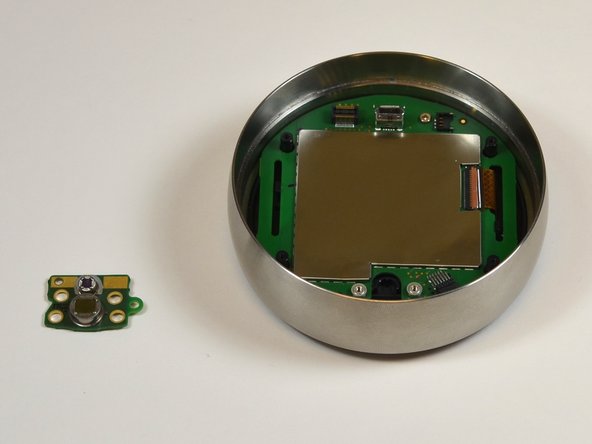
    • Lift the auto-away sensor from motherboard using tweezers.

    • Peel the copper foil gently from the EMI shield.

  11. Nest Learning Thermostat 2nd Generation LCD Screen Replacement, Remove screw from motherboard: paso 11, imagen 1 de 1
    • Remove one 4 mm screw from the motherboard using a #0 Phillips screwdriver.

  12. Nest Learning Thermostat 2nd Generation LCD Screen Replacement, Remove EMI shield from motherboard: paso 12, imagen 1 de 2 Nest Learning Thermostat 2nd Generation LCD Screen Replacement, Remove EMI shield from motherboard: paso 12, imagen 2 de 2
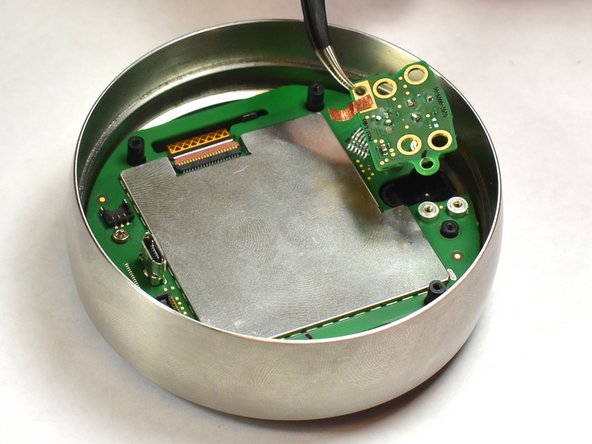
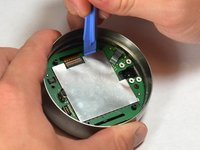
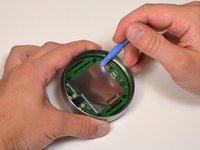
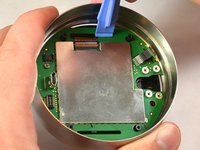
    • Remove the EMI shield from the motherboard using the plastic opening tools.

  13. Nest Learning Thermostat 2nd Generation LCD Screen Replacement, Disconnect the LCD ribbon from the motherboard: paso 13, imagen 1 de 2 Nest Learning Thermostat 2nd Generation LCD Screen Replacement, Disconnect the LCD ribbon from the motherboard: paso 13, imagen 2 de 2
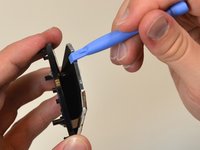
    • Unsnap the LCD ribbon from the motherboard gently using the tweezers.

  14. Nest Learning Thermostat 2nd Generation LCD Screen Replacement, Disconnect display from motherboard: paso 14, imagen 1 de 3 Nest Learning Thermostat 2nd Generation LCD Screen Replacement, Disconnect display from motherboard: paso 14, imagen 2 de 3 Nest Learning Thermostat 2nd Generation LCD Screen Replacement, Disconnect display from motherboard: paso 14, imagen 3 de 3
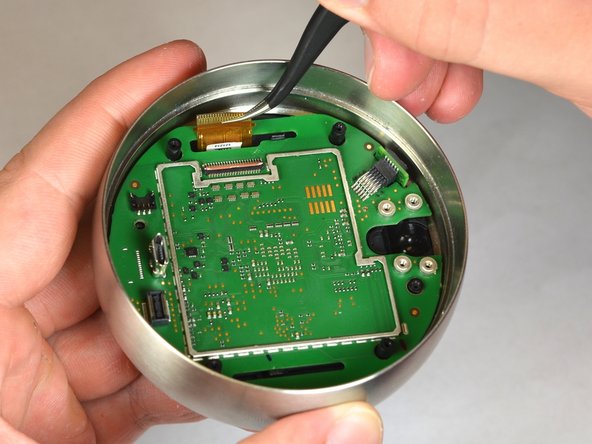
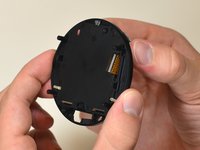
    • Locate the black tabs that hold the display to the motherboard.

    • Push the black tabs gently away from the motherboard using the plastic opening tools.

  15. Nest Learning Thermostat 2nd Generation LCD Screen Replacement, Remove from motherboard: paso 15, imagen 1 de 2 Nest Learning Thermostat 2nd Generation LCD Screen Replacement, Remove from motherboard: paso 15, imagen 2 de 2
    • Pull the face display gently away from the motherboard.

  16. Nest Learning Thermostat 2nd Generation LCD Screen Replacement, Remove bottom of display frame: paso 16, imagen 1 de 3 Nest Learning Thermostat 2nd Generation LCD Screen Replacement, Remove bottom of display frame: paso 16, imagen 2 de 3 Nest Learning Thermostat 2nd Generation LCD Screen Replacement, Remove bottom of display frame: paso 16, imagen 3 de 3
    • The front of the glass display and plastic frame is held together by only light adhesive.

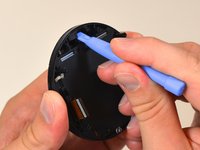
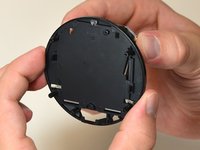
    • Push the crescent shape bottom of the display away from the plastic frame using the plastic opening tools.

  17. Nest Learning Thermostat 2nd Generation LCD Screen Replacement: paso 17, imagen 1 de 1
    • Pry the front glass and plastic frame apart gently using the plastic opening tools.

  18. Nest Learning Thermostat 2nd Generation LCD Screen Replacement, Remove LCD screen from plastic frame: paso 18, imagen 1 de 2 Nest Learning Thermostat 2nd Generation LCD Screen Replacement, Remove LCD screen from plastic frame: paso 18, imagen 2 de 2
    • Pry the LCD screen gently from the plastic frame using the plastic opening tools.

  19. Nest Learning Thermostat 2nd Generation LCD Screen Replacement, Separate LCD from frame: paso 19, imagen 1 de 3 Nest Learning Thermostat 2nd Generation LCD Screen Replacement, Separate LCD from frame: paso 19, imagen 2 de 3 Nest Learning Thermostat 2nd Generation LCD Screen Replacement, Separate LCD from frame: paso 19, imagen 3 de 3
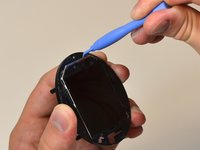
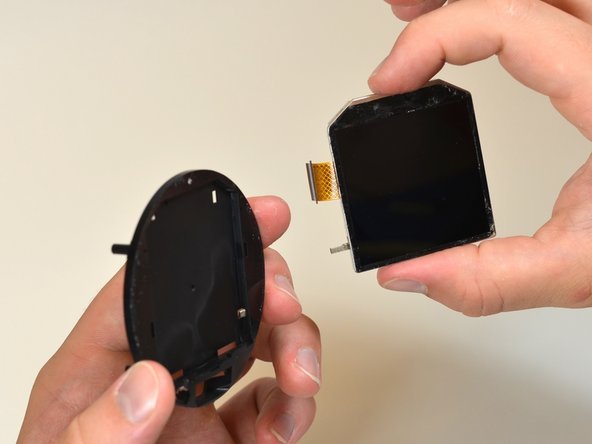
    • Pull the LCD screen away from the plastic frame gently using your fingers.

Conclusión

To reassemble your device, follow these instructions in reverse order.

8 personas más completaron esta guía.

Justin Curry

Miembro Desde 09/23/14

264 Reputación

2 Guías creadas

Equipo

USF Tampa, Team 11-5, Blackwell Fall 2014 Miembro de USF Tampa, Team 11-5, Blackwell Fall 2014

USFT-BLACKWELL-F14S11G5

5 Miembros

12 Guías creadas

5 comentarios

Please could you say the type of LCD screen? Or present detailed photo of rear side?

vladvys - Contestar

Yes, this is a guide for replacing the LCD. I'd like to know what LCD to order. Thanks.

kylegoetz - Contestar

Thank you for providing this tutorial. My dog, not making this up, knocked my nest off the wall. Where can I purchase the replacement green itself and the plastic opening tools you used throughout the repair? This will be my first time on something like this, but with your guide I should have a decent shot at not screwing it up.

erick.starke - Contestar

Skip step 12. There is no reason to remove the EMI shield.

richardrobison - Contestar

Where can you get the replacement lcd screen for gen 2 nest learning thermostat?

Stan Griff - Contestar

Agregar Comentario

Ver Estadísticas:

Ultimas 24 horas: 1

Ultimos 7 días: 6

Ultimos 30 días: 43

Todo El Tiempo: 15,042