Esta versión puede contener ediciones incorrectas. Cambie a la última instantánea verificada.
Qué necesitas
-
Este paso está sin traducir. Ayuda a traducirlo
-
Remove the seven 10-mm black Phillips screws from the blaster casing with a #1 Phillips Screwdriver.
-
-
Este paso está sin traducir. Ayuda a traducirlo
-
Slowly pull apart the blaster casing, starting at the battery location.
-
Keep pulling apart slowly until it separates completely. Be cautious as to not send the internal components flying.
-
-
Este paso está sin traducir. Ayuda a traducirlo
-
Use a #1 Phillips screwdriver to remove the 10 -mm screw that secures the battery plate, then remove the battery cover using your hands.
-
-
-
Este paso está sin traducir. Ayuda a traducirlo
-
Remove the laser trigger by grabbing the trigger with your fingers and pulling it up and out.
-
-
Este paso está sin traducir. Ayuda a traducirlo
-
Gently pull up on the circuit board located near the gun handle until it separates from the gun.
-
-
Este paso está sin traducir. Ayuda a traducirlo
-
Grip the circuit board located at the base of the laser with your fingers; rotate it towards the ammo compartment on the blaster until the guide hole is clear of the guide pin.
-
Slide the laser assembly out.
-
-
Este paso está sin traducir. Ayuda a traducirlo
-
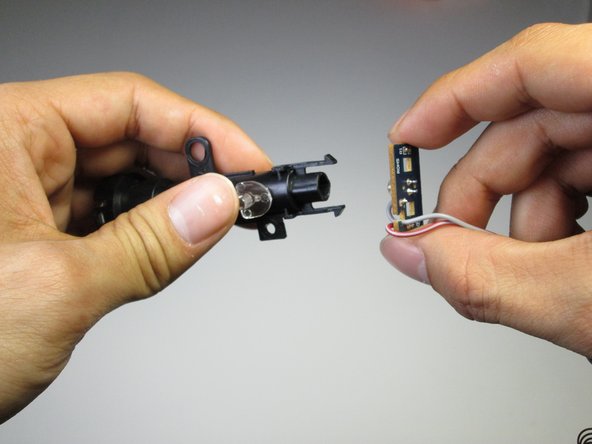
Pinch the clips holding the laser beam casing to the circuit board with your fingers. Slide off the casing revealing the LED.
-
-
Este paso está sin traducir. Ayuda a traducirlo
-
Use a soldering iron to heat up the two connections holding the LED to the circuit board. Remove the LED.
-


Cancelar: No complete esta guía.
6 personas más completaron esta guía.

Equipo

Cal Poly, Team 15-6, Amido Spring 2015 Miembro de Cal Poly, Team 15-6, Amido Spring 2015
CPSU-AMIDO-S15S15G6
3 Miembros
8 Guías creadas