Saltar al contenido principal

Neato XV-21 Motherboard Replacement

Qué necesitas

  1. Neato XV-21 Motherboard Replacement, Back Panels of Neato XV-21: paso 1, imagen 1 de 1
    • Flip the Neato on its back so the bottom is exposed

    • Unscrew the seven screws.

  2. Neato XV-21 Motherboard Replacement: paso 2, imagen 1 de 1
    • Lift the panels to reveal the batteries, brush and fan

    • There should be little to no resistance during this step, do not continue if the pieces do not separate easily

  3. Neato XV-21 Motherboard Replacement: paso 3, imagen 1 de 1
    • The Neato's core components are now exposed and ready to be cleaned and/or replaced.

  4. Neato XV-21 Motherboard Replacement, Battery: paso 4, imagen 1 de 1
    • Pinch and pull the white connector to disconnect the battery from the device

    • Failure to complete this step could cause electric shock or later complications

    • Lift and remove the battery from the cavity

    • If replacing the battery, make sure to use proper disposal methods.

  5. Neato XV-21 Motherboard Replacement, Lidar Distance Sensor: paso 5, imagen 1 de 1
    • Remove the 17 visible screws and the 2 covered/hidden screws near the battery compartments that connect the bottom to the top of the Neato robot.

  6. Neato XV-21 Motherboard Replacement: paso 6, imagen 1 de 1
    • Lift and separate the two pieces to give access to the Distance Sensor

    • There may be slight resistance during this step, make sure to lift the pieces straight rather than an angle. Lifting at an angle may cause pieces to catch, causing resistance

  7. Neato XV-21 Motherboard Replacement: paso 7, imagen 1 de 3 Neato XV-21 Motherboard Replacement: paso 7, imagen 2 de 3 Neato XV-21 Motherboard Replacement: paso 7, imagen 3 de 3
    • Remove the four screws on the lidar sensor.

    • After the wires are fully disconnected lift the motor away to reveal the motherboard

    • There should be little to no resistance during this step. Do not continue if there is resistance, this may damage the motherboard

  8. Neato XV-21 Motherboard Replacement: paso 8, imagen 1 de 1
    • Pinch and pull the white connectors indicated in the image, this will allow the top and bottom panels to fully seperate

  9. Neato XV-21 Motherboard Replacement, Motherboard: paso 9, imagen 1 de 1
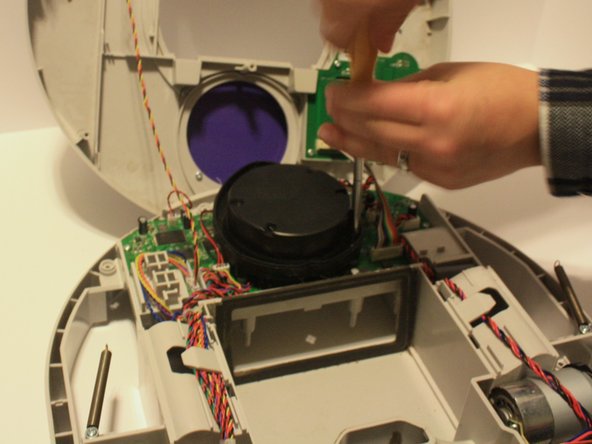
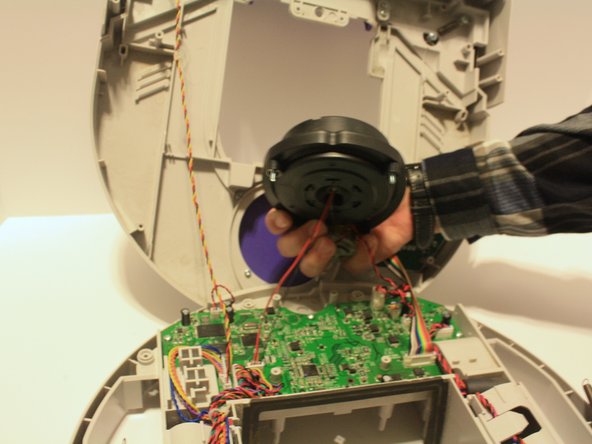
    • Pinch and pull the white connectors that connect the LCD screen and motherboard components

  10. Neato XV-21 Motherboard Replacement: paso 10, imagen 1 de 1
    • Remove the four screws that hold down the motherboard.

  11. Neato XV-21 Motherboard Replacement: paso 11, imagen 1 de 1
    • Lift motherboard off of the device so that the new motherboard can be connected

    • There should be little to no resistance during this step. Do not continue if there is resistance, this could cause damage to the motherboard

Conclusión

To reassemble your device, follow these instructions in reverse order.

Una persona más ha completado esta guía.

0 comentarios

Agregar Comentario

Ver Estadísticas:

Ultimas 24 horas: 1

Ultimos 7 días: 7

Ultimos 30 días: 20

Todo El Tiempo: 2,900