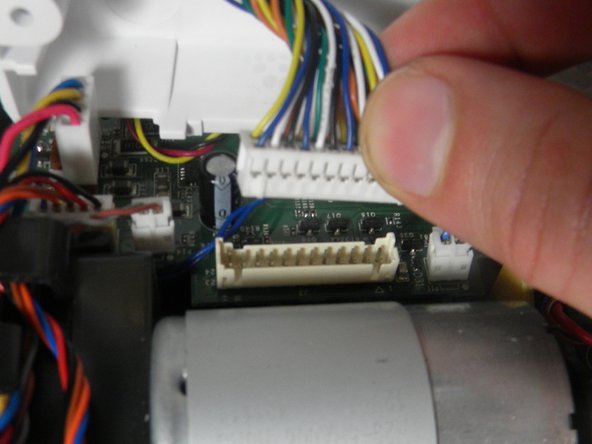
Saltar al contenido principal

Neato Botvac 65 Top Cover Removal

Qué necesitas

  1. Neato Botvac 65 Top Cover Removal, Battery: paso 1, imagen 1 de 2 Neato Botvac 65 Top Cover Removal, Battery: paso 1, imagen 2 de 2
    • Flip the device upside down.

    • Locate the two (2) 20mm screws on the batttery plate.

  2. Neato Botvac 65 Top Cover Removal: paso 2, imagen 1 de 2 Neato Botvac 65 Top Cover Removal: paso 2, imagen 2 de 2
    • Use the Phillips #1 screwdriver to loosen both screws.

  3. Neato Botvac 65 Top Cover Removal: paso 3, imagen 1 de 1
    • Remove the battery back plate to reveal the battery.

  4. Neato Botvac 65 Top Cover Removal: paso 4, imagen 1 de 2 Neato Botvac 65 Top Cover Removal: paso 4, imagen 2 de 2
    • Disconnect the current battery by pulling the connector from the base and pushing on the clip.

  5. Neato Botvac 65 Top Cover Removal, Brush: paso 5, imagen 1 de 1
    • Flip the device upside down.

  6. Neato Botvac 65 Top Cover Removal: paso 6, imagen 1 de 2 Neato Botvac 65 Top Cover Removal: paso 6, imagen 2 de 2
    • Use the screwdriver to take off the four (4) 10mm screws located near the brush which secure the plastic guard.

  7. Neato Botvac 65 Top Cover Removal: paso 7, imagen 1 de 2 Neato Botvac 65 Top Cover Removal: paso 7, imagen 2 de 2
    • Remove the plastic brush guard.

    • Pull off the plastic covering the brush.

  8. Neato Botvac 65 Top Cover Removal: paso 8, imagen 1 de 1
    • Lift the brush to clean or replace.

  9. Neato Botvac 65 Top Cover Removal, Top Cover: paso 9, imagen 1 de 1
    • Flip device upside down.

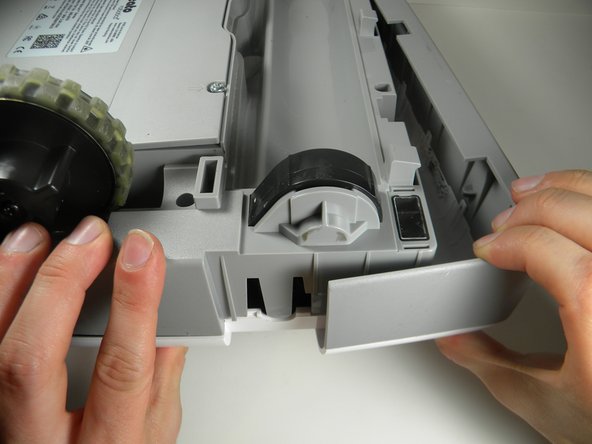
    • Locate the six (6) screw connected to the top cover.

  10. Neato Botvac 65 Top Cover Removal: paso 10, imagen 1 de 1
    • Remove eight (8) star screws using the T10 bit.

  11. Neato Botvac 65 Top Cover Removal: paso 11, imagen 1 de 2 Neato Botvac 65 Top Cover Removal: paso 11, imagen 2 de 2
    • Pull off one side of the brush front cover, and then pull off the other.

  12. Neato Botvac 65 Top Cover Removal: paso 12, imagen 1 de 1
    • Flip right side up and turn around.

    • FInd the two clips connecting the top cover to the body of the device.

  13. Neato Botvac 65 Top Cover Removal: paso 13, imagen 1 de 2 Neato Botvac 65 Top Cover Removal: paso 13, imagen 2 de 2
    • Lift up on the top cover gently.

    • Disconnect the connector from the motherboard to detach the top cover from the robot.

Conclusión

To reassemble your device, follow these instructions in reverse order.

Joseph Caton

Miembro Desde 02/15/17

334 Reputación

3 Guías creadas

Equipo

USF Tampa, Team S2-G1, Lacy Spring 2017 Miembro de USF Tampa, Team S2-G1, Lacy Spring 2017

USFT-LACY-S17S2G1

4 Miembros

10 Guías creadas

0 comentarios

Agregar Comentario

Ver Estadísticas:

Ultimas 24 horas: 0

Ultimos 7 días: 0

Ultimos 30 días: 5

Todo El Tiempo: 1,274