Saltar al contenido principal

Nanit Pro N301 Motherboard Replacement

Qué necesitas

  1. Nanit Pro N301 Motherboard Replacement, Motherboard: paso 1, imagen 1 de 3 Nanit Pro N301 Motherboard Replacement, Motherboard: paso 1, imagen 2 de 3 Nanit Pro N301 Motherboard Replacement, Motherboard: paso 1, imagen 3 de 3
    • Insert an opening pick into the seam between the front and rear case.

    • Slide the opening pick around the perimeter of the camera until all of the retaining clips are released.

    • Separate the front and rear case.

  2. Nanit Pro N301 Motherboard Replacement: paso 2, imagen 1 de 1
    • Remove the four 4 mm T6 Torx screws from each corner of the circuit board.

    • Lift the circuit board out of the chassis.

  3. Nanit Pro N301 Motherboard Replacement: paso 3, imagen 1 de 1
    • Desolder the black wire's motherboard connection.

    • Soldering irons can cause burns and fires. Always solder/desolder in a well-ventilated workspace.

  4. Nanit Pro N301 Motherboard Replacement: paso 4, imagen 1 de 1
    • Use tweezers to gently lift the two additional circuit boards out of the housing.

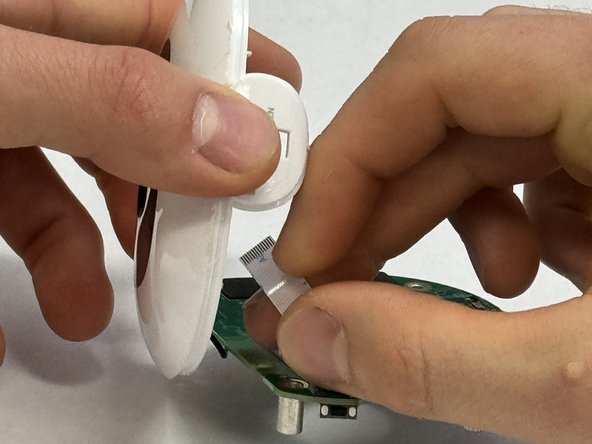
  5. Nanit Pro N301 Motherboard Replacement: paso 5, imagen 1 de 1
    • Disconnect the battery ribbon cable strip from the rear case.

    • Remove the motherboard.

Conclusión

To reassemble your device, follow these instructions in reverse order.

2 personas más completaron esta guía.

Derek Maue

Miembro Desde 04/02/24

151 Reputación

1 Guía escrita

Equipo

IUPUI, Team 3-1, Harley Spring 2024 Miembro de IUPUI, Team 3-1, Harley Spring 2024

IUPUI-HARLEY-S24S3G1

3 Miembros

3 Guías creadas

0 comentarios

Agregar Comentario

Ver Estadísticas:

Ultimas 24 horas: 2

Ultimos 7 días: 8

Ultimos 30 días: 8

Todo El Tiempo: 48