Saltar al contenido principal

Motorola W385 Top Logic Board Replacement

Qué necesitas

  1. Motorola W385 Top Logic Board Replacement, Battery: paso 1, imagen 1 de 1
    • Using your finger, press down on the clip holding the back cover on.

  2. Motorola W385 Top Logic Board Replacement: paso 2, imagen 1 de 1
    • Using the spudger or your finger, gently pull the battery out from the top.

  3. Motorola W385 Top Logic Board Replacement, Front Casing: paso 3, imagen 1 de 1
    • Remove the four rubber pieces from the face of the phone using the sharp end of the spudger.

    • The rubber pieces are held in with a mild adhesive.

  4. Motorola W385 Top Logic Board Replacement: paso 4, imagen 1 de 1
    • Remove the four Torx-6 screws from underneath the rubber pieces.

  5. Motorola W385 Top Logic Board Replacement: paso 5, imagen 1 de 2 Motorola W385 Top Logic Board Replacement: paso 5, imagen 2 de 2
    • Close the phone before proceeding.

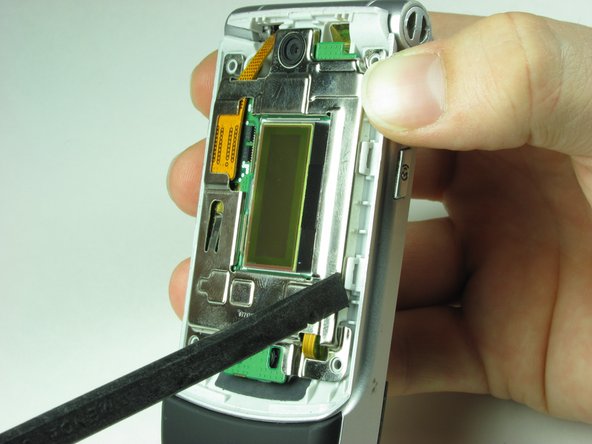
    • Using the flat end of the spudger, insert it under the plastic at the top left of the phone.

    • Gently, although a small amount of force is required, use a twisting motion to pull the plastic casing away from the body of the phone.

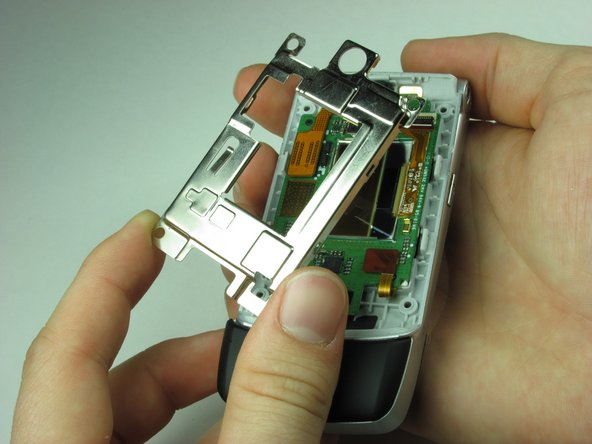
    • Continue to move around the phone counter clockwise until the casing is separated from the body.

    • It is not unusual for it to pop off before making it back to the starting point.

  6. Motorola W385 Top Logic Board Replacement: paso 6, imagen 1 de 1
    • If the casing has not popped off of the body, remove it carefully from the the phone.

  7. Motorola W385 Top Logic Board Replacement, Top Logic Board: paso 7, imagen 1 de 1
    • After completing Steps 3-6 in the casing repair guide, your phone should look like this.

  8. Motorola W385 Top Logic Board Replacement: paso 8, imagen 1 de 3 Motorola W385 Top Logic Board Replacement: paso 8, imagen 2 de 3 Motorola W385 Top Logic Board Replacement: paso 8, imagen 3 de 3
    • Use the spudger to unhinge the four clips around the metal casing of the top logic board.

    • Gently take off the metal casing of the logic board.

  9. Motorola W385 Top Logic Board Replacement: paso 9, imagen 1 de 3 Motorola W385 Top Logic Board Replacement: paso 9, imagen 2 de 3 Motorola W385 Top Logic Board Replacement: paso 9, imagen 3 de 3
    • Use spudger to gently disconnect the ribbon cable from phone.

    • Gently remove Logic Board making sure not to damage any other components.

Conclusión

To reassemble your device, follow these instructions in reverse order.

Javier Mendez

Miembro Desde 01/21/10

13 Reputación

2 Guías creadas

Equipo

Cal Poly, Team 8-50, Regan Winter 2010 Miembro de Cal Poly, Team 8-50, Regan Winter 2010

CPSU-REGAN-W10S8G50

3 Miembros

14 Guías creadas

0 comentarios

Agregar Comentario

Ver Estadísticas:

Ultimas 24 horas: 0

Ultimos 7 días: 2

Ultimos 30 días: 3

Todo El Tiempo: 2,519