Esta versión puede contener ediciones incorrectas. Cambie a la última instantánea verificada.
Qué necesitas
-
Este paso está sin traducir. Ayuda a traducirlo
-
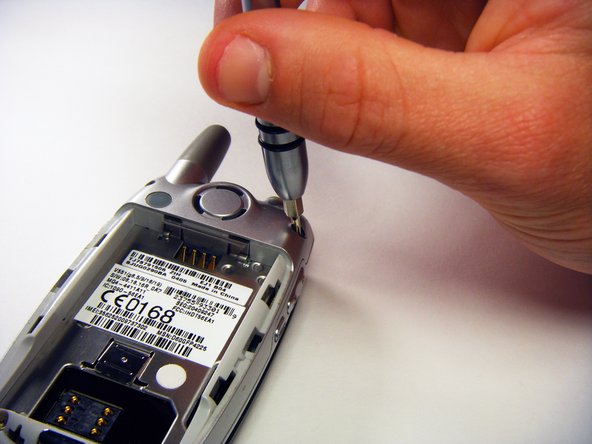
Press down on the chrome button on the bottom of the chassis. Simultaneously slide the back cover down, away from the phone.
-
-
Este paso está sin traducir. Ayuda a traducirlo
-
Lever the battery out by pressing upwards on the bottom corners of the battery.
-
-
Este paso está sin traducir. Ayuda a traducirlo
-
Remove the rubber screw covers using a plastic spudger.
-
Use a T6 Torx screwdriver to remove the screws underneath the rubber screw covers.
-
-
-
Este paso está sin traducir. Ayuda a traducirlo
-
Gently release the two latches using an opening tool.
-
Pry off the back panel by wedging an opening tool into the crevice between the back panel and the circuit board.
-
Lift the back panel off of the phone.
-
-
Este paso está sin traducir. Ayuda a traducirlo
-
Loosen the copper circuit board connection with an opening tool.
-
Gently lift the copper connection.
-
-
Este paso está sin traducir. Ayuda a traducirlo
-
Lift up and pull out the pressure pad from under the buttons on the side of the chassis.
-
Gently lift the motherboard off of the front panel.
-
-
Este paso está sin traducir. Ayuda a traducirlo
-
Push both side keys in so they are not sticking out of the phone.
-
Remove the keypad.
-
-
Este paso está sin traducir. Ayuda a traducirlo
-
Gently squeeze the bottle of super glue so that only a small amount (about 1/3 pinky width) is a applied to the back side of the key.
-
-
Este paso está sin traducir. Ayuda a traducirlo
-
Carefully place key onto the key pad so that it will be properly oriented and in line with the other keys.
-


Cancelar: No complete esta guía.
Una persona más ha completado esta guía.
Equipo

Cal Poly, Team 6-6, Maness Fall 2009 Miembro de Cal Poly, Team 6-6, Maness Fall 2009
CPSU-MANESS-F09S6G6
4 Miembros
12 Guías creadas