Qué necesitas
-
-
Retira los cinco tornillos Torx T3 de 3 mm del ensamblaje conector para audífonos/altavoz.
-
-
-
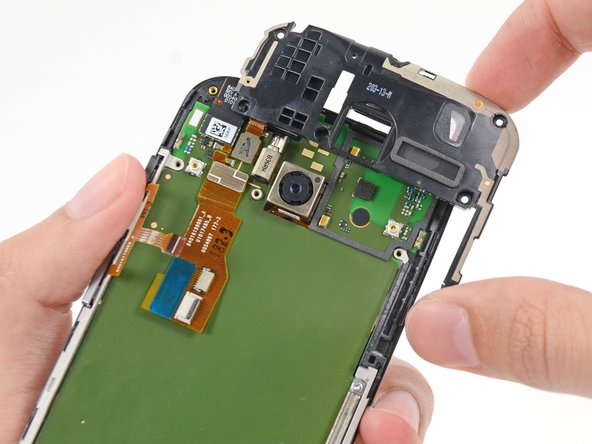
Introduce un spudger bajo el mango del ensamblaje del conector para audífonos/altavoz y haz palanca para sacarlo de su hueco.
-
Insertar traducción aquí
The microphone assembly has foam tape adhesive on it and will want to separate with the headphone jack / speaker assembly.
-
-
-
-
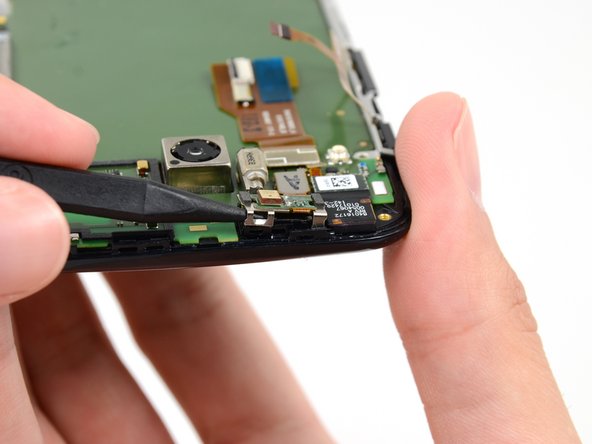
Desconecta el conector del cable de la cámara frontal.
-
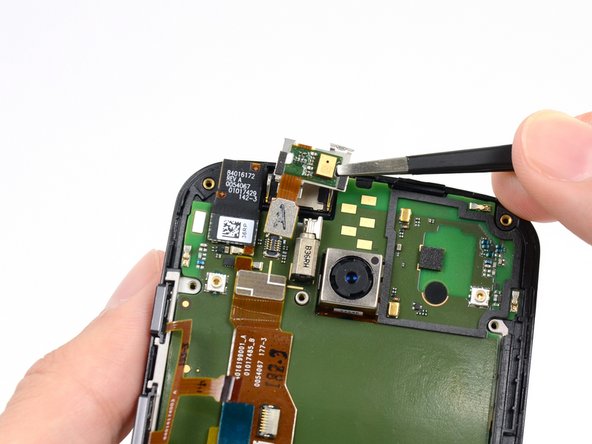
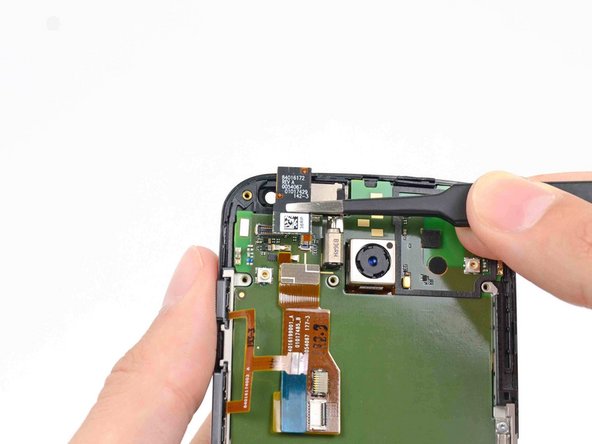
Saca la cámara frontal de su alojamiento con unas pinzas.
There is a thin black foam gasket (like a small washer) that is stuck to the front of this camera lens housing. On mine, the gasket was stuck off-center with the inner edge in the field of view of the lens. Using tweezers, I removed it and re-attached it on center. The image is now much sharper!
-
-
-
Retira los dos últimos tornillos Torx T3 de 3 mm del soporte de la ranura SIM.
On my XT1053 Developer Edition, the Torx screws on the sim slot bracket were not T3 like all the others, they were T4. Trying to use a T3 screwdriver resulted in twisting off the tip of the screwdriver. A T4 screwdriver removed them just fine.
-
-
-
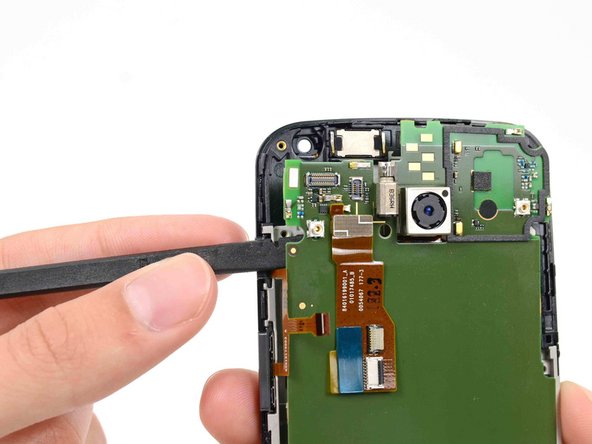
Utiliza el extremo plano de un spudger para girar la pestaña de retención del conector ZIF del cable de la pantalla.
-
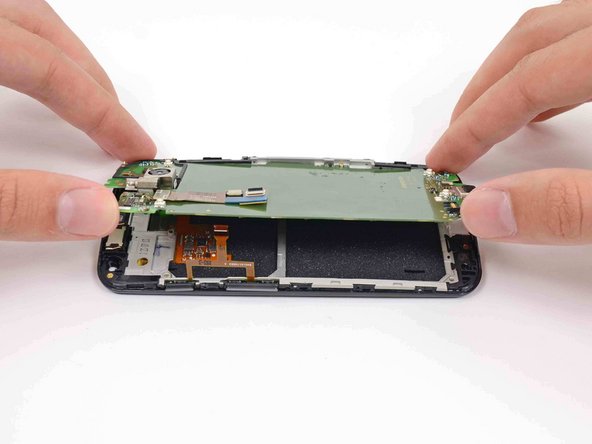
Saca con cuidado el cable de pantalla de su conector mientras retiras la placa madre del ensamblaje de pantalla.
I also struggled getting this cable back in, I actually assembled it thinking it was "in enough", only to find out I had to take it back apart and push it in further.
I found that you can lay the screen face down, with the cable upright at a 90 degree angle, then push the motherboard down onto the cable. When it goes in enough, it snaps in fairly well. If it's not in enough, it will be impossible to close the clamp.
There is a small black plastic piece which goes over the proximity sensor which can easily fall off. If it does, the sensor will malfunction and think that you are always close, which means you will not be able to hang up or do anything else with your phone while you are on a call and will just have to wait for the other person to hang up. I had to do more or less the whole job over again to reinsert this piece (I couldn't tell where it had fallen from and just hoped my phone would be alright with out it).
This is discussed in the thread here:
Can you disable the proximity sensor, Moto X?
You can see the black plastic over the proximity sensor in these two photos:
https://d3nevzfk7ii3be.cloudfront.net/ig...
https://d3nevzfk7ii3be.cloudfront.net/ig...
Whereas it is missing in this photo:
https://d3nevzfk7ii3be.cloudfront.net/ig...
(The sensor is on the lower left in this last photo).
When lifting the motherboard, note that there will be some resistance near the USB port due to an adhered foam gasket/funnel which channels sound from the tiny hole in the glass to the voice mic on the back side of the motherboard. Before re-installation of the motherboard, inspect the shape and hole in this foam gasket. It should look like cylindrical standoff about 0.1 inch tall. If it is not a clear sight to the tiny hole in the motherboard, sound will not reach the voice mic. I used the point of a spudger to re-form the hole.
-


Para volver a montar el dispositivo, siga estas instrucciones en orden inverso.
Para volver a montar el dispositivo, siga estas instrucciones en orden inverso.
Un agradecimiento especial a estos traductores:
100%

¡ Mariana Roca nos está ayudando a reparar el mundo! ¿Quieres contribuir?
Empezar a traducir ›


These screws appear to have some yellow locktite on them. I rounded 2 of them, so take caution and make sure your screw driver fits correctly. Otherwise you will need to find a drill press to extract them.
stevengrey - Contestar
Is the glass glued to the LCD like the iPhone 5? Is it possible to repair a broken front glass without changing the whole assembly?
Alisio - Contestar
Yes and Yes. Just fixed mine.
Buy a Glass+Frame from ebay. Do steps 1-18 and 37. Then just open the bottom two torx screws, no more. They are the only ones connected to the front frame. Then heat&remove the glass, tear off the frame with pliers. Then you just need to clean the screen from residue and apply LOCA and the Glass+Frame.
Adrian Koch -
Yep, I rounded the bottom-left and bottom-center screws as well as my Torx driver, then slipped with the drill bit and went right through the mobo.
Coinneach - Contestar
All screws appear to be Torx T4.
ktmorimoto - Contestar