Esta traducción podría no reflejar los cambios más recientes añadidos a la guía de referencia. Ayúdanos a actualizar la traducción o revisa la guía original.
Qué necesitas
-
Este paso está sin traducir. Ayuda a traducirlo
-
Remove back cover.
-
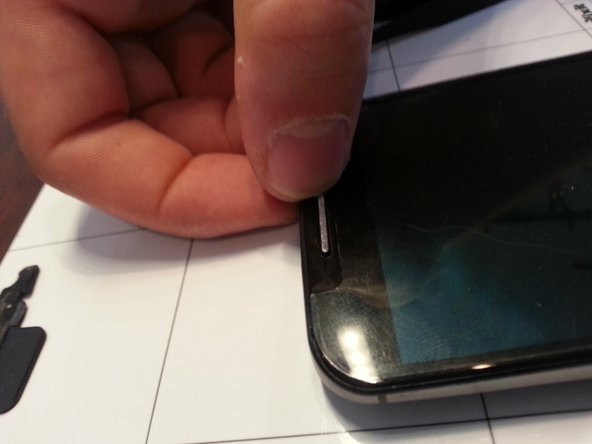
Shove the sim card remover or blunt (not sharp!) metal object into the hole that is inside the sim card slot. There is a specific hole that appears to designed to allow you push the back cover off with a small metal rod.
-
The leather back seems very fragile. It folded and bent easily so peel back with extreme caution and go slowly.
-
-
Este paso está sin traducir. Ayuda a traducirlo
-
Note that it might not be obvious from the pictures, but the black "lattice" in the picture and on the inside of the cover is the adhesive. All of this portion must be pried loose (carefully!) for the back to come off. I used tweezers to pry off the center portions.
-
-
Este paso está sin traducir. Ayuda a traducirlo
-
Remove those two rubber covers which securing power button connecting flex connector and battery connector.
-
-
-
Este paso está sin traducir. Ayuda a traducirlo
-
Twist off all 18 black torx screws and remove the front assembly from middle housing.
-
-
Este paso está sin traducir. Ayuda a traducirlo
-
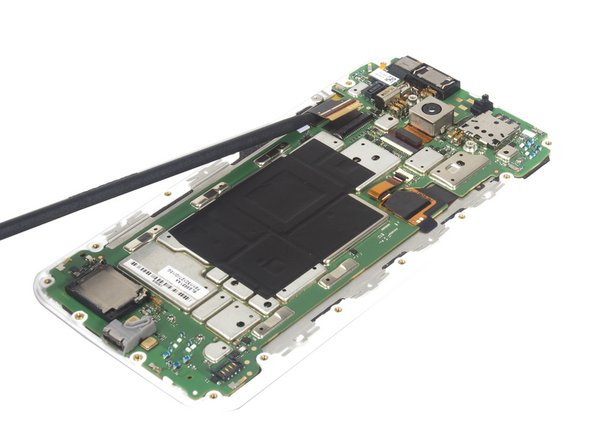
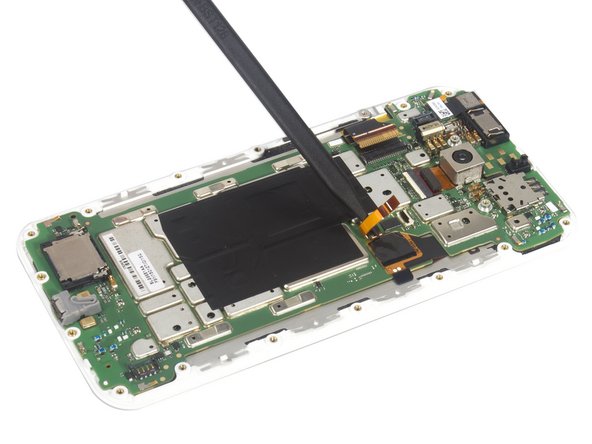
Pry up the motherboard from right and bottom corner. Remove the LCD screen from motherboard.
-
-
Este paso está sin traducir. Ayuda a traducirlo
-
Tips: The LCD screen is difficult to separate from bezel even though by heat. So you'd better prepare the screen replacement parts with bezel together. And the metal shield can be removed easily.
-
-
-
Es probable que la pantalla recién comprada no tenga rejillas para altavoces, por lo que debe quitarlas de la pantalla rota y colocarlas en la nueva pantalla
-
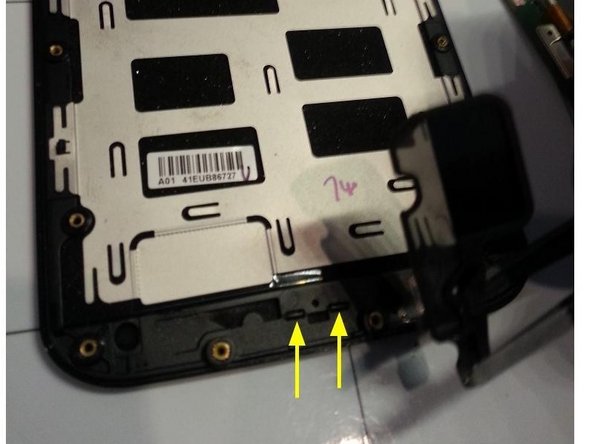
En los altavoces superiores e inferiores quite la espuma del altavoz que se adhiere ligeramente. Pelar suavemente. Esta espuma no será reutilizada por lo que su bien si se desgarra.
-
Localice las dos lengüetas que sujetan la parrilla del altavoz en su lugar. Destacado en la foto con flechas amarillas.
-
Empuje hacia fuera la parrilla del altavoz forzando cualquiera de esas dos lengüetas hacia fuera del marco presionando sobre la lengüeta con un extremo de la pinza. Requiere un poco de fuerza y saldrá.
-
La foto sólo muestra la extracción de la parrilla inferior del altavoz, pero la parrilla superior del altavoz se quita de la misma manera.
-
-
Este paso está sin traducir. Ayuda a traducirlo
-
After removal of both speaker grills they can be put into the new screen. Wait until the phone is fully reassembled to put the old grills into the new screen.
-
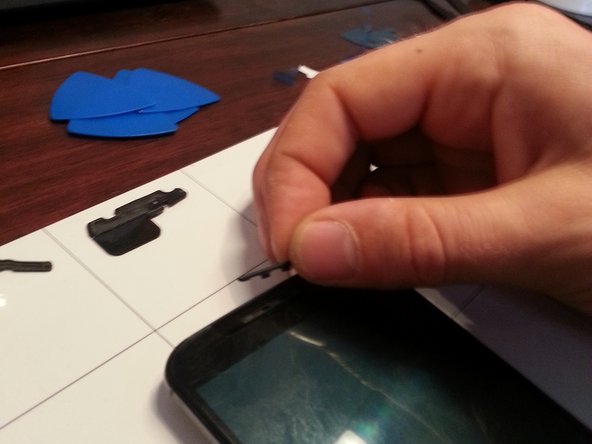
Align the two tabs of the grill with the two slots in the new screen
-
Carefully push the grill into the two slots. Start by pushing with your thumb and nail over one tab and only push one of the two tabs in at a time. A lot of pushing pressure is required so be careful not to damage the new screen.
-
If you are unable to push the grills in with your thumbs, try placing the grills in position and then pushing the screen face-down against a flat surface.
-
After one of the tabs is into the slot then the second tab can be pushed into the slot with some additional pressure. Both speaker grills can be replaced in this manner.
-
A couple people reported breaking their newly installed screen while popping in the speaker grill. Its also OK to not even install the cosmetic speaker grill.
-


Cancelar: No complete esta guía.
42 personas más completaron esta guía.
Un agradecimiento especial a estos traductores:
5%
¡ jlgjorge nos está ayudando a reparar el mundo! ¿Quieres contribuir?
Empezar a traducir ›
18 comentarios
Asking what little bit I don't hear about removing the top and bottom speaker pieces and if someone can give me a little more detailed information as to how to remove them so that I can reuse them in the new LCD and digitizer assembly that I got. For whatever reason it didn't occur to me when I ordered it to make sure that it came with new speaker pieces but thankfully because of a discount code and free shipping I can't complain much for getting the assembly combo for $85 with the exception of it not coming with new speakers or I know the bottom one of the speaker and the top one isn't but hopefully you get what I'm saying. So any more info I would appreciate it
What would cause the new screen to just shut off intermittently and power the phone down. I also experience a good amount of heat towards the lower portion of the screen assembly when powered on or plugged into a charger. I have changed the power/volume button flex cable assembly, both pieces and that didn't solve my issue with screen powering off.
I'm experiencing a similar issue. I've been scratching my head after replacing a screen on a customer's device for several days now. When I power up the device, everything appears to work except for the AT&T network (not sure if has been disconnected or not). Though, once the phone goes to sleep on it's own, or it's left alone for too long, things start to act funky. I wake the phone up after falling asleep for the first time since boot, the home screen appears, but there is no sense of touch/the digitizer isn't functioning anymore. Once the screen falls back asleep due to no interaction, it will not wake back up by pressing the power button and the LCD remains completely black. When I put the original screen back into the phone, however, the phone works as it should. The only way to reset the device is to unplug the battery, which results in app optimization after every trial (time consuming). There is also a bit of heat coming from the middle of the phone. I'm running out of ideas. Please help!
I am having exactly the same issue. I replaced the screen (which came with a frame) without incident. Phone powered up fine, touch worked normally, all apps and connectivity normal. After the screen goes black and I power it back on, the touch won't work. After it goes black again, the phone shuts down completely, I have to turn it on by unplugging the power cord and then holding the power and volume up buttons. Apps must initialize again, takes a few minutes. I suspect that there may be something defective with these screens? I got the following part: 2-O-1932-TK1887 Motorola Moto X 2 Screen Assembly with Frame - White (Add Toolkit) from Strive Mobile. Anyone else?