Introducción
For the official iFixit guide, click here. This guide is archived for historical purposes.
If there is any problem with the phone that you plan to repair, removing the battery is the first step in completing the repairs and is critical for safety while working on the phone.
If your battery is swollen, take appropriate precautions.
Qué necesitas
-
-
Insert the spudger into the notch on the corner of the phone and lift up to remove the back case.
-
-
-
Use the T4 Torx Screwdriver to remove the 17 3.2 mm screws in the back panel covering the battery.
What do you do if the screws to tight and you can not unscrew them… Also the head of the screws too soft and damages easily.. I got few screws damaged, simply will probably need to use drill to get them out or something…
-
-
-
-
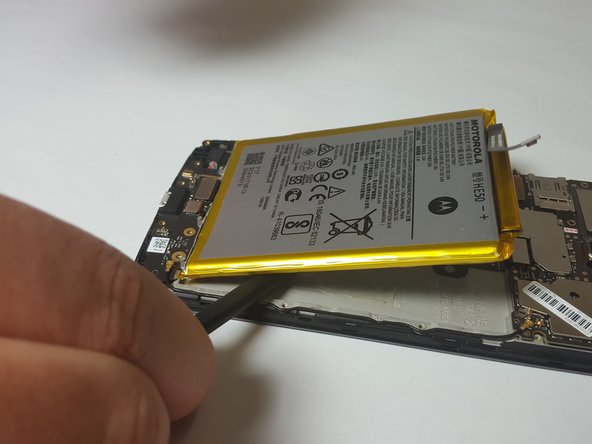
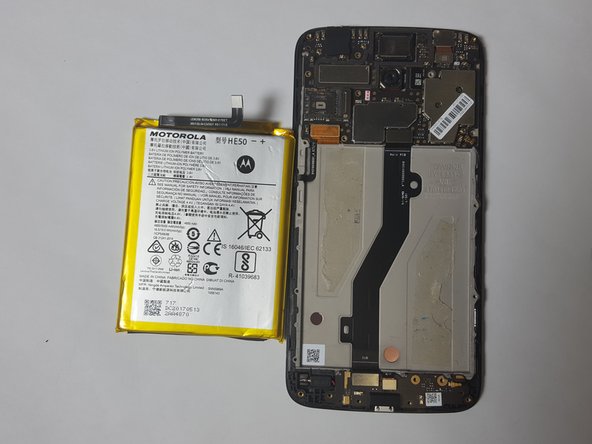
Wedge the spudger between the battery and the phone to lift the battery up and remove the battery. There will be slight resistance to this but the battery will not be damaged by this. It is just the adhesive tape.
-


To reassemble your device, follow these instructions in reverse order.
After completing this guide, calibrate your newly-installed battery.
To reassemble your device, follow these instructions in reverse order.
After completing this guide, calibrate your newly-installed battery.
Cancelar: No complete esta guía.
10 personas más completaron esta guía.
Equipo

Baylor, Team S3-G2, Williams Spring 2018 Miembro de Baylor, Team S3-G2, Williams Spring 2018
BU-WILLIAMS-S18S3G2
4 Miembros
13 Guías creadas
3 comentarios
my moto e4 plus screen is freezing , how can we unfreeze please advise
This is the only tutorial that looks like my phone inside, even tho they’re all supposed to be Moto E4 Plus. All the ones on YouTube look different, screws in different places, etc.
Hi Brad,
Motorola released a few variants of Moto E4s. You can compare phone’s model number to figure out exactly which model you have. We unfortunately don’t have all the Motorola guides covered at this point, but we’re working on it!