Esta versión puede contener ediciones incorrectas. Cambiar a la última instantánea verificada.
Qué necesitas
-
Este paso está sin traducir. Ayuda a traducirlo
-
Remove the phone's back cover A thumb nail or similar will remove it. You will have done this when you inserted a SIM or MicroSD card.
-
-
Este paso está sin traducir. Ayuda a traducirlo
-
Remove Your SIM card(s) and MicroSD card (if installed). Put them somewhere safe.
-
Remove the screws highlighted using a T5 Torx driver, (A T6 will remover them but will require force and mess up the heads!)
-
-
-
Este paso está sin traducir. Ayuda a traducirlo
-
Once the phone is open some screws may remain in the back case. They are small and easily lost! Be sure to collect them up and store them in a container for re-assembly.
-
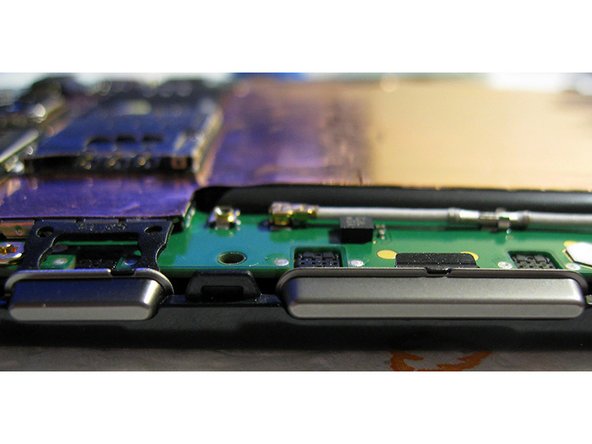
You may also want to put the two buttons away safely as they may drop out.
-
Note the speaker, show an arrow, can be removed without further disassembly.
-
-
Este paso está sin traducir. Ayuda a traducirlo
-
Remove the speaker by lifting it using a screwdriver or similar tool. Note It is only held in by adhesive tape. Take your time, especially if you are removing a donor speaker from a broken phone. If you push in, as the speaker lifts the tool will slide under the speaker damaging its surface!
-
The second image shows the front of the good replacement speaker I used.
-
Note: Both speakers in the phone are identical. If you mess up removing a donor speaker you get a second chance!
-
-
Este paso está sin traducir. Ayuda a traducirlo
-
If you are using a used donor part the adhesive tape will probably be damaged. I put the speaker in place, applied a thin strip of two part epoxy resin along its right edge. You can use silicone sealant or any other adhesive you deem safe.
-
My speaker will be more difficult to remove than if I had used silicone sealant which if flexible strong but can be cut easily. It is also more messy....
-
-
Este paso está sin traducir. Ayuda a traducirlo
-
Your finished! Reassemble, note the side buttons fit in the case as show.
-


Cancelar: No complete esta guía.
2 personas más completaron esta guía.
