Saltar al contenido principal

Motorola Defy Earpiece Speaker Replacement

Qué necesitas

  1. Motorola Defy Earpiece Speaker Replacement, Rear Case: paso 1, imagen 1 de 1
    • Using the screwdriver and the T-5 bit, unscrew the seven 5 mm screws around the outside of the phone.

  2. Motorola Defy Earpiece Speaker Replacement: paso 2, imagen 1 de 2 Motorola Defy Earpiece Speaker Replacement: paso 2, imagen 2 de 2
    • Remove the back cover of the phone by sliding the bottom black button to the unlock position and lifting it up.

  3. Motorola Defy Earpiece Speaker Replacement, Battery: paso 3, imagen 1 de 1
    • Use a plastic opening tool to pry the battery out of the phone.

  4. Motorola Defy Earpiece Speaker Replacement, Midframe: paso 4, imagen 1 de 1
    • Unscrew the two silver screws located at the top of the back of the phone.

  5. Motorola Defy Earpiece Speaker Replacement: paso 5, imagen 1 de 1
    • Use a plastic opening tool to gently pry the midframe from the rest of the phone.

  6. Motorola Defy Earpiece Speaker Replacement, Motherboard: paso 6, imagen 1 de 2 Motorola Defy Earpiece Speaker Replacement, Motherboard: paso 6, imagen 2 de 2
    • Use metal spudger to pry off the middle yellow flap carefully.

  7. Motorola Defy Earpiece Speaker Replacement: paso 7, imagen 1 de 3 Motorola Defy Earpiece Speaker Replacement: paso 7, imagen 2 de 3 Motorola Defy Earpiece Speaker Replacement: paso 7, imagen 3 de 3
    • Use tweezers again to pry off the second yellow flap carefully.

  8. Motorola Defy Earpiece Speaker Replacement: paso 8, imagen 1 de 1
    • The motherboard is the whole green board. Pry it off carefully with tweezers from the sides and place it aside.

  9. Motorola Defy Earpiece Speaker Replacement, Remove the earpiece speaker: paso 9, imagen 1 de 2 Motorola Defy Earpiece Speaker Replacement, Remove the earpiece speaker: paso 9, imagen 2 de 2
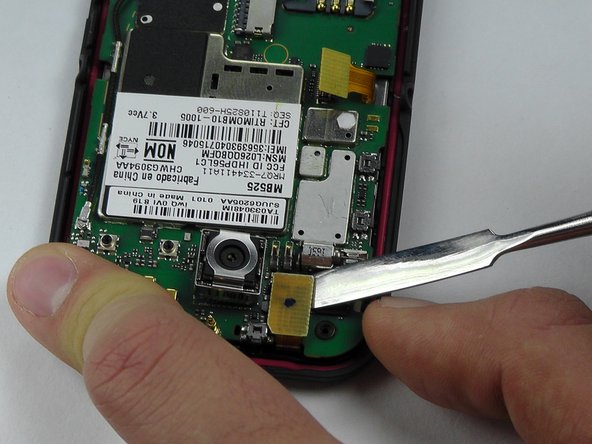
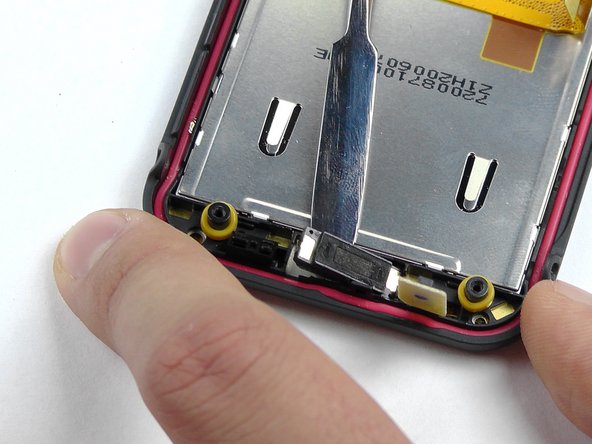
    • Once the motherboard is removed, use either the metal tweezers or the metal spudger to remove the speaker by prying it as shown.

    • The speaker is glued to its position, thus you will have to glue the new one back on.

    • The speaker must be pried off carefully. It is very delicate.

Conclusión

To reassemble your device, follow these instructions in reverse order.

Andres

Miembro Desde 10/08/14

101 Reputación

1 Guía escrita

Equipo

USF Tampa, Team 14-2, Leahy Fall 2014 Miembro de USF Tampa, Team 14-2, Leahy Fall 2014

USFT-LEAHY-F14S14G2

4 Miembros

6 Guías creadas

0 comentarios

Agregar Comentario

Ver Estadísticas:

Ultimas 24 horas: 0

Ultimos 7 días: 0

Ultimos 30 días: 1

Todo El Tiempo: 619