Saltar al contenido principal

Esta guía ha sufrido modificaciones. Revisa la última versión sin revisar.

Motorola C139 Keypad & Faceplate Replacement

Qué necesitas

  1. Motorola C139 Keypad & Faceplate Replacement, Battery: paso 1, imagen 1 de 3 Motorola C139 Keypad & Faceplate Replacement, Battery: paso 1, imagen 2 de 3 Motorola C139 Keypad & Faceplate Replacement, Battery: paso 1, imagen 3 de 3
    • Begin by flipping your phone over so that the back cover is facing up.

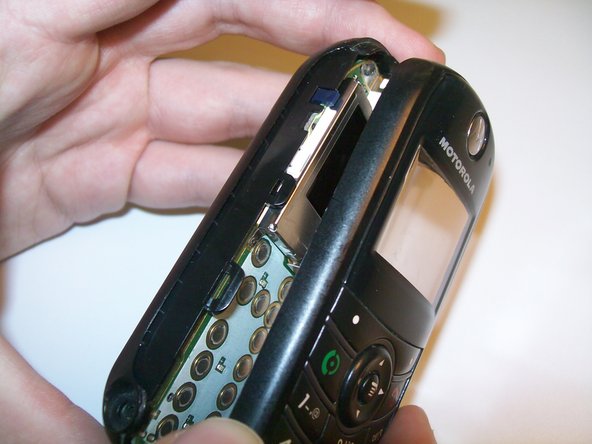
    • Apply force to the back cover and simultaneously slide the cover down.

    • Note: Applying pressure on the ridges will make it easier to remove the cover.

  2. Motorola C139 Keypad & Faceplate Replacement: paso 2, imagen 1 de 3 Motorola C139 Keypad & Faceplate Replacement: paso 2, imagen 2 de 3 Motorola C139 Keypad & Faceplate Replacement: paso 2, imagen 3 de 3
    • Press the button labeled "PUSH" located at the bottom back of the phone. This will release the battery.

    • Lift and remove the battery.

  3. Motorola C139 Keypad & Faceplate Replacement, Rear Casing: paso 3, imagen 1 de 3 Motorola C139 Keypad & Faceplate Replacement, Rear Casing: paso 3, imagen 2 de 3 Motorola C139 Keypad & Faceplate Replacement, Rear Casing: paso 3, imagen 3 de 3
    • Use a Torx T-5 screwdriver to remove the screws on the back of the phone.

    • The screws are 6.86 mm long and 1.61 mm in diameter.

  4. Motorola C139 Keypad & Faceplate Replacement: paso 4, imagen 1 de 3 Motorola C139 Keypad & Faceplate Replacement: paso 4, imagen 2 de 3 Motorola C139 Keypad & Faceplate Replacement: paso 4, imagen 3 de 3
    • Slide a pry tool underneath the adhesive rubber stip and peel it back away from the phone.

    • Repeat for the other side.

  5. Motorola C139 Keypad & Faceplate Replacement: paso 5, imagen 1 de 3 Motorola C139 Keypad & Faceplate Replacement: paso 5, imagen 2 de 3 Motorola C139 Keypad & Faceplate Replacement: paso 5, imagen 3 de 3
    • Insert the pry tool in the slit on the side of the phone and slide it down until you hear an audible click and the phone bottom loosens from the top.

    • Use the pry tool to release the two hooks on each side and the two hooks at the top holding the case together.

    • Release a total of six hooks from the sides and top to free the phone into two halves.

  6. Motorola C139 Keypad & Faceplate Replacement: paso 6, imagen 1 de 3 Motorola C139 Keypad & Faceplate Replacement: paso 6, imagen 2 de 3 Motorola C139 Keypad & Faceplate Replacement: paso 6, imagen 3 de 3
    • Using a Torx T-5 screwdriver remove the screws at the top of the phone.

    • The screws are 6.86 mm long and 1.61mm in diameter.

  7. Motorola C139 Keypad & Faceplate Replacement: paso 7, imagen 1 de 3 Motorola C139 Keypad & Faceplate Replacement: paso 7, imagen 2 de 3 Motorola C139 Keypad & Faceplate Replacement: paso 7, imagen 3 de 3
    • Use plastic opening tools to free the circuit board from the case.

    • There are two hooks (one on each side) holding the circuit board into the case.

    • Then grip the circuit board and lift to remove the circuit board from the case.

  8. Motorola C139 Keypad & Faceplate Replacement, Keypad & Faceplate: paso 8, imagen 1 de 2 Motorola C139 Keypad & Faceplate Replacement, Keypad & Faceplate: paso 8, imagen 2 de 2
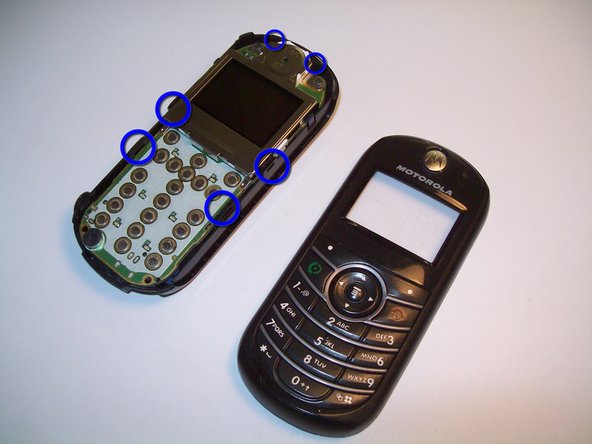
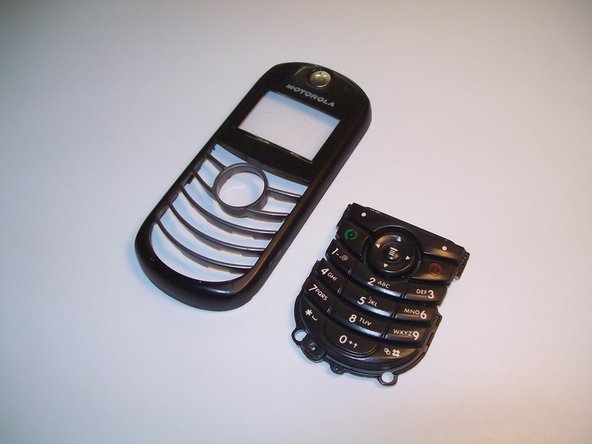
    • On the top half of the phone push downwards on the number keys to free the keypad from the top of the phone.

Conclusión

To reassemble your device, follow these instructions in reverse order.

Equipo

Clemson, Team 2-2, Benson Spring 2012 Miembro de Clemson, Team 2-2, Benson Spring 2012

CLEM-BENSON-S12S2G2

3 Miembros

15 Guías creadas

0 comentarios

Agregar Comentario

Ver Estadísticas:

Ultimas 24 horas: 1

Ultimos 7 días: 1

Ultimos 30 días: 1

Todo El Tiempo: 993