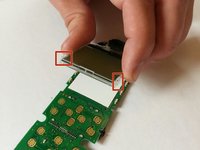
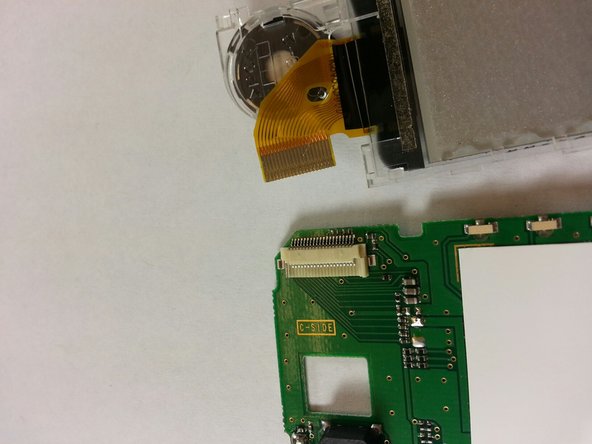
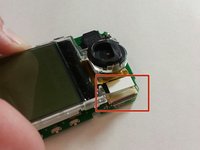
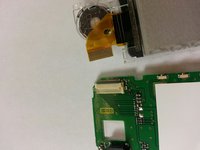
Saltar al contenido principal

Mitsubishi T200 Screen Replacement

Qué necesitas

  1. Mitsubishi T200 Screen Replacement, Screen: paso 1, imagen 1 de 2 Mitsubishi T200 Screen Replacement, Screen: paso 1, imagen 2 de 2
    • Begin disassembling the phone by removing the phone back cover and battery.

  2. Mitsubishi T200 Screen Replacement: paso 2, imagen 1 de 1
    • To remove the back plate, loosen and remove the four screws by using a #00 Philips head screwdriver.

  3. Mitsubishi T200 Screen Replacement: paso 3, imagen 1 de 1
    • Separate the front plastic component from the motherboard component.

  4. Mitsubishi T200 Screen Replacement: paso 4, imagen 1 de 1
    • Take the circuit board off the motherboard.

  5. Mitsubishi T200 Screen Replacement: paso 5, imagen 1 de 2 Mitsubishi T200 Screen Replacement: paso 5, imagen 2 de 2
    • Unclip the four clips to remove the screen (connected to the clear plastic) from the circuit board.

  6. Mitsubishi T200 Screen Replacement: paso 6, imagen 1 de 2 Mitsubishi T200 Screen Replacement: paso 6, imagen 2 de 2
    • Remove the attached ribbon from the circuit board by prying open the gray plastic clip at the top right of the circuit board.

  7. Mitsubishi T200 Screen Replacement: paso 7, imagen 1 de 2 Mitsubishi T200 Screen Replacement: paso 7, imagen 2 de 2
    • We can now insert the new screen and reassemble the device.

    • Place the ribbon of the new screen into the clip on the top right of the circuit board.

  8. Mitsubishi T200 Screen Replacement: paso 8, imagen 1 de 1
    • Clip the new screen onto the circuit board.

  9. Mitsubishi T200 Screen Replacement: paso 9, imagen 1 de 1
    • Replace circut board back on top of motherboard.

  10. Mitsubishi T200 Screen Replacement: paso 10, imagen 1 de 1
    • Take the entire internal assembly and join it with the front plastic housing.

    • Ensure that the tops of both pieces clip into place before joining the bottom ones.

  11. Mitsubishi T200 Screen Replacement: paso 11, imagen 1 de 1
    • Join the phone's face assembly to the back plastic housing. Make sure you carefully insert the front into the antenna's clip first.

    • Snap the whole unit together.

  12. Mitsubishi T200 Screen Replacement: paso 12, imagen 1 de 1
    • Firmly replace screws into the backing.

Linea de Meta

2 personas más completaron esta guía.

Taylor Lewis

Miembro Desde 02/13/14

14 Reputación

1 Guía escrita

Equipo

Ohio State, Team 1-5, Meza Spring 2014 Miembro de Ohio State, Team 1-5, Meza Spring 2014

OSU-MEZA-S14S1G5

4 Miembros

4 Guías creadas

0 comentarios

Agregar Comentario

Ver Estadísticas:

Ultimas 24 horas: 5

Ultimos 7 días: 5

Ultimos 30 días: 8

Todo El Tiempo: 809