Saltar al contenido principal
Únete a la Comunidad de Reparación - Crear Cuenta

Minolta Dimage Xt Flashbulb and Housing Replacement

Qué necesitas

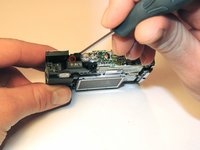
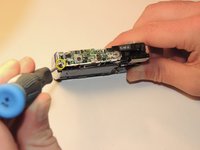
    1. Minolta Dimage Xt Flashbulb and Housing Replacement, Casing: paso 1, imagen 1 de 3 Minolta Dimage Xt Flashbulb and Housing Replacement, Casing: paso 1, imagen 2 de 3 Minolta Dimage Xt Flashbulb and Housing Replacement, Casing: paso 1, imagen 3 de 3
      • Locate and remove the silver screws on each side of the camera.

      • Use the Phillips #00 Screwdriver to unscrew all 2.0mm (4 instances) and 4.0mm (2 instances) screws.

      Pregunta a FixBot

      Agregar Comentario

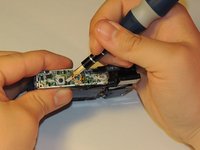
    2. Minolta Dimage Xt Flashbulb and Housing Replacement: paso 2, imagen 1 de 3 Minolta Dimage Xt Flashbulb and Housing Replacement: paso 2, imagen 2 de 3 Minolta Dimage Xt Flashbulb and Housing Replacement: paso 2, imagen 3 de 3
      • Then, carefully pry apart the front and back outer casing away from the internal components.

      • Be aware of the ribbon wire that will disconnect when the casing is detached.

      Pregunta a FixBot

      Agregar Comentario

    1. Minolta Dimage Xt Flashbulb and Housing Replacement, Flashbulb and Housing: paso 3, imagen 1 de 2 Minolta Dimage Xt Flashbulb and Housing Replacement, Flashbulb and Housing: paso 3, imagen 2 de 2
      • Remove 2mm screws connecting the flash housing to the main components of the camera.

      • Use a Philips #00 screwdriver to remove the black 2.0mm (4 instances) screws .

      Pregunta a FixBot

      Agregar Comentario

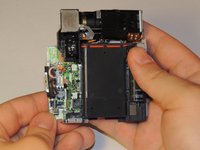
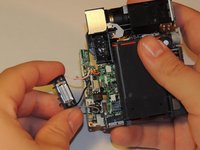
    2. Minolta Dimage Xt Flashbulb and Housing Replacement: paso 4, imagen 1 de 3 Minolta Dimage Xt Flashbulb and Housing Replacement: paso 4, imagen 2 de 3 Minolta Dimage Xt Flashbulb and Housing Replacement: paso 4, imagen 3 de 3
      • Use the spudger to push the black plastic hooks through the circuit board to release the flash housing.

      • Once the screws have been removed, pull the circuit board away from the body of the camera.

      • Wires will keep it from completely detaching.

      • Pull the housing away from the circuit board.

      Pregunta a FixBot

      Agregar Comentario

Conclusión

To reassemble device, follow steps in reverse order. This will require the reattachment of wires from the camera to the flashbulb casing.

Cancelar: No complete esta guía.

Equipo

Clemson, Team 12-4, Benson Spring 2013 Miembro de Clemson, Team 12-4, Benson Spring 2013

CLEM-BENSON-S13S12G4

Miembros de 3

84 Guías creadas

0Guía Comentarios

Agregar Comentario

Ver Estadísticas:

Ultimas 24 horas: 1

Ultimos 7 días: 7

Ultimos 30 días: 29

Todo El Tiempo: 1,094