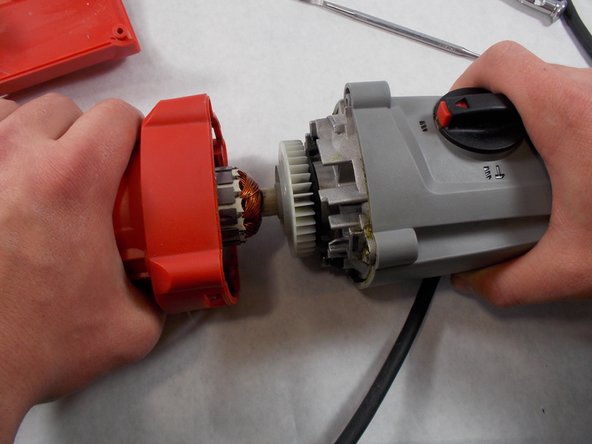
Saltar al contenido principal

Milwaukee 5262-21 Reduction Gear Assembly Replacement

Qué necesitas

  1. Milwaukee 5262-21 Reduction Gear Assembly Replacement, Housing Assembly: paso 1, imagen 1 de 1
    • Remove the ten 19mm T20 Torx screws shown in red.

  2. Milwaukee 5262-21 Reduction Gear Assembly Replacement: paso 2, imagen 1 de 1
    • Remove the red Housing Assembly by lifting it up off of the tool.

  3. Milwaukee 5262-21 Reduction Gear Assembly Replacement, Reduction Gear Assembly: paso 3, imagen 1 de 2 Milwaukee 5262-21 Reduction Gear Assembly Replacement, Reduction Gear Assembly: paso 3, imagen 2 de 2
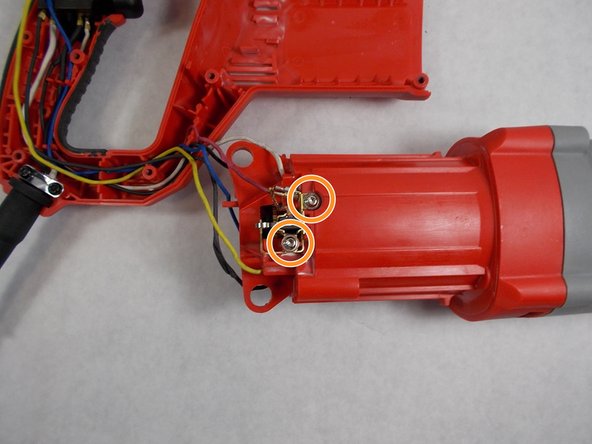
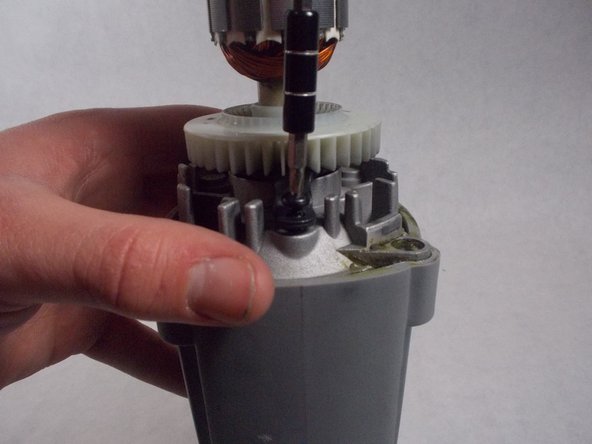
    • Remove the two 10mm T-10 Torx screws that attach the top brush holders to the motor housing.

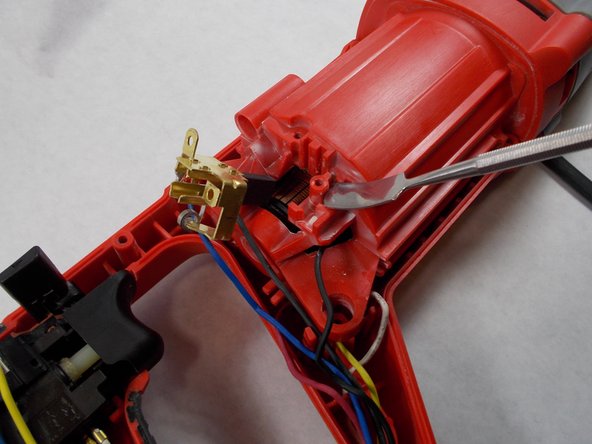
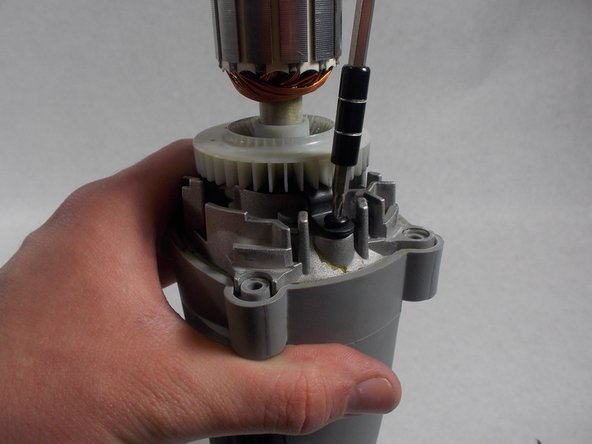
    • Remove the two 10mm T-10 Torx screws that attach the bottom brush holders to the motor housing.

  4. Milwaukee 5262-21 Reduction Gear Assembly Replacement: paso 4, imagen 1 de 2 Milwaukee 5262-21 Reduction Gear Assembly Replacement: paso 4, imagen 2 de 2
    • Using a metal spudger, pry off each brush holder.

  5. Milwaukee 5262-21 Reduction Gear Assembly Replacement: paso 5, imagen 1 de 3 Milwaukee 5262-21 Reduction Gear Assembly Replacement: paso 5, imagen 2 de 3 Milwaukee 5262-21 Reduction Gear Assembly Replacement: paso 5, imagen 3 de 3
    • Remove the four 37mm T20 Torx screws shown in red.

  6. Milwaukee 5262-21 Reduction Gear Assembly Replacement: paso 6, imagen 1 de 2 Milwaukee 5262-21 Reduction Gear Assembly Replacement: paso 6, imagen 2 de 2
    • Pull the front portion of the tool out from the motor housing.

  7. Milwaukee 5262-21 Reduction Gear Assembly Replacement: paso 7, imagen 1 de 3 Milwaukee 5262-21 Reduction Gear Assembly Replacement: paso 7, imagen 2 de 3 Milwaukee 5262-21 Reduction Gear Assembly Replacement: paso 7, imagen 3 de 3
    • Remove the two 11.5mm T10 Torx screws shown in red.

  8. Milwaukee 5262-21 Reduction Gear Assembly Replacement: paso 8, imagen 1 de 2 Milwaukee 5262-21 Reduction Gear Assembly Replacement: paso 8, imagen 2 de 2
    • Pull the 120V armature assembly out of the diaphragm assembly.

  9. Milwaukee 5262-21 Reduction Gear Assembly Replacement: paso 9, imagen 1 de 2 Milwaukee 5262-21 Reduction Gear Assembly Replacement: paso 9, imagen 2 de 2
    • Using a metal spudger, pry the diaphgram assembly out of the gear case.

  10. Milwaukee 5262-21 Reduction Gear Assembly Replacement: paso 10, imagen 1 de 2 Milwaukee 5262-21 Reduction Gear Assembly Replacement: paso 10, imagen 2 de 2
    • Now that you have loosened the diaphragm, you can now pull it out of the gear case.

  11. Milwaukee 5262-21 Reduction Gear Assembly Replacement: paso 11, imagen 1 de 3 Milwaukee 5262-21 Reduction Gear Assembly Replacement: paso 11, imagen 2 de 3 Milwaukee 5262-21 Reduction Gear Assembly Replacement: paso 11, imagen 3 de 3
    • The diaphragm assembly will be lathered in grease. In order to move forward, you may want to give it a wipe down to remove any extra grease.

    • After removing some grease (if needed), remove the two 15mm T20 Torx screws shown in red.

  12. Milwaukee 5262-21 Reduction Gear Assembly Replacement: paso 12, imagen 1 de 3 Milwaukee 5262-21 Reduction Gear Assembly Replacement: paso 12, imagen 2 de 3 Milwaukee 5262-21 Reduction Gear Assembly Replacement: paso 12, imagen 3 de 3
    • Now pull the reduction gear assembly up and out of the diaphragm.

Conclusión

To reassemble your device, follow these instructions in reverse order.

Una persona más ha completado esta guía.

Payton Parker

Miembro Desde 03/08/19

534 Reputación

2 Guías creadas

Equipo

0 comentarios

Agregar Comentario

Ver Estadísticas:

Ultimas 24 horas: 0

Ultimos 7 días: 1

Ultimos 30 días: 3

Todo El Tiempo: 1,308