Saltar al contenido principal

Microsoft Surface Pro 4 Left Speaker Replacement

Qué necesitas

  1. Microsoft Surface Pro 4 Left Speaker Replacement, Remove the CPU shield: paso 1, imagen 1 de 2 Microsoft Surface Pro 4 Left Speaker Replacement, Remove the CPU shield: paso 1, imagen 2 de 2
    • Insert one point of a pair of pointed tweezers into a gap in the corner of the EMI shield covering the heat sink.

    • Use the tweezers to pry the EMI shield away from the motherboard as much as you can without bending it. Do not remove it yet.

    • Take care not to puncture the battery with the tweezers while working on this shield.

  2. Microsoft Surface Pro 4 Left Speaker Replacement: paso 2, imagen 1 de 3 Microsoft Surface Pro 4 Left Speaker Replacement: paso 2, imagen 2 de 3 Microsoft Surface Pro 4 Left Speaker Replacement: paso 2, imagen 3 de 3
    • Repeat the last step at various locations around the perimeter of the EMI shield covering the heat sink.

    • Remove the CPU shield.

  3. Microsoft Surface Pro 4 Left Speaker Replacement, Unscrew the heat sink: paso 3, imagen 1 de 1
    • Use a T3 Torx screwdriver to remove two screws from the heat sink:

    • One 2.4 mm screw along the top of the rectangular plate covering the battery.

    • Make sure you don't lose this bracket, as it might separate from the heatsink.

    • One 2.2 mm screw along the bottom of the rectangular plate covering the battery

  4. Microsoft Surface Pro 4 Left Speaker Replacement: paso 4, imagen 1 de 1
    • The heat sink is firmly adhered to the fan.

    • Use a Phillips screwdriver to remove three 2.4 mm screws securing the fan.

    • Use a T5 Torx screwdriver to remove the final 4.4 mm screw securing in the fan cover.

  5. Microsoft Surface Pro 4 Left Speaker Replacement: paso 5, imagen 1 de 1
    • Use a T5 Torx screwdriver to remove the heat sink screws surrounding the CPU in the following pattern, one turn at a time, until they're free.

    • Screw 1

    • Screw 2

    • Screw 3

    • Screw 4

    • During reassembly, use the same method to install these screws, tightening one turn at a time until each screw is snug.

  6. Microsoft Surface Pro 4 Left Speaker Replacement, Remove the heatsink: paso 6, imagen 1 de 2 Microsoft Surface Pro 4 Left Speaker Replacement, Remove the heatsink: paso 6, imagen 2 de 2
    • Use the flat end of a spudger to gently pry the heat sink straight up and off of the CPU.

    • Take care not to dent or crease the heat sink pipes during removal.

  7. Microsoft Surface Pro 4 Left Speaker Replacement: paso 7, imagen 1 de 3 Microsoft Surface Pro 4 Left Speaker Replacement: paso 7, imagen 2 de 3 Microsoft Surface Pro 4 Left Speaker Replacement: paso 7, imagen 3 de 3
    • Insert the pointed end of a spudger into a screw hole in the fan shield and lift up to separate it from the fan.

    • The fan shield is held in place with light adhesive.

    • Take care not to dent or crease the heat sink pipes during removal.

  8. Microsoft Surface Pro 4 Left Speaker Replacement: paso 8, imagen 1 de 1
  9. Microsoft Surface Pro 4 Left Speaker Replacement, Left Speaker: paso 9, imagen 1 de 2 Microsoft Surface Pro 4 Left Speaker Replacement, Left Speaker: paso 9, imagen 2 de 2
    • Detach the speaker connector from the motherboard.

  10. Microsoft Surface Pro 4 Left Speaker Replacement: paso 10, imagen 1 de 3 Microsoft Surface Pro 4 Left Speaker Replacement: paso 10, imagen 2 de 3 Microsoft Surface Pro 4 Left Speaker Replacement: paso 10, imagen 3 de 3
    • Remove screws from the speaker.

    • 2mm Torx T5 screw

    • 3 mm Torx T5 screw

  11. Microsoft Surface Pro 4 Left Speaker Replacement: paso 11, imagen 1 de 3 Microsoft Surface Pro 4 Left Speaker Replacement: paso 11, imagen 2 de 3 Microsoft Surface Pro 4 Left Speaker Replacement: paso 11, imagen 3 de 3
    • Work the speaker out with your fingers.

    • The speaker is still wedged tightly into the frame and is difficult to remove.

  12. Microsoft Surface Pro 4 Left Speaker Replacement: paso 12, imagen 1 de 3 Microsoft Surface Pro 4 Left Speaker Replacement: paso 12, imagen 2 de 3 Microsoft Surface Pro 4 Left Speaker Replacement: paso 12, imagen 3 de 3
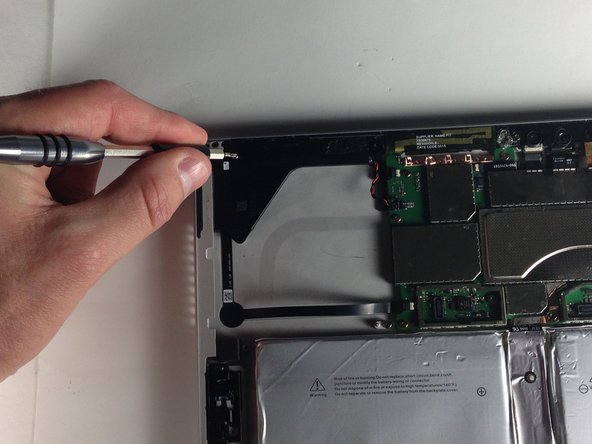
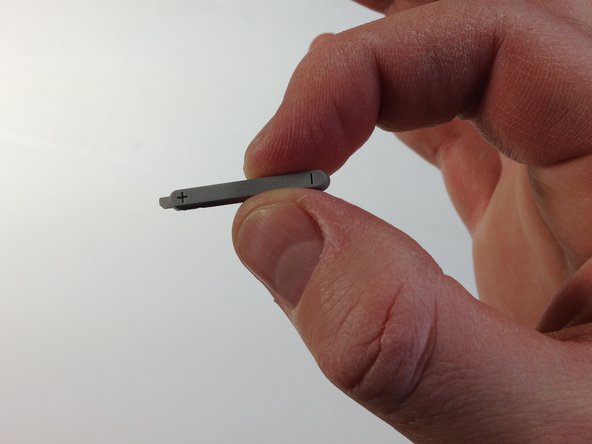
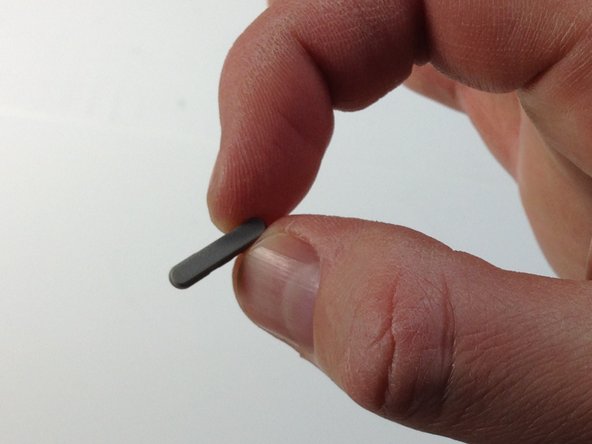
    • Remove the speaker, the volume button and the power button from the Surface Pro 4.

Conclusión

To reassemble your device, follow these instructions in reverse order.

4 personas más completaron esta guía.

Andrew Prater

Miembro Desde 02/01/16

5,728 Reputación

4 Guías creadas

Equipo

Metro State, Team 1-3, Carpenter Spring 2016 Miembro de Metro State, Team 1-3, Carpenter Spring 2016

MSU-CARPENTER-S16S1G3

2 Miembros

12 Guías creadas

0 comentarios

Agregar Comentario

Ver Estadísticas:

Ultimas 24 horas: 1

Ultimos 7 días: 4

Ultimos 30 días: 14

Todo El Tiempo: 3,215