Esta versión puede contener ediciones incorrectas. Cambiar a la última instantánea verificada.
Qué necesitas
-
Este paso está sin traducir. Ayuda a traducirlo
-
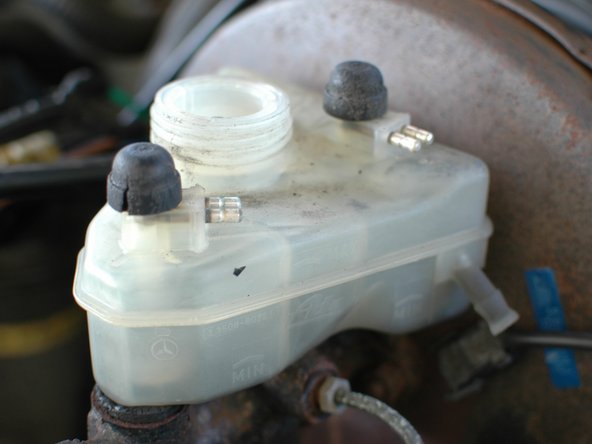
There are a total of four rubber seals that help to keep brake fluid inside of your reservoir during use. When the rubber ages, it can crack, and harden leading to the potential for leaks.
-
The first pair of seals cover the brake fluid sensor floats. They can be easily seen on top of the reservoir. These are very visibly cracked.
-
The second set of seals, also called plugs, seal the area where the reservoir enters the master cylinder.
-
The reservoir is not under pressure when using the brakes so these seals can be in pretty rough shape and still work OK. However, if you bleed your brakes using a pressure bleeder you may find fluid shooting out! That will hint at a good time to change them...
-
-
Este paso está sin traducir. Ayuda a traducirlo
-
Begin by draining the brake fluid from the system.
-
You will need to jack up the car, and remove the wheels. See the W123 guide page for help with both of these topics.
-
Now you can open the bleeder on each caliper to let the fluid drain in to an appropriate drip pan. It will take a while as it will drain slowly. Let it drain until it is barely dripping and the reservoir is empty.
-
-
Este paso está sin traducir. Ayuda a traducirlo
-
Now you can proceed to remove the reservoir. Start by unplugging the two sensor wires from each of the two floats.
-
-
Este paso está sin traducir. Ayuda a traducirlo
-
With the sensor plugs disconnected you can simply pull the reservoir out of the master cylinder. Pull straight up. It may take some force. You will have a bit of brake fluid drip and splash at this point - have a bit of water ready to rinse it off the painted surfaces underneath.
-
-
Este paso está sin traducir. Ayuda a traducirlo
-
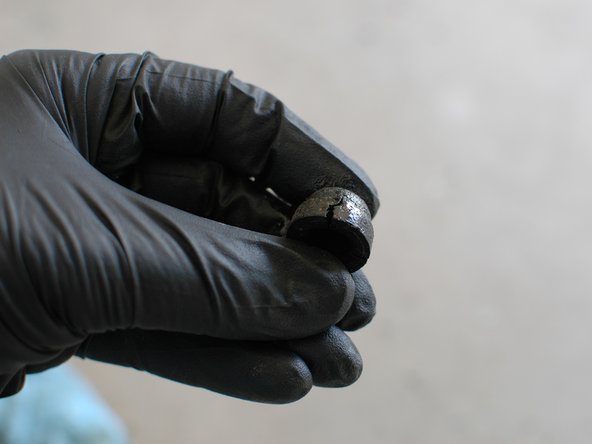
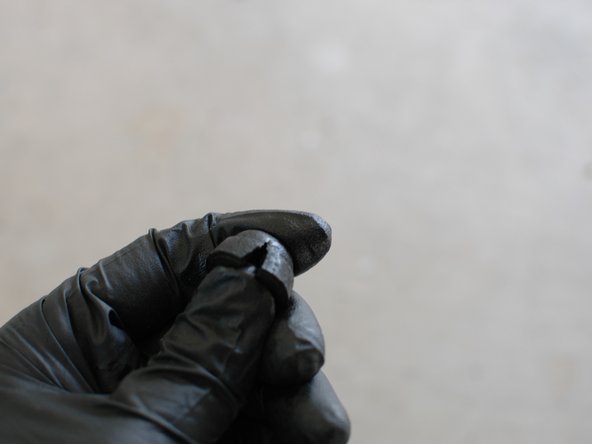
With the reservoir free you can pull the seals off the sensor floats. They should pull off with just some prying with your fingers.
-
See the second and third picture to get a good view of the condition of these seals once pulled. You can see for yourself why these were leaking!
-
-
-
Este paso está sin traducir. Ayuda a traducirlo
-
Lightly coat the new seals with some brake cylinder grease (not brake pad grease!!) or some clean brake fluid.
-
Push the new seals on over the floats until they seat firmly in place.
-
-
Este paso está sin traducir. Ayuda a traducirlo
-
Now it's time to replace the plugs on the master cylinder. You can get an idea here of their condition - they are pretty rough.
-
These seals should also simply pull out by hand.
-
-
Este paso está sin traducir. Ayuda a traducirlo
-
In this picture the front plug has been removed. Proceed to carefully clean around this area with a shop towel. Do not allow dirt to enter the master cylinder - clean so that the dirt goes out, not in.
-
-
Este paso está sin traducir. Ayuda a traducirlo
-
Coat these plugs with some brake cylinder grease, or brake fluid, and push them in. A wide flat blade screw driver used gently can help push the seals in.
-
You can see in this picture both new plugs installed.
-
-
Este paso está sin traducir. Ayuda a traducirlo
-
Now you can push the brake reservoir in to the front plug opening. Do this with the reservoir at an angle from the master cylinder.
-
-
Este paso está sin traducir. Ayuda a traducirlo
-
Once the front of the reservoir is inserted you can rotate the rear end in to place and push it in to the plug.
-
-
Este paso está sin traducir. Ayuda a traducirlo
-
Your brake fluid reservoir is now ready to go, except for the plug connections. Re-install them.
-
-
Este paso está sin traducir. Ayuda a traducirlo
-
Re-fill your brake reservoir with clean DOT4 brake fluid.
-
Then, proceed to bleed your brakes using the pressure bleed method. You can click here for a guide on this process.
-


Cancelar: No complete esta guía.
9 personas más completaron esta guía.

Equipo
