Esta versión puede contener ediciones incorrectas. Cambie a la última instantánea verificada.
Qué necesitas
-
Este paso está sin traducir. Ayuda a traducirlo
-
Remove the two plastic screw covers on the back of your Minimove by inserting the flat end of your plastic opening tool between the screw cover and the back panel and prying it out.
-
-
Este paso está sin traducir. Ayuda a traducirlo
-
Use a Phillips #1 screwdriver to remove the two 12 mm screws.
-
-
Este paso está sin traducir. Ayuda a traducirlo
-
Remove the four grey screw covers by inserting the plastic opening tool underneath the screw covers and rotating around the circumference.
-
-
Este paso está sin traducir. Ayuda a traducirlo
-
Remove the two 8 mm screws with a Phillips #1 screwdriver.
-
Remove the two 12 mm screws with a long Phillips #1 screwdriver.
-
-
-
Este paso está sin traducir. Ayuda a traducirlo
-
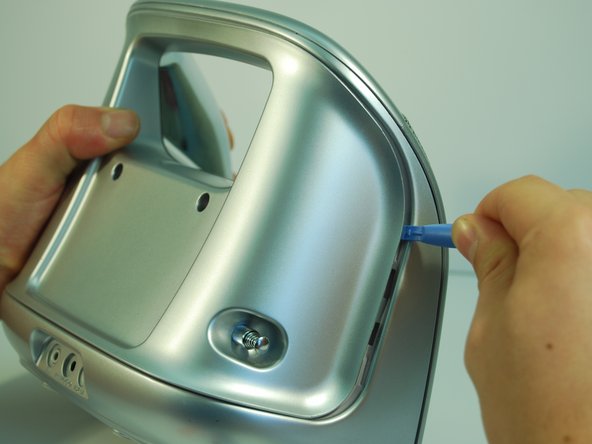
To remove the back panel, use the plastic opening tool and gently work around the outline of the panel. The outline wraps around the sides and can be spotted at the top back of the device.
-
-
Este paso está sin traducir. Ayuda a traducirlo
-
After loosening the panel with the plastic opening tool, use moderate force to pry open the panel with your hands.
-
Carefully pull the panel off.
-
-
Este paso está sin traducir. Ayuda a traducirlo
-
Use a Phillips #1 screwdriver to detach the wire from the back panel by removing the 8 mm screw connecting the wire to the antenna.
-
-
Este paso está sin traducir. Ayuda a traducirlo
-
If desired, the antenna can now be removed by pulling inwards and horizontal to the panel bottom.
-
-
Este paso está sin traducir. Ayuda a traducirlo
-
Use the Phillips #1 screwdriver to remove the four 12 mm screws.
-
Remove the five 6 mm screws at the top with the same screwdriver.
-
-
Este paso está sin traducir. Ayuda a traducirlo
-
Use a Phillips #1 screwdriver and remove the two vertical 8 mm screws from the top.
-
-
Este paso está sin traducir. Ayuda a traducirlo
-
Pry open the inner back panel by inserting the plastic opening tool in the crack at the top corner.
-
Use moderate force to pry it open and take the cover off.
-
Cancelar: No complete esta guía.
3 personas más completaron esta guía.


