Saltar al contenido principal

Martian Victory LED Screen Replacement

Qué necesitas

  1. Martian Victory LED Screen Replacement, Back Plate: paso 1, imagen 1 de 2 Martian Victory LED Screen Replacement, Back Plate: paso 1, imagen 2 de 2
    • Unscrew the four 3.4 mm flat head screws

  2. Martian Victory LED Screen Replacement: paso 2, imagen 1 de 1
    • Carefully lift the back plate off the watch. You will notice a lithium battery and rubber gasket attached to the back plate.

  3. Martian Victory LED Screen Replacement, Lithium Battery: paso 3, imagen 1 de 1
    • If not replacing lithium battery, skip down two steps.

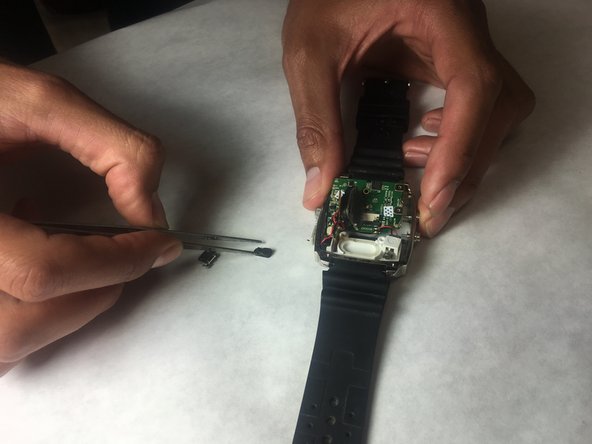
    • Using the plastic removal tool, pry the battery from the backing plate. The battery is simply attached with glue.

  4. Martian Victory LED Screen Replacement: paso 4, imagen 1 de 1
    • Desolder the battery connections from the motherboard. Learn how to solder components here!

  5. Martian Victory LED Screen Replacement, LED Screen: paso 5, imagen 1 de 1
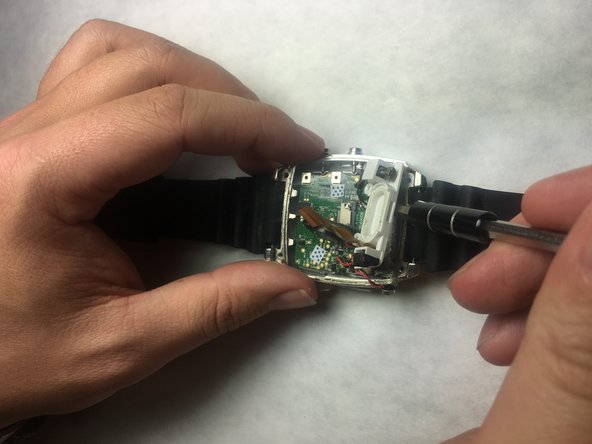
    • Locate the ribbon connection, and use remove the clips holding the strip on each side using needle tool.

  6. Martian Victory LED Screen Replacement: paso 6, imagen 1 de 1
    • With a pair of tweezers, carefully remove the ribbon strip connection.

  7. Martian Victory LED Screen Replacement: paso 7, imagen 1 de 1
    • Remove the screw driver holding the LED screen and Speaker in place.

  8. Martian Victory LED Screen Replacement: paso 8, imagen 1 de 1
    • Insert a small flat screw driver under the speaker in order to remove it.

  9. Martian Victory LED Screen Replacement: paso 9, imagen 1 de 2 Martian Victory LED Screen Replacement: paso 9, imagen 2 de 2
    • Using tweezers, remove the speaker and move off to the side.

  10. Martian Victory LED Screen Replacement: paso 10, imagen 1 de 2 Martian Victory LED Screen Replacement: paso 10, imagen 2 de 2
    • Place a small flat head screwdriver under the LED screen, and carefully push it out of it's socket.

  11. Martian Victory LED Screen Replacement: paso 11, imagen 1 de 1
    • Remove final connection to accelerometer. The LED screen is now separated from the device.

Conclusión

To reassemble your device, follow these instructions in reverse order.

Robert Sanchez

Miembro Desde 10/31/16

201 Reputación

2 Guías creadas

Equipo

IUPUI, Team 3-3, Baechle Fall 2016 Miembro de IUPUI, Team 3-3, Baechle Fall 2016

IUPUI-BAECHLE-F16S3G3

4 Miembros

8 Guías creadas

0 comentarios

Agregar Comentario

Ver Estadísticas:

Ultimas 24 horas: 0

Ultimos 7 días: 0

Ultimos 30 días: 2

Todo El Tiempo: 194