Introducción
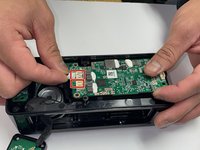
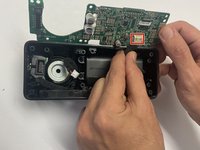
The motherboard is responsible for giving power and electricity to the speaker. With time, the motherboard can overheat and stop working. You must use the TR-9 screw to replace the motherboard. This replacement guide will teach you how to replace the whole motherboard. Be cautious because the motherboard is fragile.
Qué necesitas


To reassemble your device, follow these instructions in reverse order.
To reassemble your device, follow these instructions in reverse order.
Cancelar: No complete esta guía.
Una persona más ha completado esta guía.
Equipo

CSU Los Angeles, Team 5-1, Adachi Fall 2022 Miembro de CSU Los Angeles, Team 5-1, Adachi Fall 2022
CSULA-ADACHI-F22S5G1
5 Miembros
6 Guías creadas
Un comentario
How or where can I purchase a new motherboard for my Emberton II? My won’t charge the battery any longer, I’ve since bought another speaker but would like to repair this one if I can get my hands on a new motherboard. Thanks in advance.