Saltar al contenido principal

Magellan Roadmate 9055-LM Power Button Replacement

Qué necesitas

  1. Magellan Roadmate 9055-LM Power Button Replacement, Magellan Roadmate 9055-LM Back Panel Disassembly: paso 1, imagen 1 de 1
    • Flip your device with back panel facing up.

  2. Magellan Roadmate 9055-LM Power Button Replacement: paso 2, imagen 1 de 3 Magellan Roadmate 9055-LM Power Button Replacement: paso 2, imagen 2 de 3 Magellan Roadmate 9055-LM Power Button Replacement: paso 2, imagen 3 de 3
    • Unscrew four Phillips #0 screws from the back panel.

  3. Magellan Roadmate 9055-LM Power Button Replacement: paso 3, imagen 1 de 2 Magellan Roadmate 9055-LM Power Button Replacement: paso 3, imagen 2 de 2
    • Unscrew two Phillips #0 screws from the back panel.

  4. Magellan Roadmate 9055-LM Power Button Replacement: paso 4, imagen 1 de 2 Magellan Roadmate 9055-LM Power Button Replacement: paso 4, imagen 2 de 2
    • Use a plastic opening tool to pop the right side of the panel.

  5. Magellan Roadmate 9055-LM Power Button Replacement: paso 5, imagen 1 de 1
    • Lifting the back panel too quickly or forcefully may damage the speaker cable and battery cable, which are still attached underneath.

    • Gently lift up the back panel.

  6. Magellan Roadmate 9055-LM Power Button Replacement: paso 6, imagen 1 de 3 Magellan Roadmate 9055-LM Power Button Replacement: paso 6, imagen 2 de 3 Magellan Roadmate 9055-LM Power Button Replacement: paso 6, imagen 3 de 3
    • Remove the tape.

    • Unplug the cable for the speaker.

  7. Magellan Roadmate 9055-LM Power Button Replacement: paso 7, imagen 1 de 3 Magellan Roadmate 9055-LM Power Button Replacement: paso 7, imagen 2 de 3 Magellan Roadmate 9055-LM Power Button Replacement: paso 7, imagen 3 de 3
    • Remove the cable of the battery.

    • Tape removal is not necessary.

  8. Magellan Roadmate 9055-LM Power Button Replacement: paso 8, imagen 1 de 1
    • Place the back panel gently on the table.

  9. Magellan Roadmate 9055-LM Power Button Replacement, Power Button: paso 9, imagen 1 de 1
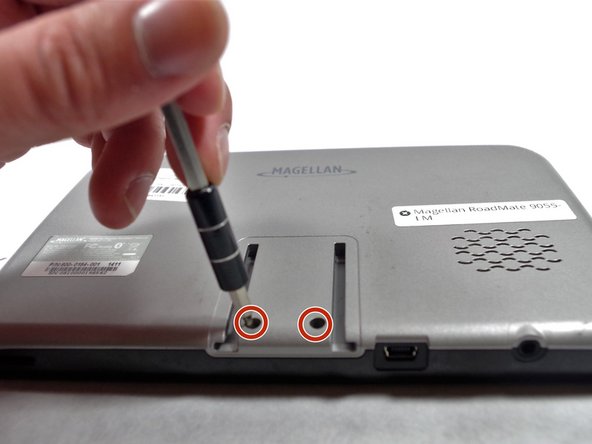
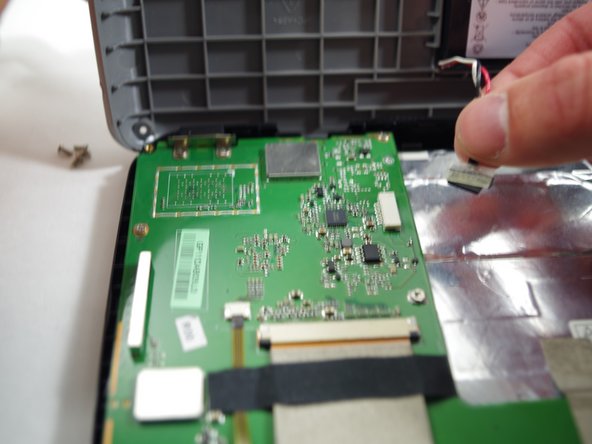
    • After the back panel is placed on the table, you must need to locate the starting button.

  10. Magellan Roadmate 9055-LM Power Button Replacement: paso 10, imagen 1 de 1
    • It is easily removable and can now be replaced.

Conclusión

To reassemble your device, follow these instructions in reverse order.

Giovanni

Miembro Desde 10/18/16

313 Reputación

3 Guías creadas

Equipo

UMass Dartmouth, Team 1-5, Catania Fall 2016 Miembro de UMass Dartmouth, Team 1-5, Catania Fall 2016

UMASSD-CATANIA-F16S1G5

3 Miembros

7 Guías creadas

0 comentarios

Agregar Comentario

Ver Estadísticas:

Ultimas 24 horas: 0

Ultimos 7 días: 2

Ultimos 30 días: 9

Todo El Tiempo: 111