Saltar al contenido principal

Macintosh Powerbook 5300cs Trackpad Replacement

Qué necesitas

  1. Macintosh Powerbook 5300cs Trackpad Replacement, Battery: paso 1, imagen 1 de 1
    • The battery compartment is located in the front-right side of the laptop.

  2. Macintosh Powerbook 5300cs Trackpad Replacement: paso 2, imagen 1 de 1
    • To insert the battery, gently slide it into the compartment until it clicks in place.

    • To remove, slide the button highlighted in the red rectangle to the right to release the battery and slide it from the compartment.

  3. Macintosh Powerbook 5300cs Trackpad Replacement, Keyboard: paso 3, imagen 1 de 1
    • With the laptop upside down and with the battery removed, use a Torx #9 screw driver to remove the three .84 in. screws shown.

  4. Macintosh Powerbook 5300cs Trackpad Replacement: paso 4, imagen 1 de 2 Macintosh Powerbook 5300cs Trackpad Replacement: paso 4, imagen 2 de 2
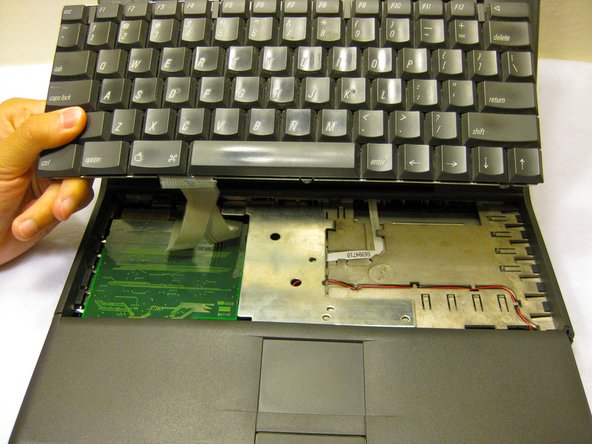
    • Carefully pull up on the front of the keyboard to pop it out from the case.

    • Then slide the back out so the keyboard becomes nearly free.

  5. Macintosh Powerbook 5300cs Trackpad Replacement: paso 5, imagen 1 de 3 Macintosh Powerbook 5300cs Trackpad Replacement: paso 5, imagen 2 de 3 Macintosh Powerbook 5300cs Trackpad Replacement: paso 5, imagen 3 de 3
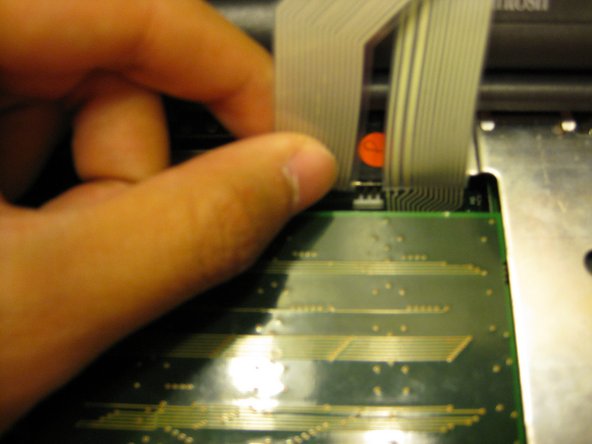
    • Disconnect the ribbon that is connecting the keyboard to the rest of the computer.

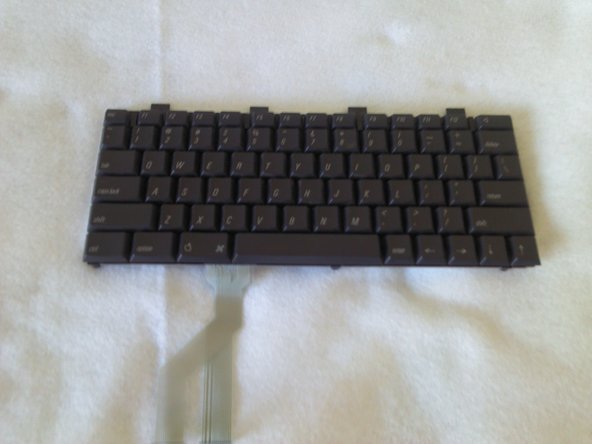
    • Pull the keyboard out and repair or replace as needed.

  6. Macintosh Powerbook 5300cs Trackpad Replacement, Trackpad: paso 6, imagen 1 de 3 Macintosh Powerbook 5300cs Trackpad Replacement, Trackpad: paso 6, imagen 2 de 3 Macintosh Powerbook 5300cs Trackpad Replacement, Trackpad: paso 6, imagen 3 de 3
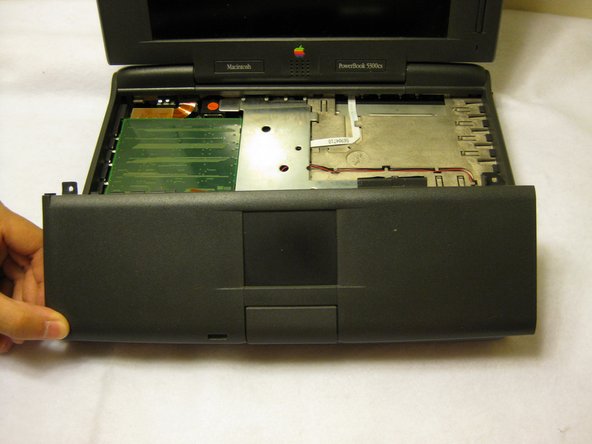
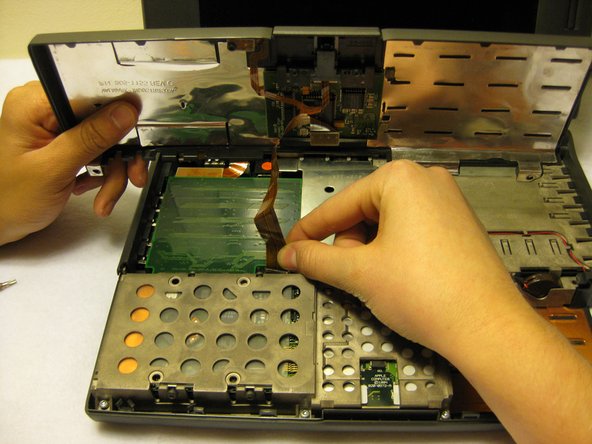
    • Remove the front plastic panel of the laptop by carefully lifting it up.

  7. Macintosh Powerbook 5300cs Trackpad Replacement: paso 7, imagen 1 de 1
    • Remove the orange stripped ribbon that connects the trackpad to the rest of the laptop by carefully pulling up.

  8. Macintosh Powerbook 5300cs Trackpad Replacement: paso 8, imagen 1 de 2 Macintosh Powerbook 5300cs Trackpad Replacement: paso 8, imagen 2 de 2
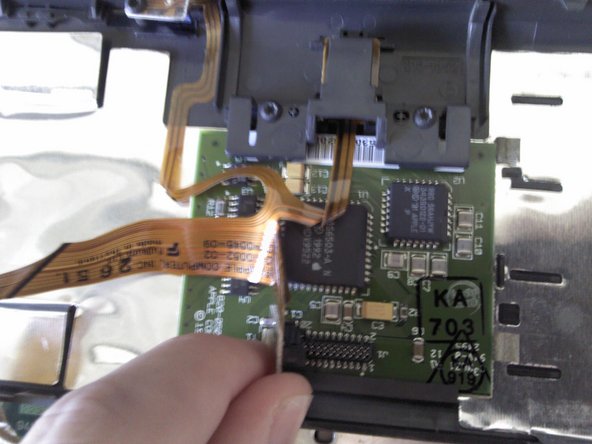
    • With a Torx #9 screwdriver, remove the two .20 in. screws circled in red that are holding the trackpad in place.

    • Then disconnect the ribbon highlighted with the red rectangle connecting the trackpad to the laptop.

  9. Macintosh Powerbook 5300cs Trackpad Replacement: paso 9, imagen 1 de 1
    • The trackpad can now be removed from the laptop.

Conclusión

To reassemble your device, follow these instructions in reverse order.

Una persona más ha completado esta guía.

Ronan

Miembro Desde 10/10/11

63 Reputación

4 Guías creadas

Equipo

Cal Poly, Team 6-1, Regan Fall 2011 Miembro de Cal Poly, Team 6-1, Regan Fall 2011

CPSU-REGAN-F11S6G1

4 Miembros

6 Guías creadas

0 comentarios

Agregar Comentario

Ver Estadísticas:

Ultimas 24 horas: 0

Ultimos 7 días: 1

Ultimos 30 días: 3

Todo El Tiempo: 1,018