Esta versión puede contener ediciones incorrectas. Cambie a la última instantánea verificada.
Qué necesitas
-
-
Con la carcasa cerrada, coloca el Unibody con la parte superior hacia abajo sobre una superficie plana.
-
Presiona el lado ranurado de la pestaña de apertura de la puerta de acceso, lo suficiente como para poder agarrar el extremo libre. Levanta la pestaña de apertura hasta que quede vertical.
-
-
-
Retira los siguientes ocho tornillos que aseguran la carcasa inferior al chasis:
-
Un tornillo Phillips de 3 mm.
-
Tres tornillos Phillips de 13.5 mm.
-
Cuatro tornillos Phillips de 3.5 mm.
-
-
-
-
Usando el extremo plano de un spudger, levanta el conector del subwoofer de la placa lógica.
-
-
Este paso está sin traducir. Ayuda a traducirlo
-
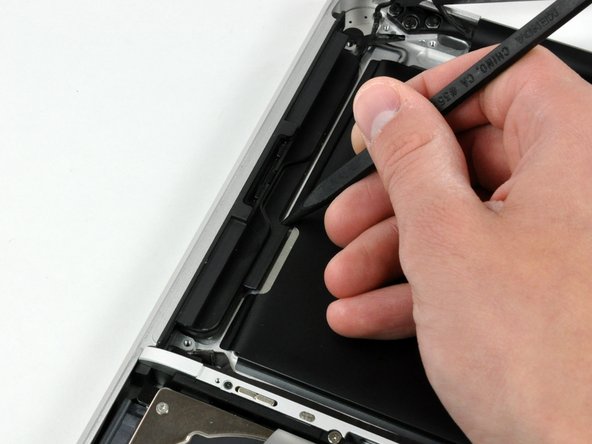
Peel back the small piece of black tape covering the right speaker cable.
-
Use the tip of a spudger to pry the right speaker up off the adhesive securing it to the upper case.
-
Lift the subwoofer and right speaker assembly out of the upper case.
-


Cancelar: No complete esta guía.
33 personas más completaron esta guía.

6 comentarios
I have good sound again, thanks.
2008 MacBook (aluminum).
The hardest part was starting the optical drives hold down screws, my jewelers screwdriver maginetic tip is weak.
Total time was about a half hour.
If all you have are Phillips screwdrivers, be very careful with the screws at the split of the bottom case and all of the internal ones. You may have to drop to a Phillips #000 if you don’t have a JIS #00, which appears to be the correct tool for them, based on the actual fit of the bits in my (iFixit) set.
I bought the speakers in Ali express for less than 9 € and my late 2008 MacBook unibody sounds well again. Thanks for your help.