Saltar al contenido principal

MacBook Pro 15" Unibody Mid 2010 Upper Case Replacement

Qué necesitas

  1. MacBook Pro 15" Unibody Mid 2010 Upper Case Replacement, Lower Case: paso 1, imagen 1 de 1
    • Remove the following ten screws securing the lower case to the upper case:

    • Three 13.5 mm (14.1 mm) Phillips screws.

    • Seven 3 mm Phillips screws.

    • When removing these screws, note how they come out at a slight angle. They must be reinstalled the same way.

  2. MacBook Pro 15" Unibody Mid 2010 Upper Case Replacement: paso 2, imagen 1 de 1
    • Using both hands, lift the lower case near the vent to pop it off two clips securing it to the upper case.

    • Remove the lower case and set it aside.

  3. MacBook Pro 15" Unibody Mid 2010 Upper Case Replacement, Battery: paso 3, imagen 1 de 1
    • Remove the two 7.4 mm Tri-point screws securing the battery to the upper case.

    • Note: For certain repairs (e.g. hard drive), removing the battery is not necessary but it prevents any accidental shorting of electronics on the motherboard. If you do not remove the battery, please be careful as parts of the motherboard might be electrified.

    • You do not necessarily have to follow steps 3-6 to remove the battery in order to replace the hard drive. However it is recommended to remove all power sources from electronics before working on them.

  4. MacBook Pro 15" Unibody Mid 2010 Upper Case Replacement: paso 4, imagen 1 de 1
    • Use the tip of your finger to carefully peel back the corner of the warning label to reveal a hidden Tri-point screw.

    • Remove the last 7.4 mm Tri-point screw securing the battery to the upper case.

  5. MacBook Pro 15" Unibody Mid 2010 Upper Case Replacement: paso 5, imagen 1 de 2 MacBook Pro 15" Unibody Mid 2010 Upper Case Replacement: paso 5, imagen 2 de 2
    • Lift the battery by its plastic pull tab and slide it away from the long edge of the upper case.

    • Do not try to completely remove the battery just yet.

  6. MacBook Pro 15" Unibody Mid 2010 Upper Case Replacement: paso 6, imagen 1 de 1
    • Tilt the battery away from the logic board enough to access the battery cable connector.

    • Pull the battery cable connector away from its socket on the logic board and remove the battery from the upper case.

    • Pull the battery cable connector away from the center of the logic board.

    • If you're installing a new battery, you should calibrate it after installation:

    • Charge it to 100%, and then keep charging it for at least 2 more hours. Next, unplug and use it normally to drain the battery. When you see the low battery warning, save your work, and keep your laptop on until it goes to sleep due to low battery. Wait at least 5 hours, then charge your laptop uninterrupted to 100%.

    • If you notice any unusual behavior or problems after installing your new battery, you may need to reset your MacBook's SMC.

  7. MacBook Pro 15" Unibody Mid 2010 Upper Case Replacement, Left Fan: paso 7, imagen 1 de 1
    • Remove the three 3.4 mm T6 Torx screws securing the left fan to the logic board.

    • In some models, these T6 Torx screws may be 3.1 mm long.

  8. MacBook Pro 15" Unibody Mid 2010 Upper Case Replacement: paso 8, imagen 1 de 3 MacBook Pro 15" Unibody Mid 2010 Upper Case Replacement: paso 8, imagen 2 de 3 MacBook Pro 15" Unibody Mid 2010 Upper Case Replacement: paso 8, imagen 3 de 3
    • Use the flat end of a spudger to disconnect the left fan connector from the logic board.

    • It is useful to twist the spudger axially from beneath the fan cable wires to release the connector.

    • The fan socket and the fan connector can be seen in the second and third pictures. Be careful not to break the plastic fan socket off the logic board as you use your spudger to lift the fan connector straight up and out of its socket. The layout of the logic board shown in the second picture may look slightly different than your machine but the fan socket is the same.

  9. MacBook Pro 15" Unibody Mid 2010 Upper Case Replacement: paso 9, imagen 1 de 1
    • Lift the left fan out of the upper case.

  10. MacBook Pro 15" Unibody Mid 2010 Upper Case Replacement, Logic Board: paso 10, imagen 1 de 1
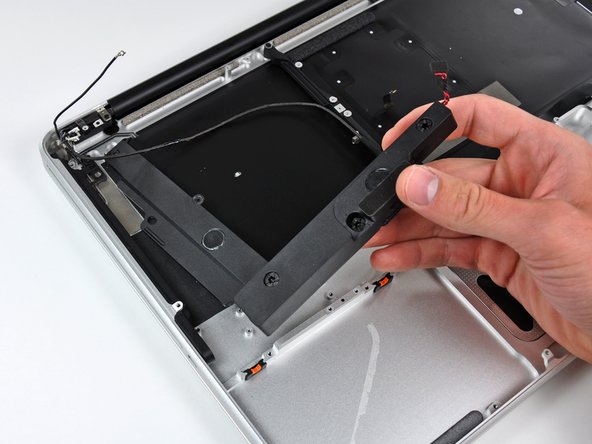
    • Remove the three T6 Torx screws securing the right fan to the upper case.

  11. MacBook Pro 15" Unibody Mid 2010 Upper Case Replacement: paso 11, imagen 1 de 2 MacBook Pro 15" Unibody Mid 2010 Upper Case Replacement: paso 11, imagen 2 de 2
    • Use the flat end of a spudger to pry the right fan connector up out of its socket on the logic board.

    • It is useful to twist the spudger axially from beneath the fan cable wires to release the connector.

    • Remove the right fan from the upper case.

  12. MacBook Pro 15" Unibody Mid 2010 Upper Case Replacement: paso 12, imagen 1 de 1
    • Use the flat end of a spudger to pry the AirPort / Bluetooth ribbon cable up off its socket on the logic board.

    • Fold the AirPort / Bluetooth ribbon cable back to keep it out of the way of the logic board.

  13. MacBook Pro 15" Unibody Mid 2010 Upper Case Replacement: paso 13, imagen 1 de 1
    • Disconnect the iSight cable by pulling its connector toward the optical drive opening.

  14. MacBook Pro 15" Unibody Mid 2010 Upper Case Replacement: paso 14, imagen 1 de 1
    • Use the flat end of a spudger to pry the optical drive cable connector up from the logic board.

    • Fold the optical drive cable back to keep it out of the way of the logic board.

  15. MacBook Pro 15" Unibody Mid 2010 Upper Case Replacement: paso 15, imagen 1 de 1
    • Carefully pull the subwoofer/right speaker cable up to lift its connector out of its socket on the logic board.

  16. MacBook Pro 15" Unibody Mid 2010 Upper Case Replacement: paso 16, imagen 1 de 1
    • Use the flat end of a spudger to pry the hard drive cable connector up out of its socket on the logic board.

  17. MacBook Pro 15" Unibody Mid 2010 Upper Case Replacement: paso 17, imagen 1 de 2 MacBook Pro 15" Unibody Mid 2010 Upper Case Replacement: paso 17, imagen 2 de 2
    • Remove the two short Phillips screws securing the small EMI shield to the logic board.

    • Remove the EMI shield from the logic board.

  18. MacBook Pro 15" Unibody Mid 2010 Upper Case Replacement: paso 18, imagen 1 de 1
    • Use the flat end of a spudger to pry the trackpad cable connector up out of its socket on the logic board.

  19. MacBook Pro 15" Unibody Mid 2010 Upper Case Replacement: paso 19, imagen 1 de 2 MacBook Pro 15" Unibody Mid 2010 Upper Case Replacement: paso 19, imagen 2 de 2
    • Use your fingernail to carefully flip up the keyboard ribbon cable retaining flap.

    • Make sure you are flipping up the retaining flap, not the socket itself.

    • Use the tip of a spudger to pull the keyboard ribbon cable straight out of its socket.

  20. MacBook Pro 15" Unibody Mid 2010 Upper Case Replacement: paso 20, imagen 1 de 1
    • Use the flat end of a spudger to pry the battery indicator cable connector up out of its socket on the logic board.

  21. MacBook Pro 15" Unibody Mid 2010 Upper Case Replacement: paso 21, imagen 1 de 3 MacBook Pro 15" Unibody Mid 2010 Upper Case Replacement: paso 21, imagen 2 de 3 MacBook Pro 15" Unibody Mid 2010 Upper Case Replacement: paso 21, imagen 3 de 3
    • Grab the plastic pull tab secured to the display data cable lock and rotate it toward the DC-In side of the computer.

    • Pull the display data cable straight out of its socket.

    • Do not pull the cable upward, as the socket is very fragile. Pull the cable parallel to the face of the logic board toward the corner of the upper case.

  22. MacBook Pro 15" Unibody Mid 2010 Upper Case Replacement: paso 22, imagen 1 de 2 MacBook Pro 15" Unibody Mid 2010 Upper Case Replacement: paso 22, imagen 2 de 2
    • Use the tip of a spudger or your fingernail to flip up the retaining flap on the keyboard backlight ribbon cable socket.

    • Be sure you are prying up on the retaining flap, not the socket itself.

    • Pull the keyboard ribbon cable straight out of its socket.

  23. MacBook Pro 15" Unibody Mid 2010 Upper Case Replacement: paso 23, imagen 1 de 1
    • Remove the following screws:

    • Seven 3.3 mm T6 Torx screws securing the logic board to the upper case.

    • Two 8 mm T6 Torx screws securing the DC-In board to the upper case.

    • Do not remove the logic board yet! There are components on the underside of the logic board attached to the the upper case that must first be disconnected.

  24. MacBook Pro 15" Unibody Mid 2010 Upper Case Replacement: paso 24, imagen 1 de 1
    • Carefully lift the logic board assembly from the left side and work it out of the upper case, minding the port side that may get caught during removal.

    • Do not entirely remove the logic board yet!

  25. MacBook Pro 15" Unibody Mid 2010 Upper Case Replacement: paso 25, imagen 1 de 1
    • Lift the logic board enough to gain clearance and use a spudger to pry the microphone up off the upper case.

  26. MacBook Pro 15" Unibody Mid 2010 Upper Case Replacement: paso 26, imagen 1 de 1
    • Slide the logic board away from the port openings and lift the assembly out of the upper case.

    • Before reinstalling the logic board, it is easiest to press the microphone down into its housing in the left speaker to keep it in place.

    • To avoid ESD damage, be sure to lay your logic board on a soft, static free surface during service.

  27. MacBook Pro 15" Unibody Mid 2010 Upper Case Replacement, Upper Case: paso 27, imagen 1 de 2 MacBook Pro 15" Unibody Mid 2010 Upper Case Replacement, Upper Case: paso 27, imagen 2 de 2
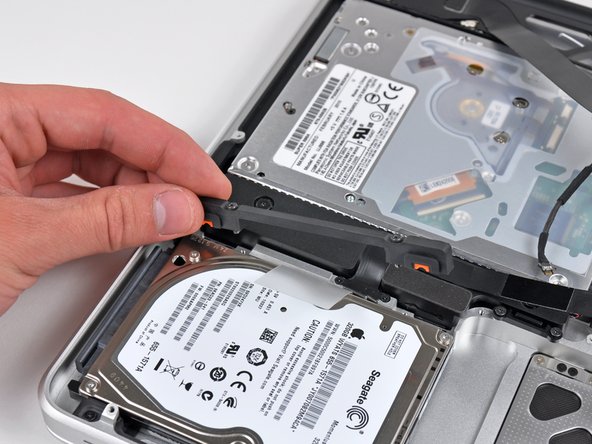
    • Remove the two Phillips screws securing the hard drive bracket to the upper case.

    • These screws are captive in the hard drive bracket.

    • Remove the hard drive bracket from the upper case.

  28. MacBook Pro 15" Unibody Mid 2010 Upper Case Replacement: paso 28, imagen 1 de 1
    • Using its attached pull tab, lift the hard drive out of the upper case.

    • Don't try to completely remove it yet, as it is still connected to the hard drive cable.

  29. MacBook Pro 15" Unibody Mid 2010 Upper Case Replacement: paso 29, imagen 1 de 2 MacBook Pro 15" Unibody Mid 2010 Upper Case Replacement: paso 29, imagen 2 de 2
    • Pull the hard drive connector out of its socket on the hard drive.

    • Pull on the connector, not the cable itself.

    • Remove the hard drive and set it aside.

  30. MacBook Pro 15" Unibody Mid 2010 Upper Case Replacement: paso 30, imagen 1 de 1
    • Remove the following four screws securing the hard drive/IR sensor cable to the upper case:

    • Two 2.5 mm Phillips screws.

    • Two 10 mm Phillips screws.

  31. MacBook Pro 15" Unibody Mid 2010 Upper Case Replacement: paso 31, imagen 1 de 2 MacBook Pro 15" Unibody Mid 2010 Upper Case Replacement: paso 31, imagen 2 de 2
    • Carefully peel the IR sensor cable off the adhesive securing it to the upper case.

    • Pull the hard drive bracket/IR sensor housing away from the side of the upper case.

    • Remove the hard drive/IR sensor cable from the upper case.

  32. MacBook Pro 15" Unibody Mid 2010 Upper Case Replacement: paso 32, imagen 1 de 1
    • Use the tip of a spudger to pry all three AirPort/Bluetooth antenna connectors up off the AirPort/Bluetooth board.

  33. MacBook Pro 15" Unibody Mid 2010 Upper Case Replacement: paso 33, imagen 1 de 2 MacBook Pro 15" Unibody Mid 2010 Upper Case Replacement: paso 33, imagen 2 de 2
    • De-route the three antenna cables from their channels in the AirPort/Bluetooth housing.

    • De-route the camera cable from its channel in the AirPort/Bluetooth housing.

  34. MacBook Pro 15" Unibody Mid 2010 Upper Case Replacement: paso 34, imagen 1 de 2 MacBook Pro 15" Unibody Mid 2010 Upper Case Replacement: paso 34, imagen 2 de 2
    • Remove the following two screws securing the AirPort/Bluetooth housing to the upper case:

    • One 3.8 mm Phillips

    • One 8.6 mm Phillips

    • Remove the AirPort/Bluetooth assembly from the upper case, minding any cables that may get caught.

  35. MacBook Pro 15" Unibody Mid 2010 Upper Case Replacement: paso 35, imagen 1 de 2 MacBook Pro 15" Unibody Mid 2010 Upper Case Replacement: paso 35, imagen 2 de 2
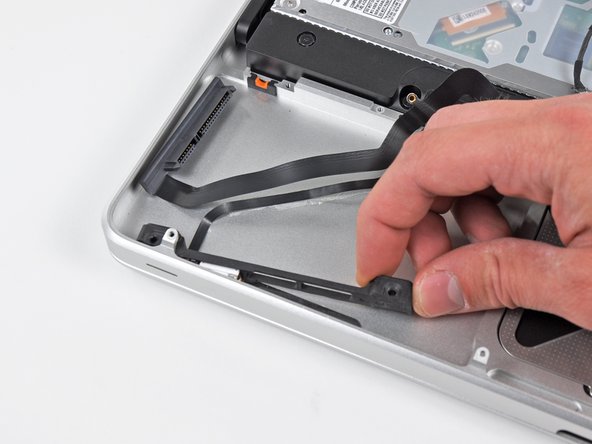
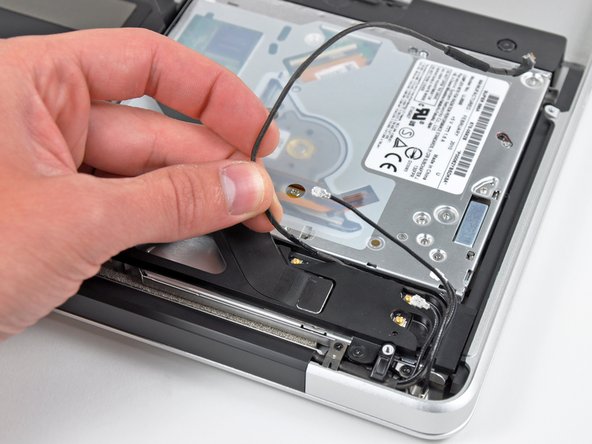
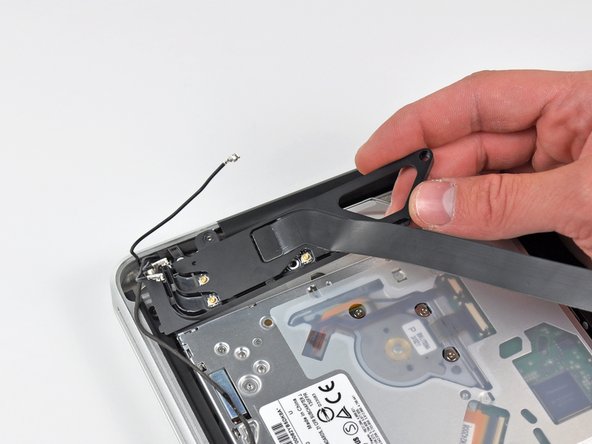
    • Remove the following three Phillips screws securing the optical drive to the upper case:

    • One 4.5 mm Phillips screw securing the optical drive bracket to the upper case near the fan.

    • Two 2.5 mm Phillips screws securing the optical drive to the upper case near the optical drive opening.

    • In some cases, all three may be 2.5mm screws.

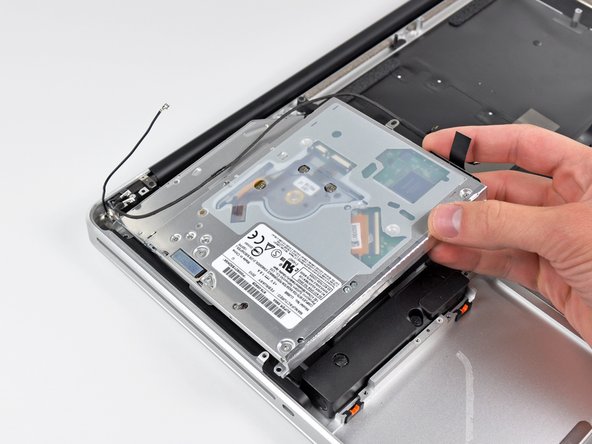
    • Remove the optical drive from the upper case.

  36. MacBook Pro 15" Unibody Mid 2010 Upper Case Replacement: paso 36, imagen 1 de 2 MacBook Pro 15" Unibody Mid 2010 Upper Case Replacement: paso 36, imagen 2 de 2
    • Remove the following six screws securing the subwoofer and right speaker to the upper case:

    • Two 3.2 mm Phillips screws.

    • Two 12.3 mm Phillips screws.

    • One 2.5 mm Phillips screw.

    • One 8.3 mm Phillips screw.

    • Remove the subwoofer/right speaker from the upper case.

  37. MacBook Pro 15" Unibody Mid 2010 Upper Case Replacement: paso 37, imagen 1 de 2 MacBook Pro 15" Unibody Mid 2010 Upper Case Replacement: paso 37, imagen 2 de 2
    • Remove the 8.6 mm Phillips screw securing the antenna/camera cable retainer to the upper case.

    • Remove the antenna/camera cable retainer from the upper case.

  38. MacBook Pro 15" Unibody Mid 2010 Upper Case Replacement: paso 38, imagen 1 de 2 MacBook Pro 15" Unibody Mid 2010 Upper Case Replacement: paso 38, imagen 2 de 2
    • Remove the single 8.6 mm Phillips screw securing the display data cable retainer to the upper case.

    • Remove the display data cable retainer from the upper case.

  39. MacBook Pro 15" Unibody Mid 2010 Upper Case Replacement: paso 39, imagen 1 de 1
    • Remove two of the three 6 mm T6 Torx screws securing the right side of the display to the upper case.

    • We purposely have you leave one screw attaching the display to the upper case to aid in future steps.

  40. MacBook Pro 15" Unibody Mid 2010 Upper Case Replacement: paso 40, imagen 1 de 1
    • Remove two of the three 6 mm T6 Torx screws securing the left side of the display to the upper case.

    • We purposely have you leave one screw attaching the display to the upper case to aid in future steps.

  41. MacBook Pro 15" Unibody Mid 2010 Upper Case Replacement: paso 41, imagen 1 de 1
    • Open your MacBook Pro so the display is perpendicular to the upper case.

    • Place your opened MacBook Pro on a table as pictured.

    • While holding the display and upper case together with your left hand, remove the remaining T6 Torx screw from the upper display bracket.

  42. MacBook Pro 15" Unibody Mid 2010 Upper Case Replacement: paso 42, imagen 1 de 1
    • Be sure to hold the display and upper case together with your left hand. Failure to do so may cause the freed display/upper case to fall, potentially damaging each component.

    • Remove the last remaining T6 Torx screw securing the display to the upper case.

  43. MacBook Pro 15" Unibody Mid 2010 Upper Case Replacement: paso 43, imagen 1 de 3 MacBook Pro 15" Unibody Mid 2010 Upper Case Replacement: paso 43, imagen 2 de 3 MacBook Pro 15" Unibody Mid 2010 Upper Case Replacement: paso 43, imagen 3 de 3
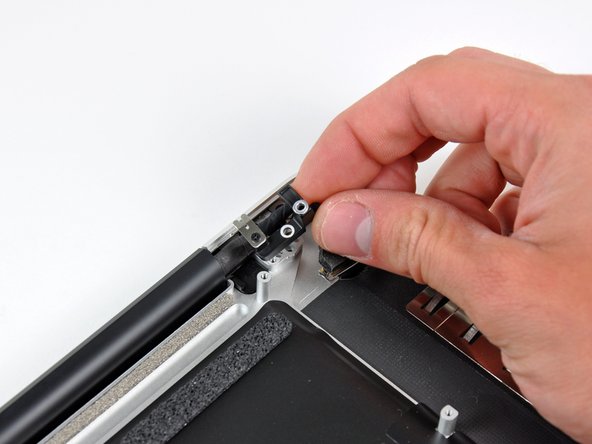
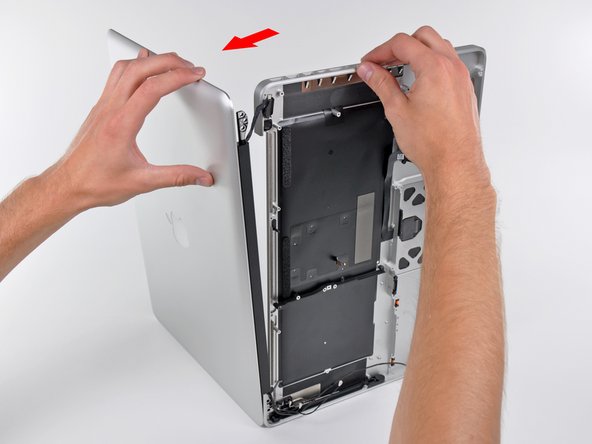
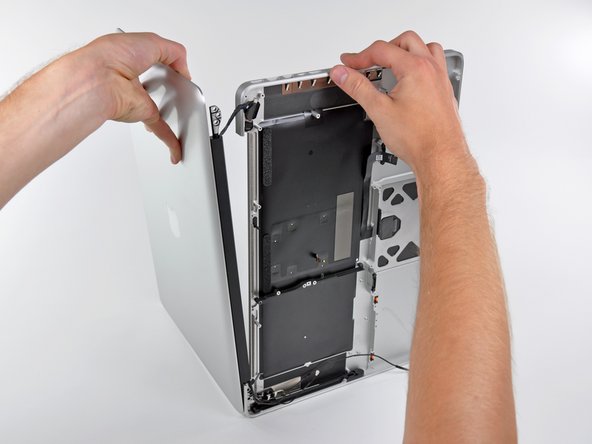
    • Grab the upper case with your right hand and rotate it slightly toward the top of the display so the upper display bracket clears the edge of the upper case.

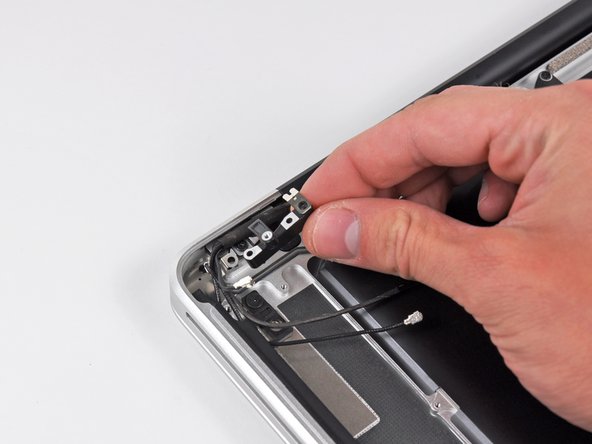
    • Rotate the display slightly away from the upper case.

    • Lift the display up and away from the upper case, minding any brackets or cables that may get caught.

Conclusión

To reassemble your device, follow these instructions in reverse order.

64 personas más completaron esta guía.

8 comentarios

In my experience, re-inserting the battery connector to the mobo is a pain with the battery in place. There is very little room to maneuver the connector and reconnect it - after several very careful attempts, I got the connector back on, but next time I'm removing the battery.

dave - Contestar

Great, easy repair (at least for me).

I only had problems with a 2.5 mm phillips screw, the one holding the right speaker assembly from the side. I needed to use a drill to drill it from the center away.

So 100% success, 1 screw less.

jacopochiapparino - Contestar

I am having a heck of a time reinserting this keyboard ribbon cable. The first time I powered up, only the left side of the keyboard worked. I tried reinserting, and all further attempts have resulted in no keyboard response at all. The ribbon is starting to "dogear" a tiny bit in the corners, so I am hesitant to try my current technique too many more times. I'd really like to do this correctly. Has anyone had luck slightly removing the logic board to aid in getting a better angle on inserting the cable? Any help would be appreciated!!!

rylandkoopus - Contestar

A number of these steps are unnecessary to replace the upper case. For example, there is no reason why the hard drive needs to be removed. After getting to the steps where the upper display hinges are removed, I couldn't see any reason why the logic board needed removal. My advice would be to disconnect the battery. Then perform Step 21 (disconnecting the display cable). Then perform Step 32 (disconnect Airport/Bluetooth antenna cables). Then proceed to Step 37 and complete the guide from there. If you encounter any part that's in your way (perhaps the edge of the logic board might prevent the upper display case from being pulled away from the lower case), just go back through this guide and follow the directions to remove only that particular part. But just be aware that quite a few steps in this guide are not necessary, and it is certainly not true that "Replacing the upper case requires removal of nearly every component inside your MacBook Pro 15" Unibody Mid 2010."

Chris Dahler - Contestar

The hard drive and logic board are installed in the upper case. How could you not remove them? You'd be rebuilding your computer with the new upper case, without a logic board or keyboard. You aren't confusing the upper case for the display, are you? This guide is about replacing the top case, which is the part where the keyboard is, not the display.

John M -

Agregar Comentario

Ver Estadísticas:

Ultimas 24 horas: 0

Ultimos 7 días: 8

Ultimos 30 días: 43

Todo El Tiempo: 90,980