Saltar al contenido principal

MacBook Pro 15" Unibody Late 2008 and Early 2009 Optical Drive Replacement

Sólo Prerrequisito
Esta guía solo debería usarse como prerrequisito para otras guías. Por tanto, estará incompleta.

Qué necesitas

  1. MacBook Pro 15" Unibody Late 2008 and Early 2009 Optical Drive Replacement, Optical Drive: paso 1, imagen 1 de 1
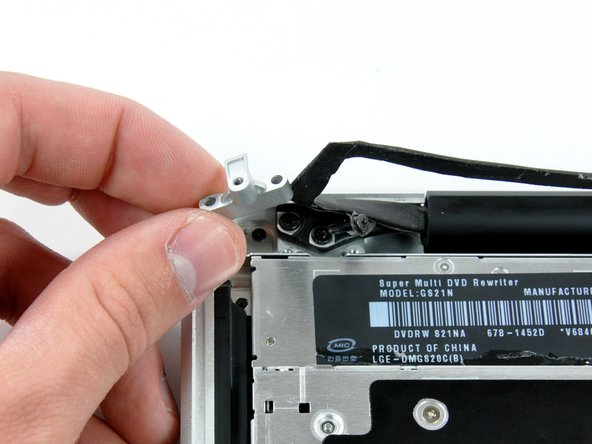
    • Disconnect the camera cable by pulling the male end straight away from its socket.

  2. MacBook Pro 15" Unibody Late 2008 and Early 2009 Optical Drive Replacement: paso 2, imagen 1 de 1
    • Deroute the camera data cable from the channel in the optical drive.

  3. MacBook Pro 15" Unibody Late 2008 and Early 2009 Optical Drive Replacement: paso 3, imagen 1 de 1
    • Use a spudger to pry the optical drive connector straight up off the logic board.

  4. MacBook Pro 15" Unibody Late 2008 and Early 2009 Optical Drive Replacement: paso 4, imagen 1 de 2 MacBook Pro 15" Unibody Late 2008 and Early 2009 Optical Drive Replacement: paso 4, imagen 2 de 2
    • Remove two 8 mm Phillips screws securing the camera cable bracket to the upper case.

    • The rightmost screw may remain captive in the camera cable.

    • Lift the camera cable bracket out from the upper case.

  5. MacBook Pro 15" Unibody Late 2008 and Early 2009 Optical Drive Replacement: paso 5, imagen 1 de 1
    • Remove the following three Phillips screws securing the optical drive to the upper case:

    • One 3.5 mm Phillips screw.

    • Two 2.5 mm Phillips screws.

  6. MacBook Pro 15" Unibody Late 2008 and Early 2009 Optical Drive Replacement: paso 6, imagen 1 de 1
    • Lift the optical drive from its left edge and pull it out of the computer.

Conclusión

To reassemble your device, follow these instructions in reverse order.

0 comentarios

Agregar Comentario

Ver Estadísticas:

Ultimas 24 horas: 0

Ultimos 7 días: 1

Ultimos 30 días: 1

Todo El Tiempo: 1,241