Introducción
Replacement of the upper case requires removal of most of your MacBook Pro's components.
Qué necesitas
-
-
Remove the following ten screws securing the lower case to the upper case:
-
Seven 3 mm Phillips screws.
-
Three 13.5 mm Phillips screws.
-
-
ComprarHerramienta utilizada en este paso:P6 Pentalobe Screwdriver 2009 15" MacBook Pro Battery$5.49
-
Three Pentalobe screws secure the battery to the upper case. They can be removed with this special driver.
Unfortunately, when I added a second hard drive via these instructions, all went well but Bluetooth is now MIA. Can anyone help?
I agree...
I have bought a used MacBook Pro, when problems arise, opening Corps was trying to turn the screw, but with poor quality could not turn a screwdriver, only to ruin the screw. Try to buy ifixit Screwdriver set. Good luck to all and thank you ifixit team for such assistance as ifixit.com. Thank you.
-
-
-
Remove the two exposed five-point Pentalobe screws along the top edge of the battery.
I have a problem with these screw. They a completly warn and I need some new ones to fix the new Battery.
Does anyone know which thread it is and which length?
-
-
-
Use the flat end of a spudger to pry the fan cable connector up off its socket on the logic board.
-
-
-
Remove the three identical T6 Torx screws securing the fan to the upper case.
-
-
-
Hold the end of the cable retainer down with one finger while you use the tip of a spudger to slightly lift the other end and rotate it away from the camera cable connector.
Bear in mind that the “Camera Cable” is also the cable connecting the logic board to the Wifi Airport Card, at least on the Glossy model (not sure about the Anti-Glare model). The Wifi Airport Card is located under the display’s clutch cover, and requires removing the display in order to access it.
-
-
-
-
Using the flat end of a spudger, pry the subwoofer connector straight up off the logic board.
I can't plug the subwoofer cable back. It seems to be too big. I have no idea, what I can do? Any ideas?
-
-
-
Using the tip of a spudger, flip up the keyboard ribbon cable retaining flap.
-
Pull the keyboard ribbon cable straight out of its socket.
-
-
-
Carefully lift the logic board assembly from the left side and work it out of the upper case, minding the port side that may get caught during removal.
I,ve done everything up to this step but my logic board still seems to be connected (by glue i think) to the black plastic underneath and the black frame that can't be unscrewed. Any idea how to get past this?
For step 24, the same thing happened to me as did to Josh. The heat pipe had bonded with the plastic film which protects the back of the keyboard. By using a spudger i was able to pry at the area where the two were attached. I don't think this is intentional, they just melt together.
Matt -
Same happened to me. Matt is right. I gained extra clearance by removing both RAM modules. Then used the spudger. Sounds cracky but it´s all fine.
-
-
-
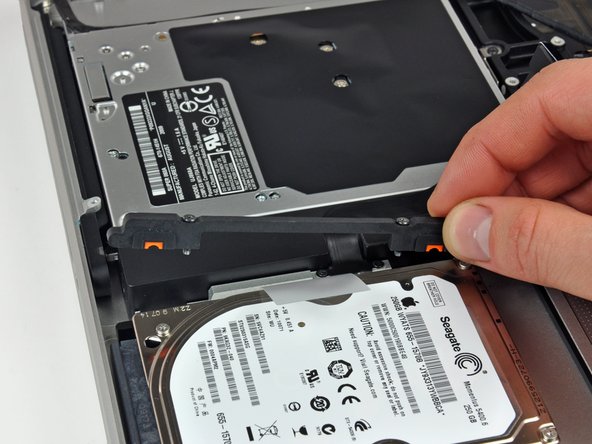
Remove the two Phillips screws securing the hard drive bracket to the upper case.
-
Remove the hard drive bracket from the upper case.
-
-
-
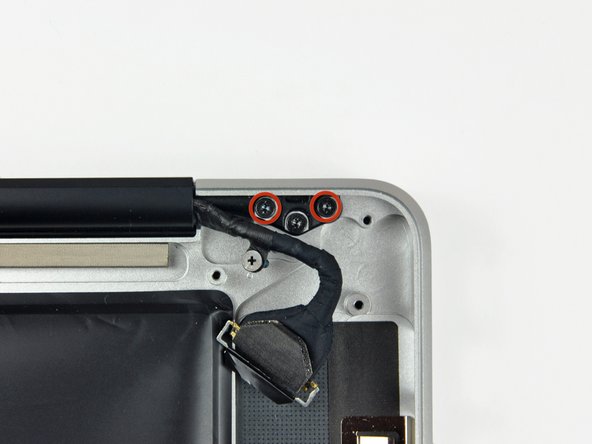
Remove the following four screws securing the hard drive and IR sensor cable to the upper case:
-
Two 1.5 mm Phillips screws.
-
Two 4 mm Phillips screws.
-
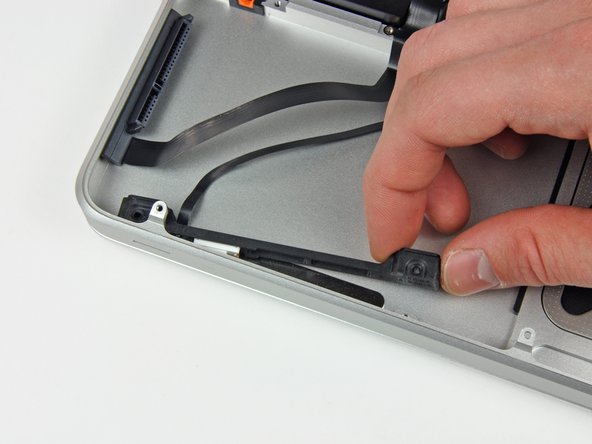
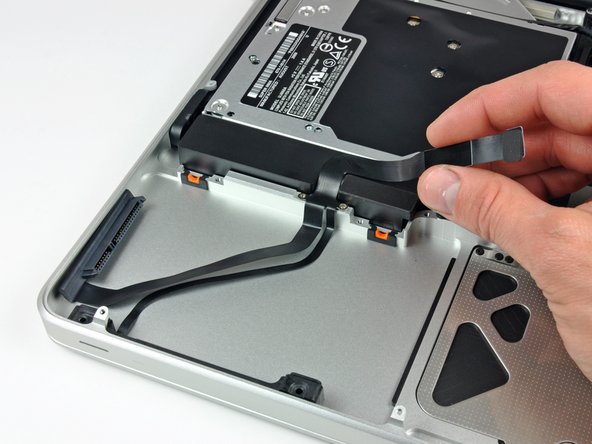
Slide the hard drive and IR sensor bracket away from the edge of the upper case.
-
Carefully peel the hard drive and IR sensor cable from the upper case.
-
Remove the hard drive/IR sensor cable from the upper case and set it aside.
-
-
-
Remove the following four screws securing the subwoofer and right speaker to the upper case:
-
Two 3.2 mm Phillips screws.
-
One 2.6 mm Phillips screw.
-
One 5 mm Phillips screw.
-
Lift the subwoofer and right speaker assembly out of the upper case.
I need help, do you recommend if my screw is damaged.
Like this -->
http://yfrog.com/j7needhelpifixitj
Thanks.
P.S. Sorry for my bad english.
-
-
-
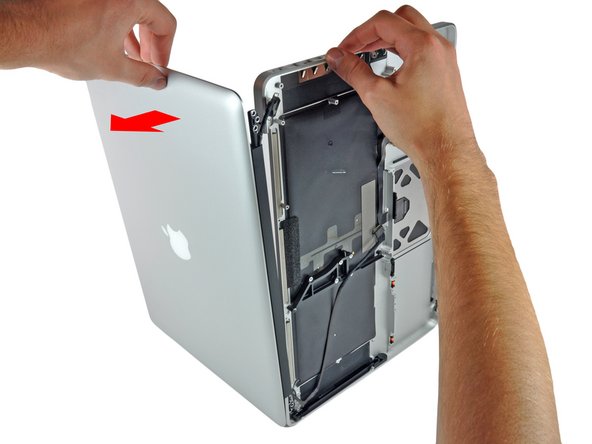
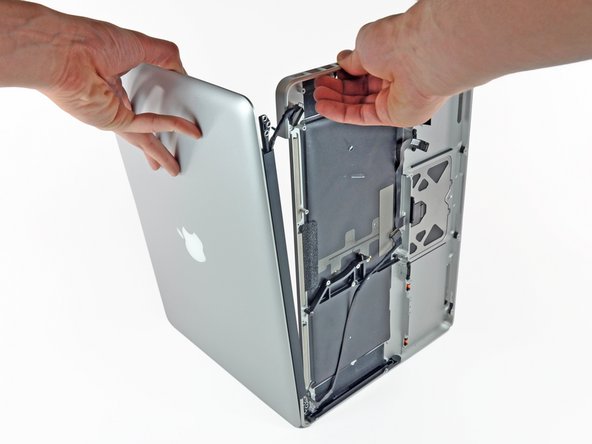
Grab the upper case with your right hand and rotate it slightly toward the top of the display so the upper display bracket clears the edge of the upper case.
-
Rotate the display slightly away from the upper case.
-
Lift the display away from the upper case, minding any brackets or cables that may get caught.
-


To reassemble your device, follow these instructions in reverse order.
To reassemble your device, follow these instructions in reverse order.
Cancelar: No complete esta guía.
21 personas más completaron esta guía.

Un comentario
This is a good guide. I got to this point and started to unscrew the screws holding the top case to the display however the T6 spun and I think I may have ruined a couple of the screws. A T7 didn't fit - too big.
Do you have any ideas on a) which type of screwdriver should fit or do you think by T6 is just poor quality and b) what to do about the screws that are now going to be impossible to take out - not sure I want to be drilling them out.