Esta versión puede contener ediciones incorrectas. Cambiar a la última instantánea verificada.
Qué necesitas
-
-
Quitar los siguientes tornillos pentalobe P5 que sujetan la cubierta del MacBook Pro:
-
Ocho 3.1 mm
-
Dos 2.3 mm
-
-
-
Retira la etiqueta de advertencia que cubre el conector de la batería
-
-
-
Usando el extremo plano de un spudger, levanta suavemente el conector de la batería directamente fuera de su zócalo en la placa lógica.
-
Dobla los cables de la batería hacia afuera y fuera del camino, asegurándose de que el conector de la batería no entre en contacto accidentalmente con la placa lógica.
-
-
-
Usa una palanca Spudger antiestático o pinzas para desconectar los tres conectores de la antena Airport y doblarlos hacia arriba y quitarlos del camino.
-
-
-
Remueve los cuatro tornillos Torx T5 de 2.2 que sujetan las tapas del conector de cable de placa de E/S.
-
-
-
Usa un destornillador Torx T5 para quitar los siguientes tres tornillos que sujetan el ventilador derecho a la placa lógica:
-
Un tornillo de 5,0 mm con un hombro de 2,0 mm de largo
-
Un tornillo de 4,0 mm con cabeza ancha
-
Un tornillo de 4,4 mm
-
-
-
Despega la tapa izquierda de goma del ventilador y dóblalo para sacarlo del camino.
-
-
-
Remueve el único tornillo Torx T5 de 2.9 mm que sujeta el SSD a la placa lógica.
-
-
-
-
Remueve los dos tornillos Torx T5 de 2.2 mm que sujetan la tapa del conector de cable del panel táctil a la placa lógica.
-
Remueve la tapa.
-
-
-
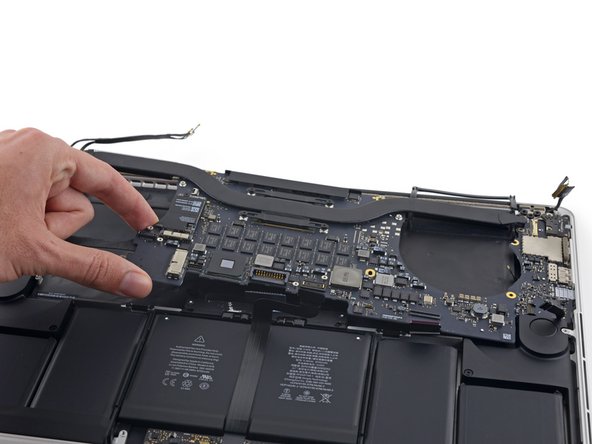
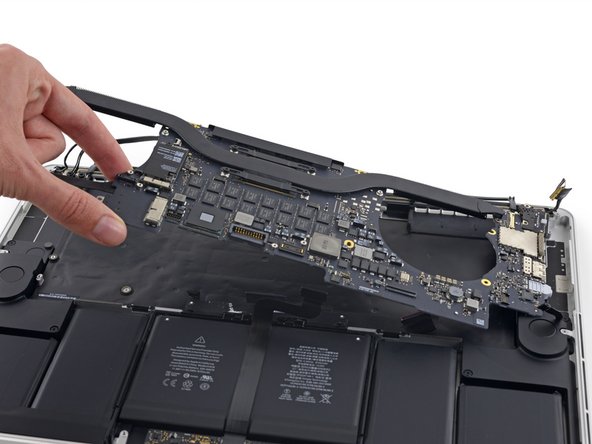
Remueve los siguientes seis tornillos que sujetan el ensamblaje de la placa lógica a la caja superior.
-
Un tornillo Torx T5 de 3.8 mm
-
Dos tornillos Torx T5 de 5.7 mm
-
Un tornillo Torx T5 de 5.6 mm (este es de plata y tiene una cabeza más alta que los otros)
-
Un tornillo Torx T5 de 2.6 mm
-
Un tornillo Torx T5 de 3.2 mm
-
-
-
Los siguientes pasos detallarán la desconexión de estos seis conectores. Asegúrate de leer cada paso ya que estos conectores vienen en estilos diferentes que se desconectar de forma diferente.
-
Cable del micrófono
-
Cable del altavoz izquierdo
-
Cable de datos del teclado
-
Cable del altavoz derecho
-
Cable de luz posterior del teclado
-
Cable de datos de pantalla
-
-
-
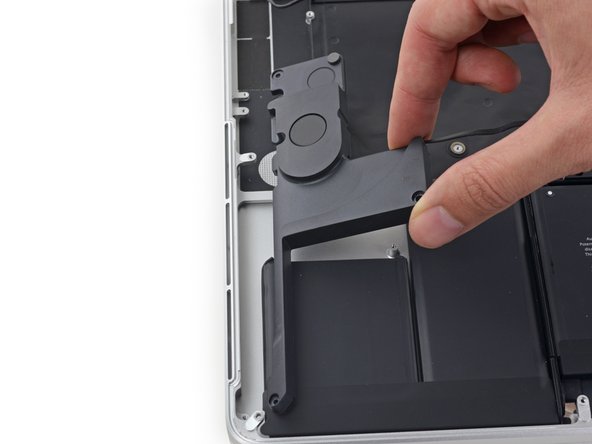
Remueve los siguientes tornillos que sujetan el altavoz izquierdo a la caja superior.
-
tornillo Torx T5 de 2.7 mm
-
Tornillo Torx T5 de 6,9 mm (con hombro de 4,5 mm)
-
tornillo Torx T5 de 5.6 mm
-
-
-
Remueve los siguientes tornillos que sujetan el altavoz derecho a la caja superior.
-
tornillo Torx T5 de 2.7 mm
-
tornillo Torx T5 de 6.9 mm (con rosca de 4.5 mm)
-
tornillo Torx T5 de 5.6 mm
-
-
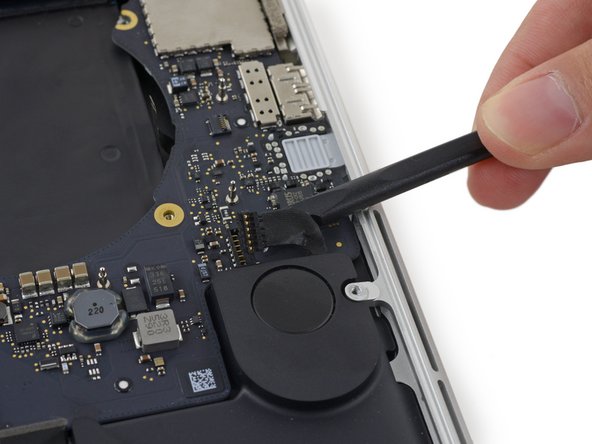
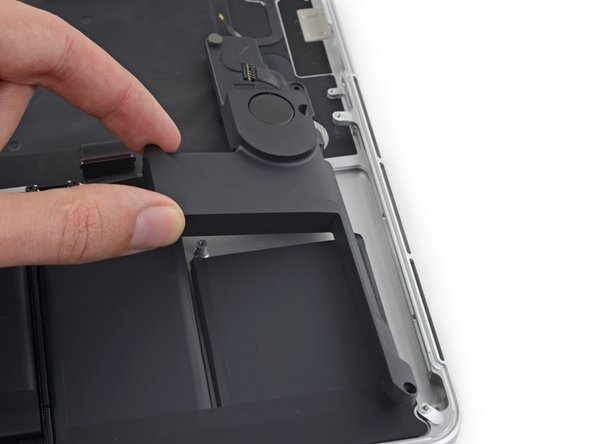
Este paso está sin traducir. Ayuda a traducirlo
-
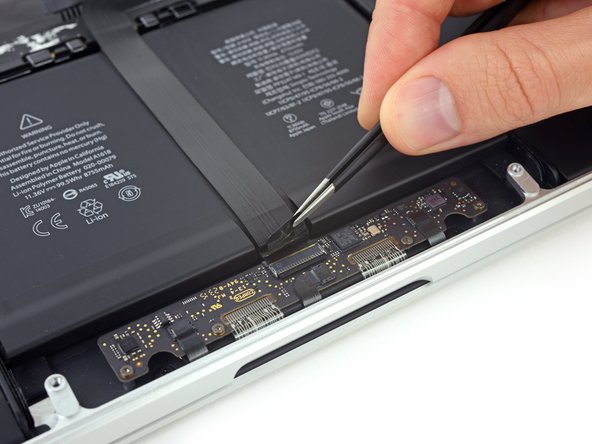
Peel back the tape covering the trackpad connector ribbon cable, near the front edge of the MacBook Pro.
-
-
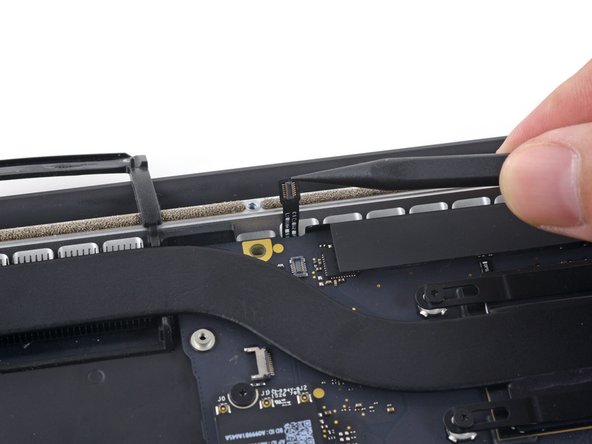
Este paso está sin traducir. Ayuda a traducirlo
-
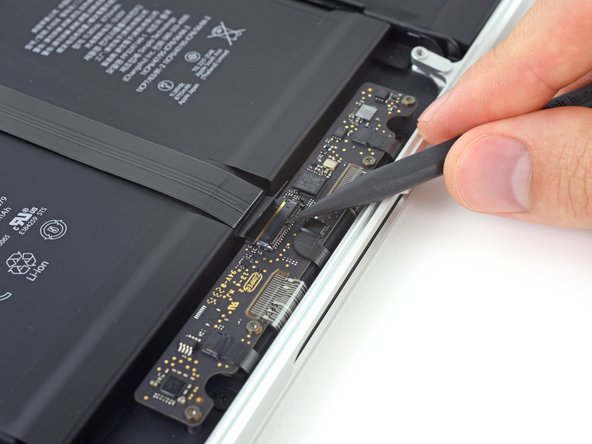
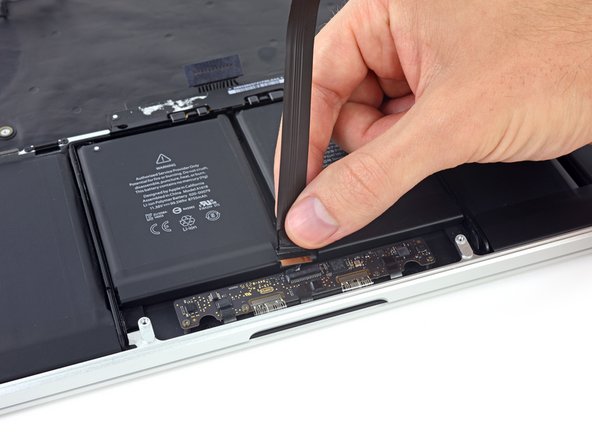
Use the tip of a spudger to flip up the black locking tab on the trackpad ribbon cable ZIF connector.
-
-
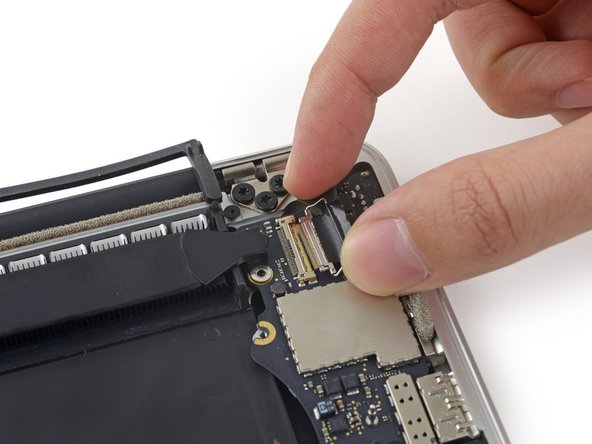
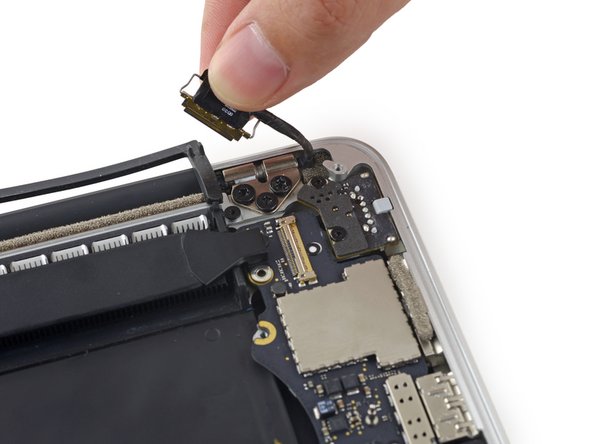
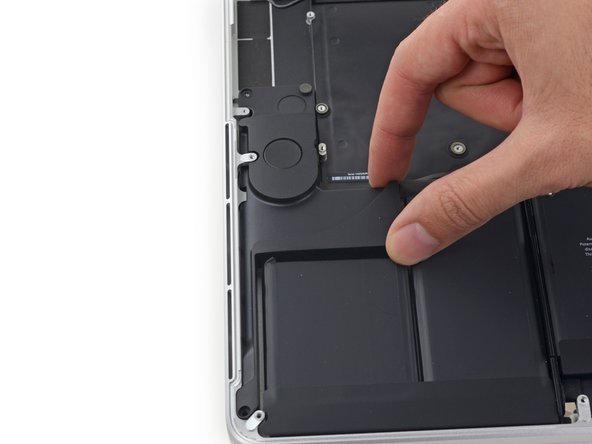
Este paso está sin traducir. Ayuda a traducirlo
-
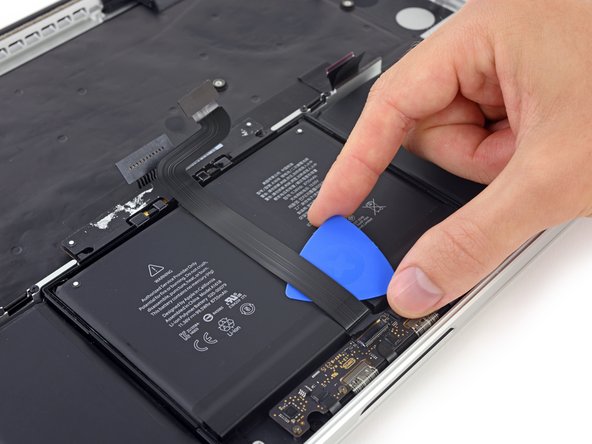
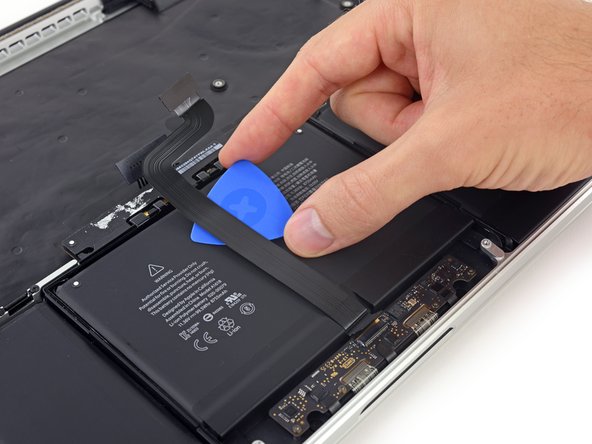
Insert an opening pick between the trackpad ribbon cable and the battery.
-
Carefully slide your pick underneath the length of the ribbon cable to separate the adhesive securing it to the battery.
-
-
Este paso está sin traducir. Ayuda a traducirlo
-
Remove the two 3.2 mm T5 Torx screws securing the battery board.
-
-
Este paso está sin traducir. Ayuda a traducirlo
-
To protect your display, place a sheet of aluminum foil between the display and keyboard and leave it there while you work.
-
-
Este paso está sin traducir. Ayuda a traducirlo
-
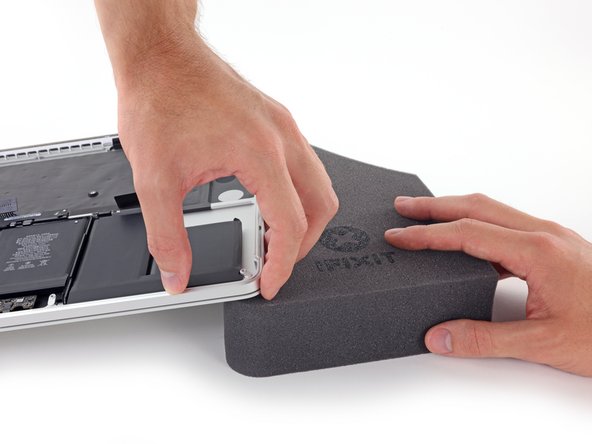
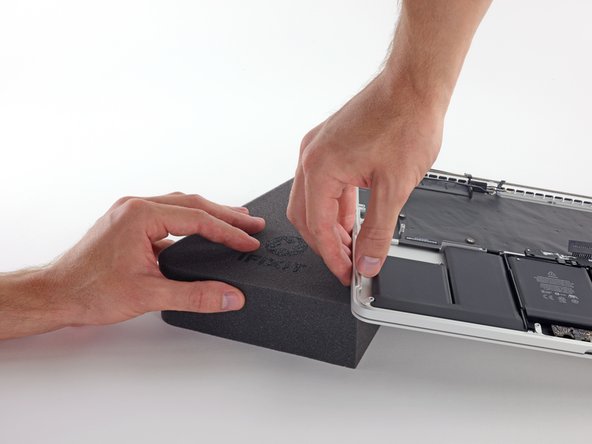
With the front edge of the MacBook Pro facing you, lift the right side and prop it up at a slight angle, using a sturdy foam block or book.
-
-
Este paso está sin traducir. Ayuda a traducirlo
-
Now that your MacBook Pro is fully prepped, it's time to prep yourself.
-
Wear eye protection when handling and applying the adhesive remover. (Eye protection is included in your kit.)
-
Do not wear contact lenses without eye protection.
-
Protective gloves are also included in your kit. If you are concerned about skin irritation, put your gloves on now.
-
-
Este paso está sin traducir. Ayuda a traducirlo
-
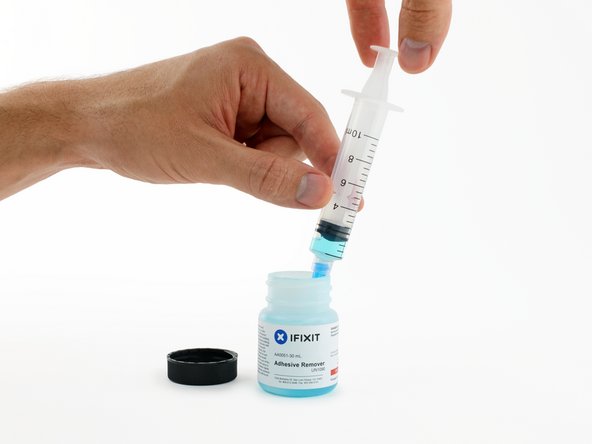
Open your container of adhesive remover.
-
Fill the syringe included in your kit with a small amount (approximately 1-2 milliliters) of adhesive remover.
-
-
Este paso está sin traducir. Ayuda a traducirlo
-
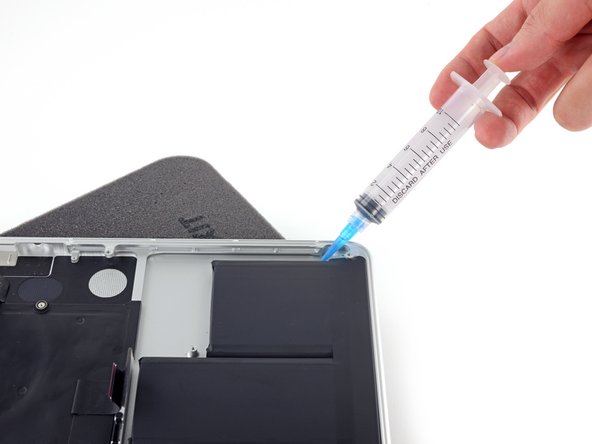
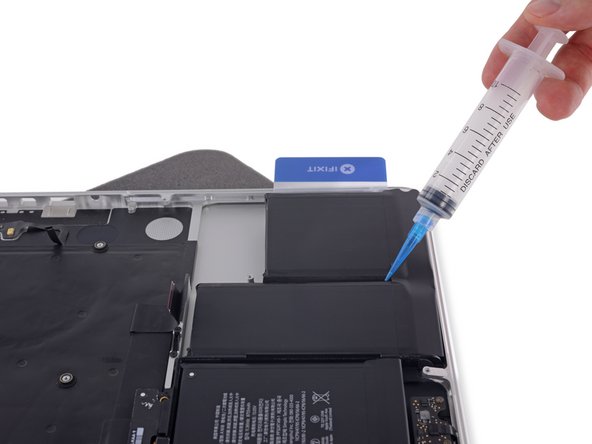
Apply a small amount of adhesive remover (approximately 1 ml) evenly along the elevated edge of the outer right battery cell.
-
Wait 2-3 minutes for the liquid adhesive remover to penetrate underneath the battery cell before you proceed to the next step.
-
-
Este paso está sin traducir. Ayuda a traducirlo
-
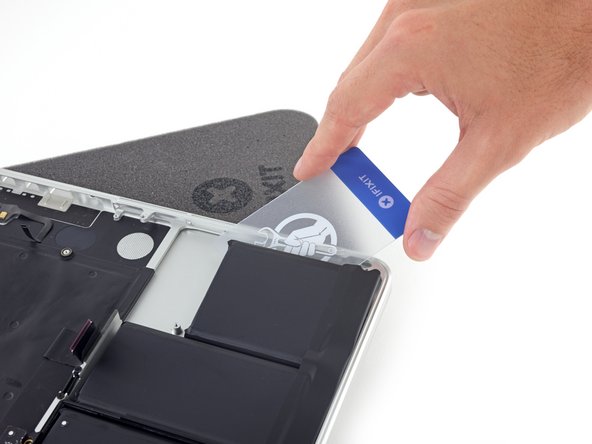
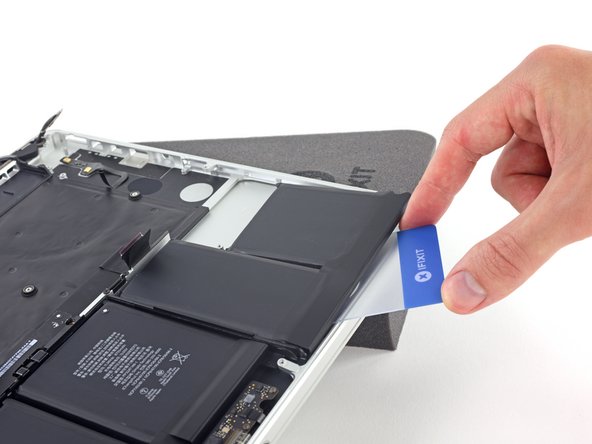
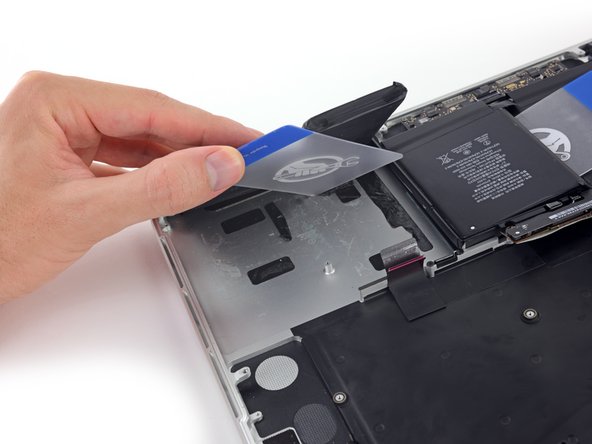
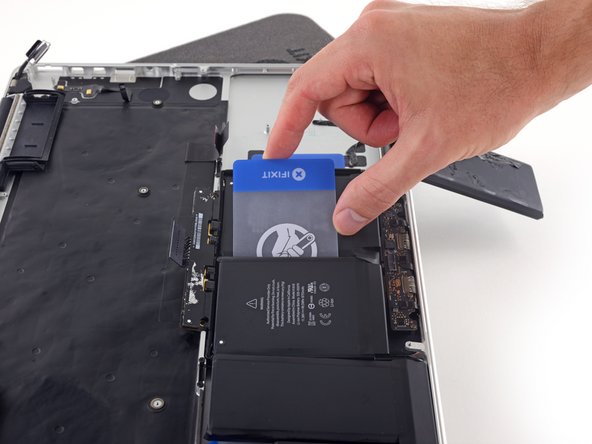
Slide one corner of a plastic card under the outer edge of the battery cell.
-
Slide the card farther underneath the battery cell to separate it from the adhesive securing it to the MacBook Pro's upper case.
-
-
Este paso está sin traducir. Ayuda a traducirlo
-
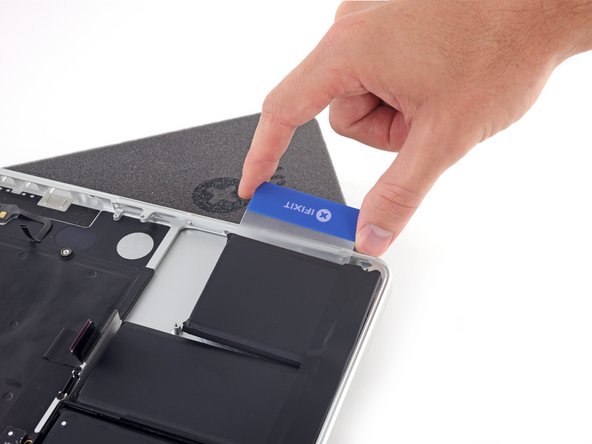
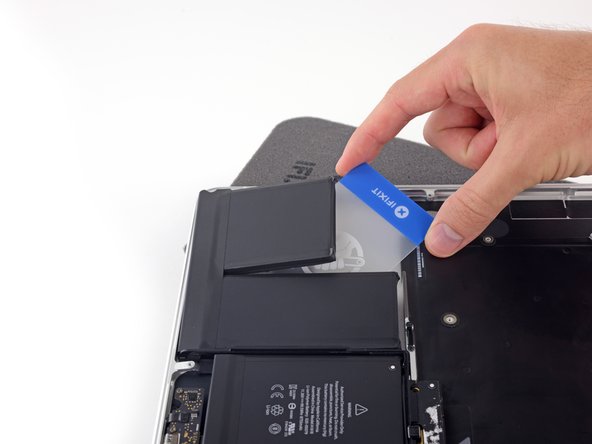
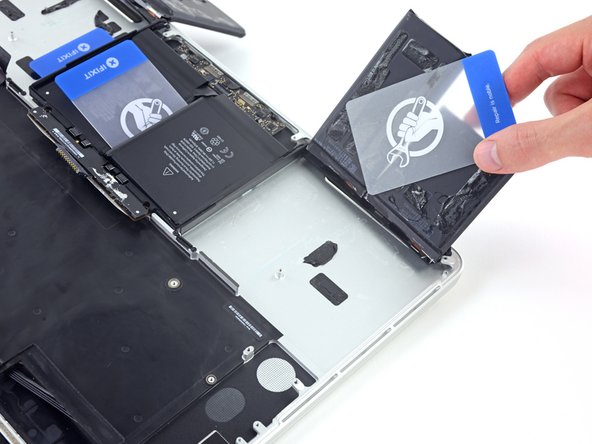
Lift the battery cell to separate it from the MacBook Pro's upper case, but don't try to remove it.
-
Leave the plastic card underneath the battery cell to prevent it from re-adhering as you proceed to the next step.
-
-
Este paso está sin traducir. Ayuda a traducirlo
-
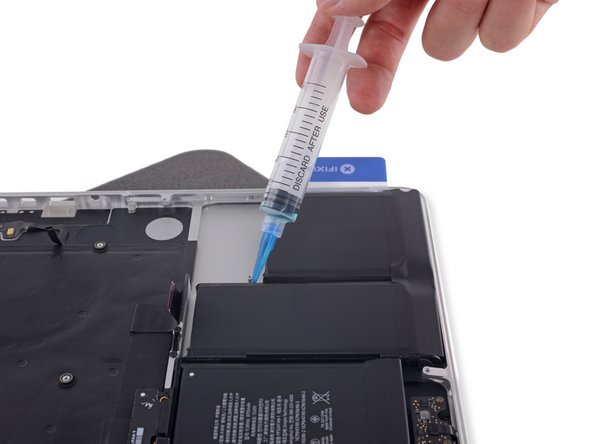
Apply a small amount of adhesive remover (approximately 1 ml) evenly along the elevated edge of the next battery cell.
-
Wait 2-3 minutes for the liquid adhesive remover to penetrate underneath the battery cell before you proceed to the next step.
-
-
Este paso está sin traducir. Ayuda a traducirlo
-
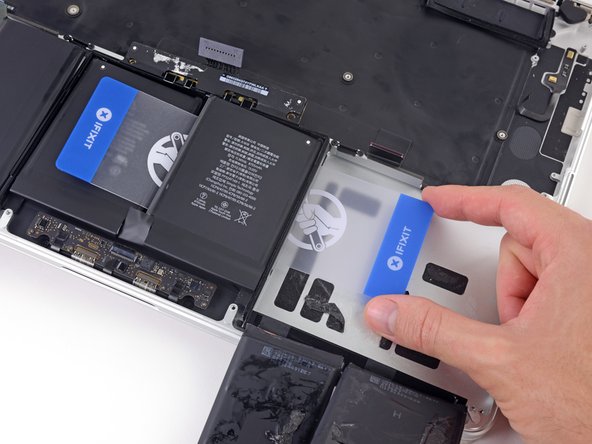
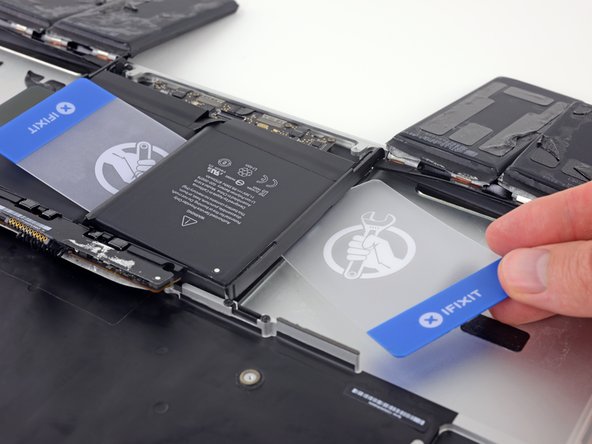
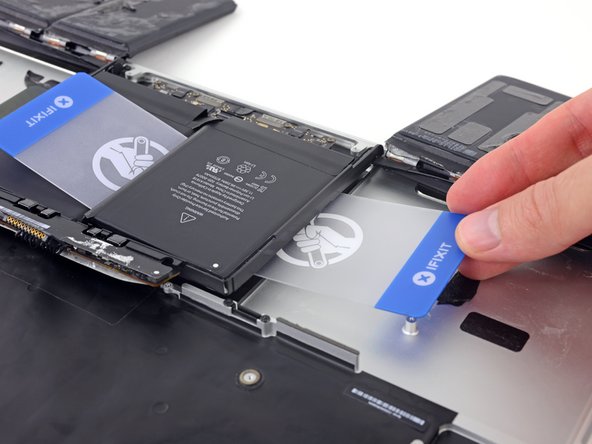
Slide one corner of your plastic card underneath the second battery cell.
-
Push the card underneath the second battery cell, and slide it side to side to separate the adhesive underneath.
-
Leave the plastic card underneath both battery cells (or flip them over) to prevent them from re-adhering as you proceed to the next step.
-
-
Este paso está sin traducir. Ayuda a traducirlo
-
It's time to switch sides. Remove your book or foam block and place it under the opposite side of your MacBook Pro.
-
-
Este paso está sin traducir. Ayuda a traducirlo
-
Repeat the procedure from the prior steps to separate the two battery cells on this side:
-
Apply your adhesive remover to the elevated edge of the outer left battery cell, and wait 2-3 minutes for it to penetrate.
-
Work one corner of a plastic card underneath the battery cell, and slide the card fully underneath the battery cell to separate it.
-
Do the same for the adjacent cell.
-
Leave your plastic card in place or flip the battery cells over to prevent them from re-adhering during the following steps.
-
-
Este paso está sin traducir. Ayuda a traducirlo
-
With the left edge of your MacBook Pro still propped up, apply a small amount (about 1 ml) of adhesive remover down the center line between the two middle battery cells.
-
Wait 2-3 minutes for the adhesive remover to penetrate before you continue.
-
-
Este paso está sin traducir. Ayuda a traducirlo
-
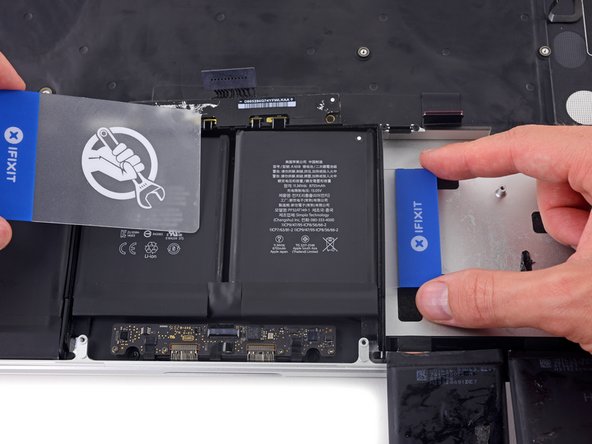
Slide one corner of a plastic card between the middle two cells, and under the elevated edge of the center-right battery cell.
-
Slide the card farther underneath the battery cell to slice through the adhesive securing it in place.
-
Don't try to fully separate this battery cell yet. Leave your plastic card in place to prevent it from re-adhering.
-
-
Este paso está sin traducir. Ayuda a traducirlo
-
Flip the two de-adhered right-hand battery cells over the front edge of the MacBook Pro, if you haven’t already. This will allow access to the outside edge of the center cell.
-
-
Este paso está sin traducir. Ayuda a traducirlo
-
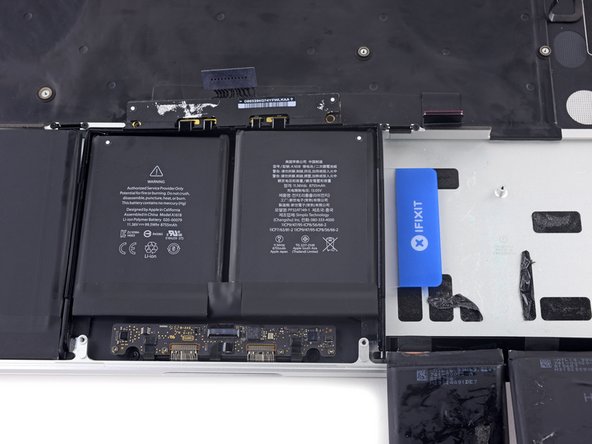
Push one corner of a plastic card below the plastic battery frame and underneath the remaining adhered edge of the lower center cell.
-
Slide your card all the way under the battery cell, and leave it to prevent the battery cell from re-adhering.
-
-
Este paso está sin traducir. Ayuda a traducirlo
-
Remove the first plastic card that you inserted under the center-right battery cell.
-
Push the other card in a little further and leave it in place to prevent the battery cell from re-adhering as you continue.
-
-
Este paso está sin traducir. Ayuda a traducirlo
-
Remove your book or foam block.
-
With the front edge of the MacBook Pro facing you, lift the right side and prop it up once again.
-
-
Este paso está sin traducir. Ayuda a traducirlo
-
Apply a small amount (about 1 ml) of adhesive remover between the two center battery cells, so that it flows underneath the remaining battery cell.
-
Wait 2-3 minutes for the adhesive remover to penetrate before you continue.
-
-
Este paso está sin traducir. Ayuda a traducirlo
-
Slide one corner of a plastic card under the elevated edge of the final battery cell.
-
Push the card farther underneath the battery cell to slice through the adhesive securing it in place.
-
Don't try to fully separate this battery cell yet. Leave your plastic card in place to prevent it from re-adhering.
-
-
Este paso está sin traducir. Ayuda a traducirlo
-
If you haven't already done so, lift and flip the two outer left battery cells to clear access to the outside edge of the final battery cell.
-
-
Este paso está sin traducir. Ayuda a traducirlo
-
Repeat the process you used on the center-right battery cell to finish separating the adhesive on the center-left cell:
-
Push one corner of a plastic card below the plastic battery frame and underneath the remaining adhered edge of the final battery cell.
-
Slide your card all the way underneath the battery cell, and leave it to prevent the battery cell from re-adhering.
-
-
Este paso está sin traducir. Ayuda a traducirlo
-
Remove the first card that you inserted under the final battery cell.
-
-
Este paso está sin traducir. Ayuda a traducirlo
-
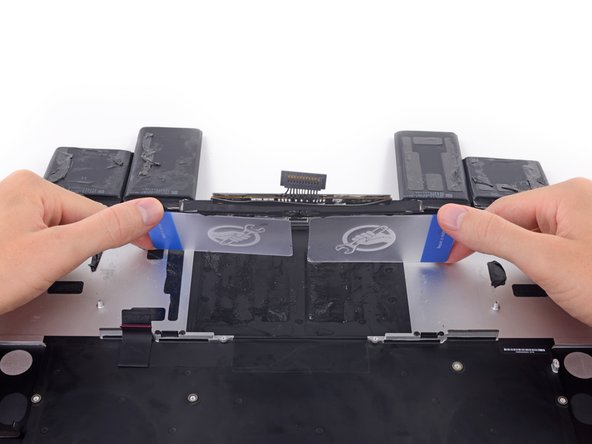
With one plastic card underneath each of the two center battery cells, twist and lift both cards to fully separate the battery cells, together with the plastic frame and battery board, from the MacBook Pro.
-
-
Este paso está sin traducir. Ayuda a traducirlo
-
Lift and remove the battery.
-
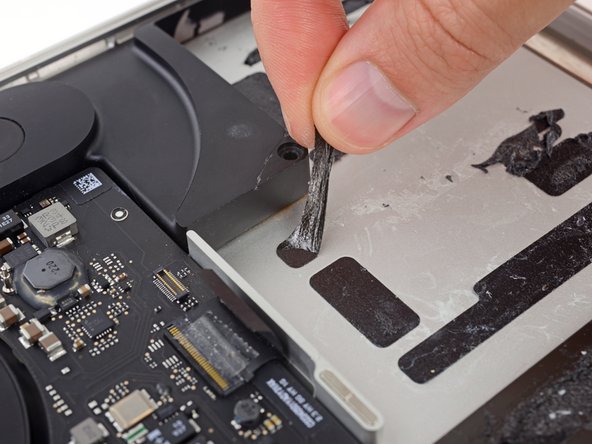
With a little luck, you can slowly pull out each strip of adhesive with your fingers.
-
Otherwise, soak each strip of adhesive with a bit of adhesive remover for 2-3 minutes, and then scrape it out with a plastic tool. This can take quite a bit of work, so be patient.
-
Mop up any remaining adhesive remover and give your MacBook Pro a few minutes to air dry.
-
Calibrate your battery before using it: allow it to drain overnight, then charge it to 100% and drain it again until your MacBook Pro shuts down automatically. Charge it again and use it normally.
-


Cancelar: No complete esta guía.
4 personas más completaron esta guía.

