Esta versión puede contener ediciones incorrectas. Cambie a la última instantánea verificada.
Qué necesitas
-
-
Retira los siguientes 10 tornillos que sujetan la tapa inferior del MacBook Pro 13 "Unibody:
-
Siete tornillos Phillips de 3 mm.
-
Tres tornillos Phillips de 13,5 mm.
-
-
-
Levanta ligeramente la tapa inferior y empuja hacia la parte posterior para liberarlo de las pestañas que lo sujetan
-
-
-
Utilice el extremo plano de un spudger para levantar el conector de la batería hacia arriba fuera de su toma en la placa lógica.
-
-
-
Usa un spudger para sacar el conector del ventilador de su zócalo en la placa lógica.
-
-
-
Toma la lengüeta de plástico asegurada al candado del cable de datos de la pantalla y gírala hacia el lado de entrada de CC de la computadora.
-
Tira con cuidado del conector del cable de datos de la pantalla paralelo a la placa.
-
-
-
Este paso está sin traducir. Ayuda a traducirlo
-
Remove two Phillips screws securing the hard drive bracket to the upper case.
-
Lift the the retaining bracket out from the upper case.
-
-
Este paso está sin traducir. Ayuda a traducirlo
-
Lift the hard drive from its free edge and pull it out of the chassis, minding the cable attaching it to the computer.
-
-
Este paso está sin traducir. Ayuda a traducirlo
-
Disconnect the hard drive by pulling the hard drive cable connector away from the drive.
-
-
Este paso está sin traducir. Ayuda a traducirlo
-
Remove the following four screws securing the hard drive and IR sensor cable to the upper case:
-
Two 1.5 mm Phillips screws.
-
Two 4 mm Phillips screws.
-
Slide the hard drive and IR sensor bracket away from the edge of the upper case.
-
Carefully peel the hard drive and IR sensor cable from the upper case.
-
-
Este paso está sin traducir. Ayuda a traducirlo
-
Remove the following screws securing the subwoofer to the upper case:
-
One 3.8 mm Phillips screw.
-
One 5 mm Phillips screw
-
Lift the subwoofer off the optical drive, and set it above the computer.
-
-
Este paso está sin traducir. Ayuda a traducirlo
-
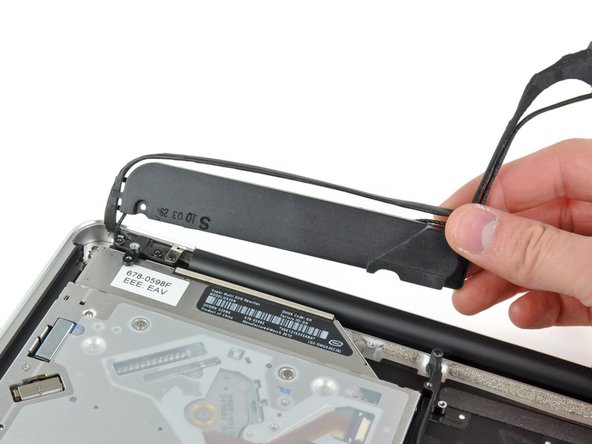
Remove the two 10 mm Phillips screws securing the camera cable bracket to the upper case.
-
Lift the camera cable bracket out of the upper case.
-
-
Este paso está sin traducir. Ayuda a traducirlo
-
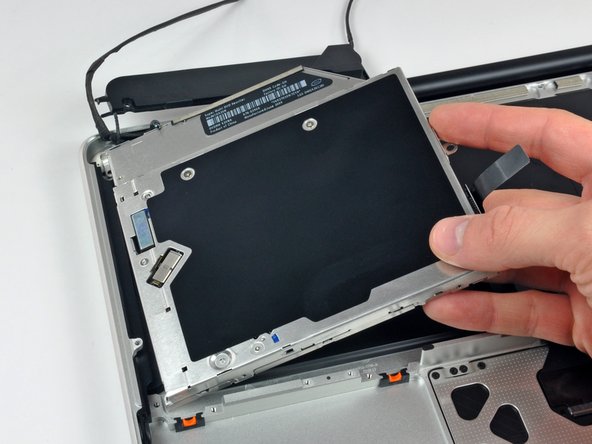
Remove the three 2.5 mm Phillips screws securing the optical drive to the upper case.
-
Lift the optical drive from its right edge and pull it out of the computer.
-
-
Este paso está sin traducir. Ayuda a traducirlo
-
Peel back the small piece of black tape covering the right speaker cable.
-
Be careful, as the power button ribbon cable is directly under this piece of tape.
-
-
Este paso está sin traducir. Ayuda a traducirlo
-
Use the tip of a spudger to pry the right speaker up off the adhesive securing it to the upper case.
-
-
Este paso está sin traducir. Ayuda a traducirlo
-
Lift the subwoofer and right speaker assembly out of the upper case.
-
-
Este paso está sin traducir. Ayuda a traducirlo
-
Remove the two outer T8 Torx screws securing each side of the display bracket to the upper case (4 screws total).
-
-
Este paso está sin traducir. Ayuda a traducirlo
-
Open your MacBook so the display is perpendicular to the upper case.
-
Place your opened MacBook on a table as pictured.
-
While holding the display and upper case together with your left hand, remove the T8 Torx screw from the lower display bracket.
-
-
Este paso está sin traducir. Ayuda a traducirlo
-
Be sure to hold the display and upper case together with your left hand. Failure to do so may cause the freed display/upper case to fall, potentially damaging each component.
-
Remove the last remaining T8 Torx screw securing the display to the upper case.
-
-
Este paso está sin traducir. Ayuda a traducirlo
-
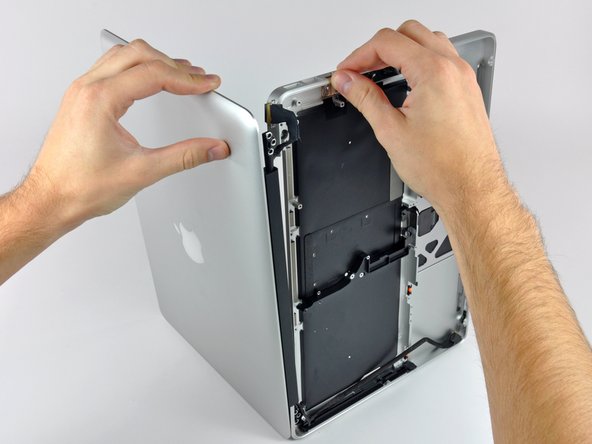
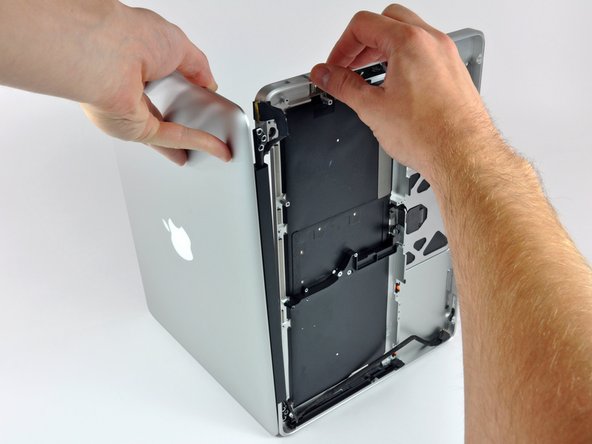
Grab the upper case with your right hand and rotate it slightly toward the top of the display so the upper display bracket clears the edge of the upper case.
-
Rotate the display slightly away from the upper case.
-
Lift the display up and away from the upper case, minding any brackets or cables that may get caught.
-


Cancelar: No complete esta guía.
9 personas más completaron esta guía.
