Introducción
Utiliza esta guía para sustituir el trackpad. Este procedimiento implica el uso de removedor de adhesivo para retirar la batería. No reutilices la batería una vez extraída, ya que podría suponer un riesgo para la seguridad. Sustitúyela por una batería nueva.
El adhesivo de iFixit es altamente inflamable. Realiza este procedimiento en un área bien ventilada. No fume ni trabaje cerca de una llama abierta durante este procedimiento.
Para minimizar el riesgo de daños, enciende el MacBook y deja que la batería se descargue por completo antes de iniciar este procedimiento. Una batería de iones de litio cargada puede crear un incendio peligroso e incontrolable si se pincha accidentalmente. Si la batería está hinchada, toma precauciones adicionales.
Qué necesitas
-
-
Quitar los siguientes diez tornillos que unen la tapa inferior con el cuerpo:
-
Dos tornillos Pentalobe P5 de 2.3mm
-
Ocho tornillos Pentalobe P5 de 3.0mm
-
-
-
Remueve la cubierta de plástico adherida a la placa de contacto de la batería.
-
-
-
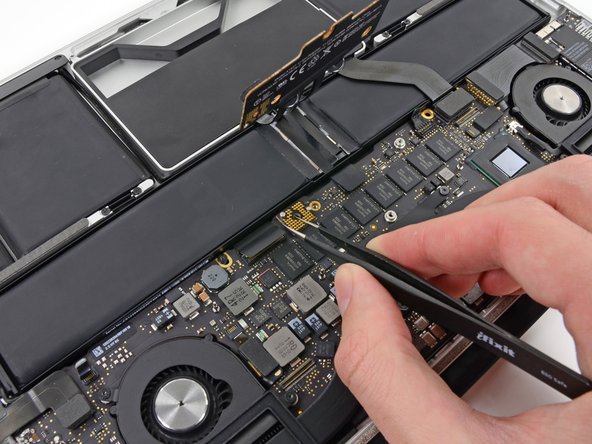
Utiliza una pincita para remover la pequeña tapa de plástico ubicada cerca de la parte inferior derecha de la placa de conector de batería.
when doing this with metal tweezers as instructed in the video, it was difficult to get off and apparently while i was trying to do it, the tweezers went too far under and i believe made contact with the screw underneath? there was a zzz noise, an orange flicker and a little stream of smoke that came out. i freaked out and put everything back together to see if the laptop even still worked, it turned on and everything but died right away (i drained it before doing the repair anyway, so i was surprised it turned on at all).
i finished the battery repair and did several other things while in there. i have charged it all the way as recommended and will use it later on to see how everything is, im hoping that it’s a okay, but could someone explain to me what happened and the possible consequences?
-
-
-
Toma el intercalador con pincita
-
Levanta el intercalador de la placa lógica y remuévelo.
you must lift it absolutely vertically, or it fouls against the locator pin in the corner- you can easily get the impression that it won’t come over the end of this pin- almost like it’s rivetted in. it isn’t. get a good grip on it with the tweezers in the centre hole & one of the sides, & lift it STRAIGHT up.
I would recommend to use plastic tweezers in order to reduce risk of damage.
Second that. If you have thin heat shrink tubing, form some over the tweezer tips. If the tubing is thin and small enough in diameter you’ll see the serrations of the tweezer tips.
wat is the model this SSD
-
-
-
Utiliza el extremo plano de un spudger para levantar el lado derecho del conector de cable de datos de la placa E/S de su enchufe en la placa E/S .
-
-
-
Calzar el extremo plano de un spudger por debajo del lado izquierdo del conector de cable de datos de placa E/S .
-
Suavemente tuerce el spudger para desconectar el conector del cable de datos de E/S de su enchufe en la placa lógica.
I also skipped this step as this data cable is not compromising the exchange of battery and less interaction with connectors is less risk of damage..
Diesen Schritt habe ich ebenfalls weggelassen, da das Datenkabel den Austausch der Batterie nicht behindert und weniger Manipulationen an Steckverbindern bedeutet ein geringeres Risiko für Beschädigungen
-
-
-
Utiliza el extremo plano de un spudger para levantar el conector de cable de SSD de su enchufe en la placa lógica.
-
Mueve el conector de cable de SSD fuera del camino.
As per my comment on step 10, this is also not required. When you remove the SSD in step 22, you can just fold it over out of the way.
This step is easy enough that I’d just remove it to be out of the way. I 100% agree with your other comments though. While you’re here, might as well do step 21 and remove the drive, just takes a sec.
I also strongly recommend not to unmount the speaker plugs, just flip them out of the way, same as with the SSD drive. Makes it much less complicated and less risky. It worked perfect for me.
Ich empfehle ebenfalls, die Platinenstecker der Lautsprecher nicht zu lösen sondern die Lautsprecher einfach, so wie das SSD-Laufwerk, einfach aus dem Weg zu legen. Das macht die Sache weniger kompliziert und weniger risikoreich. Es hat bei mir super funktioniert!
-
-
-
Calza el extremo puntiagudo de un spudger por debajo del conector de cable del altavoz derecho.
-
Levanta con cuidado el conector de cable del altavoz derecho de su enchufe en la placa lógica.
-
-
-
Utiliza un destornillador Torx T5 para retirar los siguientes tornillos que fijan el altavoz derecho a la carcasa superior:
-
Un tornillo negro de 6.8 mm
-
Un tornillo plateado de 6.3 mm
-
Un tornillo negro de 4.9 mm
If you manage to misplace any screws, particularly one of the speaker retaining screws, look under the speakers - they are magnetic and great at hiding missing screws :)
-
-
-
-
Levanta y remueve el altavoz derecho de su caja superior.
For those who don’t realize it, the speakers you are removing really are the plastic corner pieces that look like they’re just there to fill the space.
-
-
-
Utiliza el extremo plano de un spudger para levantar el conector de cable de conector para audífonos de su enchufe en la placa lógica.
For an easier, lower-risk repair, skip this step and step 18 - go straight to step 19 and fold the speaker out of the way.
Agreed, this is the way
-
-
-
Calza el extremo plano de un spudger por debajo del conector de cable del altavoz izquierdo.
-
Levanta con cuidado el conector de cable del altavoz izquierdo de su enchufe en la placa lógica.
It's easier to follow Step 19 & 20 first and then come to Step 18 (this step). Doing so will make it easier to remove that speaker connector easily holding the cable of speaker without having to use a pry tool.
-
-
-
Utiliza un destornillador T5 Torx para remover los siguientes tornillos que sujetan el altavoz izquierdo a la caja superior.
-
Un tornillo negro de 6.8 mm.
-
Un tornillo plateado de 6.3 mm
-
Un tornillo negro de 4.9 mm
Be very careful on this step. If you aren’t you can snap the plastic on the corners where the screws go in. Remember to go slowly when spinning the screws back in, it doesn’t take gorilla torque to tighten them, just take it easy!
-
-
-
Utiliza tu pulgar o dedo para doblar la barra de resorte de plástico de la bandeja de SSD para liberar los dos clips en el lado frontal del dispositivo.
-
Mientras mantienes la barra de resorte presionada, inclina el ensamblaje de SSD hacia arriba y fuera de su cavidad.
-
-
-
Remueve los tres tornillos T5 Torx de 2.2 mm de cada lado de la batería (seis tornillos en total).
If I were to do this again, I think I would leave unbolting the transverse battery until after ungluing the other four. That way one can tip the laptop on to one of its short sides and so run adhesive remover along the long edge of each battery and let gravity assist penetration without the transverse battery falling out.
I think this is good advice.
I just did one of these that didn’t have these screws installed from the factory. Odd
-
-
-
Para proteger tu pantalla, coloca una hoja de folio de aluminio entre la pantalla y el teclado y déjalo ahí mientras trabajas.
You can use a heat gun to remove the adhesive. Remember you can always add more heat so don’t over do it. I put my heat gun on high for less than 10 seconds at a time
Using a heat gun on a lithium-ion battery is not a good idea. You can get away with it if you are careful, but a solvent is much safer. ;)
-
-
-
Ahora que tu MacBook Pro está totalmente preparada, es hora de prepararte.
-
Usa protección para ojos al manejar y aplicar el removedor de adhesivo. (La protección para ojos está incluida en tu kit)
-
No uses lentes de contacto sin protección de ojos.
-
Los guantes protectores están también incluidos en tu kit. Si te preocupa la irritación de la piel, ponte los guantes ahora.
-
-
-
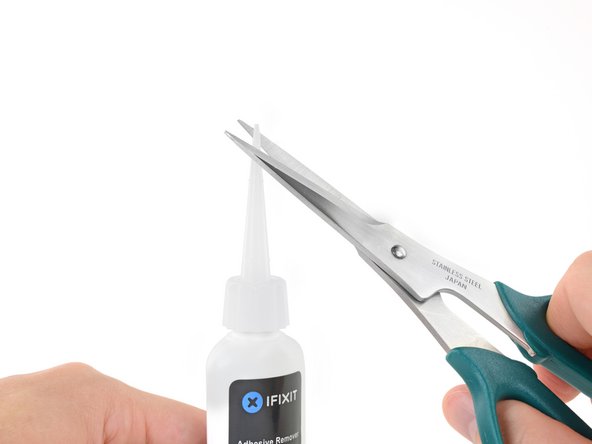
Abre tu contenedor de removedor de adhesivo.
-
Utiliza la tijera para cortar la punta sellada del aplicador.
-
Tuerce y cierra la tapa de manera segura antes de proceder.
-
-
-
Aplica una pequeña cantidad de removedor de adhesivo (aproximadamente 1 ml) de forma pareja bajo el borde de la batería que se encuentra en el extremo izquierdo.
-
Espera 2-3 minutos para que el removedor de líquido de adhesivo penetre por debajo de la celda de batería antes de proceder con el próximo paso.
-
Espera 2-3 minutos para que el removedor líquido de adhesivo penetre por debajo de la celda de batería antes de proceder al paso siguiente.
If you use a heat gun be sure to point the heat gun away from the motherboard. After heating for 10 seconds or less use the blunt end of the metal pry tool as you don’t want to puncture the battery. You don’t need much force as after you have enough heat you will hear it unsticking when you pry at it lightly with the BLUNT end of the metal pry tool. Repeat this step on the other side. You don’t need to heat the cells near the motherboard as they are secured with small screws
I replace a lot of glued in Macbook batteries and you really do not need ISO to get them out. These wide blade plastic spudgers are brilliant and cheap. https://www.aliexpress.com/item/32824615... Image here https://imgur.com/a/0Y0Yvyj
May not need it to remove the battery, but it sure helps for removing the leftover residue and black VHB that’s left behind. I found that dousing the VHB and using a metal flat spatula helped.
Some good advice:
Use a iFixit plastic card/credit card (work from the short side of the computer) and stick it under the battery towards the glue strip and hold the card approx 45° (or whatever angle is appropriate) and drip the glue remover on the card so it slides/runs down the card underneath the battery. In this way the glue remover is aimed straight to the glue under the battery to ‘eat its way’ onto the glue. Let it do its job for a minute or two. Then you can dig in the card even more underneath (the angle of the card will obviously be less and less as you get further in; the idea is just to somehow slide the liquid under), add a bit more remover, dig a bit more, etc…
Otherwise the glue remover can get a bit all over the place but this way it is more easily directed towards the glue.
Goo Gone, applied with a pipette, is a non-flammable alternative solution for releasing the adhesive that won’t harm plastics if it seeps past the battery cavities. It does take a bit longer, 30-45 mins, but is much safer. An additional benefit is that the adhesive will be completely separated from the top-case, so cleanup is super quick.
Hi John,
We don’t recommend using Goo Gone because it’s a petroleum distillate based remover, which leaves an oily residue. The residue can prevent replacement adhesive from fully bonding with the surface. Be sure to clean any Goo Gone surface with a detergent-based cleaner.
Isopropyl alcohol and iFixit’s adhesive remover are formulated to evaporate quickly and leave little residue, which allows replacement adhesive to bond properly to the surface.
Note, per my later cleanup, I found that 2-3 drops may not be enough, or else, 2-3 minutes is too long to wait before trying to pry. Once the remover starts to dry, it is not as easy to work the adhesive. I ended up using maybe 1/10 of the bottle overall and most of that was liberally dousing the residue a few times to fully clean the case.
-
-
-
Inserta el borde plano de un spudger o tarjeta plástica por debajo de la celda de batería del extremo izquierdo.
-
Desliza una herramienta a lo largo del perímetro de la celda de batería y levanta para comenzar a separar el adhesivo.
This is the most difficult step. The tip of my spudger got bended and the aluminum case damaged it.
I also broke a spudger trying to do this. Eventually I figured out it is easier to go in diagonally from the corner, just to one side of the screw hole, and lever until you hear the adhesive pad tear and give way.
we use a hair dryer and gently blow hot air in between the battery for a good minute before trying to lift it with a spunger. It worked wonderfully! When lifting, just give it constant force upward and you'll hear the battery slowly breaking away from the macbook, and we don't even see glue residues on our macbook at all. Just be patient. :)
Just a note to say that the above comments were written before the liquid adhesive remover was added to the guide—you should definitely NOT be breaking any spudgers using the current procedure, which requires very little force. I recommend using plastic cards rather than spudgers—it's pretty easy to slide them under each battery cell and separate the adhesive once the solvent has done its work.
This is much easier to do using a plastic card. Just slide the card under the side of the battery and rock it back and forth. The battery will separate pretty quickly with minimal residue.
by a plastic card, do you mean a credit card type thing? thanks in advance.
Exactly—one of these or an old credit card should work fine.
I second this, I also used an old credit card and it totally worked! I did not use any heat or liquid
Some good advice:
Use a iFixit plastic card/credit card (work from the short side of the computer) and stick it under the battery towards the glue strip and hold the card approx 45° (or whatever angle is appropriate) and drip the glue remover on the card so it slides/runs down the card underneath the battery. In this way the glue remover is aimed straight to the glue under the battery to ‘eat its way’ onto the glue. Let it do its job for a minute or two. Then you can dig in the card even more underneath (the angle of the card will obviously be less and less as you get further in; the idea is just to somehow slide the liquid under), add a bit more remover, dig a bit more, etc…
Otherwise the glue remover can get a bit all over the place but this way it is more easily directed towards the glue.
My MBP identifies as late 2012/early 2013, and don’t know where you come up with a separate identity.
Looking at both disassembly procedures, neither shows the aftermarket (probably NewerTech or OWC) battery I found in this MBP.
That’s disconcerting; finds one asking myself - “Am I using the right procedure??”
if you know this might be the case, please add note to this step if the user finds only 4 physical cased batteries.
Tnx!
Use the plastic credit-card shaped card.
-
-
-
Repite los pasos de arriba para separar la celda de batería adyacente de su adhesivo:
-
Aplica una pequeña cantidad (alrededor de 1 ml) de removedor líquido de adhesivo por debajo de la celda de batería.
-
Espera 2-3 minutos para que el removedor de adhesivo penetre y ablande el adhesivo.
-
Cuidadosamente coloca un spudger o tarjeta de plástico hacia adentro, con cuidado de no dañar la batería, y separa la celda de batería del adhesivo ajustándola a tu MacBook Pro.
-
-
-
Cambia de lado y repite el procedimiento para las dos celdas de batería del lado derecho de tu MacBook Pro.
-
Recuerda de agregar alrededor de 1 ml de removedor líquido de adhesivo debajo de cada batería y espera 2-3 minutos para que penetre antes de intentar levantar la celda debatería.
Puncturing the battery’s protective covering can lead to release of caustic fumes or fire.
-
-
-
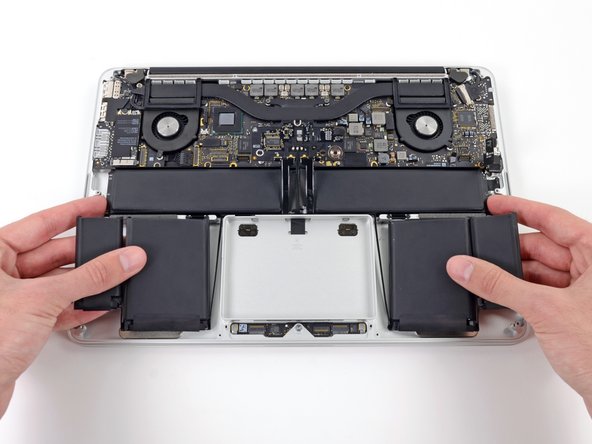
Levanta la batería como una sola de la caja superior y remuévela .
-
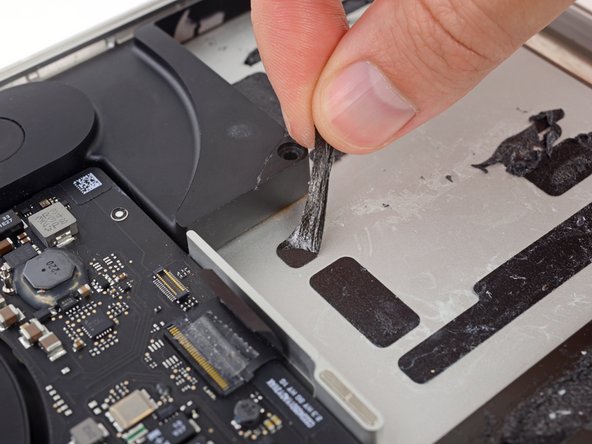
Con un poco de suerte, puedes lentamente levantar cada tira de adhesivo con tus dedos.
-
De lo contrario, empapa cada sección de adhesivo con un poco de removedor de adhesivo durante 2-3 minutos y luego raspa y sácalo con un pico de apertura o cualquiera de las herramientas en tu kit. Esto podría ser mucho trabajo, así que ten paciencia.
-
Limpia cualquier resto de removedor de adhesivo y dale a tu MacBook Pro durante unos pocos minutos para que se seque al aire.
-
Calibra tu batería nueva. Cárgala hasta el 100% y luego sigue cargándola durante al menos 2 horas más. Luego, desenchúfala y úsala normalmente para drenar la batería. Cuando veas la advertencia de batería baja, guarda tu trabajo y mantén tu laptop encendida hasta que se duerma. Espera al menos 5 horas, luego cárgala de forma ininterrumpida hasta 100%.
During battery replacement take care to position the two left and right battery packs inwards and upwards towards the macbook center such, that there is sufficient space for reinstallation of the two speakers!
I second Fred’s suggestion. I had to “smoosh” the right speaker in since my battery replacement was a little bit too far over. It was fine, but the “heads up” note is warranted.
If you're replacing the top case that includes a new battery, can't you skip removal of the battery?
Yes!! If uppercase Assembly(Includes Trackpad, keyboard, Palmrest & BATTERY) is being replaced, there is no need to remove battery from old uppercase assembly.
When you are at this step and before you put the new battery in, take the time to clean your computer really well. You will be surprised how much dust/dirt and even pet hairs have gotten into your computer. After I removed the battery, I use a little more of the acetone to clean the bays up and after it dried, I used a tiny bit of Isopropyl Alcohol to make sure there was a good clean area for the new bonding. Make sure you clean the fans. Don’t use a toothbrush or anything like that. If your have a Lowes or Home Depot, you can buy a shop vac attachment kit for about $20, it’s well worth it. Don’t use that air in a can crap, it will put moisture on circuits. Take your time, it’s not a hard task to do everything, just use a little patience.
Hi all,
After installing the new batteries, my mac is not powering up… Do i need to charge the battery first and then check again? Have anyone faced similar issue before?
My 1st battery from ifixit came out to be defective and it caused fire at the centre of the long battery. I have got a replacement for the defective piece which i have installed now. However, now i am worried that connecting to power could lead to any potential fire / harm to my mac???
Already i have spent lot of time in this and it would be very upsetting if this battery spoils my mac!!!
Any suggestion people???? thanks in advance!
BR,
Vijay
Hi Vijay!
Uh-oh, we’re sorry to hear about the battery trouble!
Our batteries come with a 1-year warranty, so this would definitely be something we can assist with. Please feel welcome to reach out via help.ifixit.com and provide our Support team with your order number so that they can look into these battery troubles with you.
Thanks!
Hi All,
Just replaced battery, and am typing this on the live MacBook. The unit fired up as soon as I plugged in the power adapter. Nice. The battery percentage indicator said the battery had approximately 85% power charge. Is this normal? If not, what steps should I take to ensure that this battery is properly calibrated?
Cheers,
James
Hi James,
Follow these steps to calibrate your new battery: https://help.ifixit.com/article/265-batt...
ご指摘ありがとうございました!訂正済みです。
Can someone tell me which model is written in the battery? I saw that is written the model a1437. Is this model compatible with the a1425? Thanks
Hi Mizuno,
The battery model is A1437, and it is compatible with the MacBook Pro model A1425.
These instructions are brilliantly concise! Thank you. And thank you everyone for your comments. As a final comment from me, it is much easier to assess the final position of the batteries if you place them gently in position, reinstall the speakers, adjust the battery position if needed and then press them firmly into place.
I did everything in the kit, but my computer won’t acknowledge the battery and is only running on my power adapter. Once I take off the power adapter it shuts down. I also tried resetting the snc, but unsure if it did anything. I reopened up the back to see if I missed anything. The batteries are warm, which means they were running. I’m very confused, anybody else run into similar issues?
My OEM adhesive was particularly persnickety and did not want to come up. I found a pick to be more useful than the flat spudger or the card. I also used several applications of remover and found that working with it wet was much more effective than letting it dry to dissolve the glue. A final few wipes with more remover and the cloth wipe that came with the kit did a good cleanup job.
So I just replaced the battery and reassembled everything and when plugging it into the power supply, the LED is not lighting up and computer is not turning on. Not sure what I did incorrectly as I basically followed the steps in reverse for reassembly after installing the battery. Any advice would be appreciated.
-
-
-
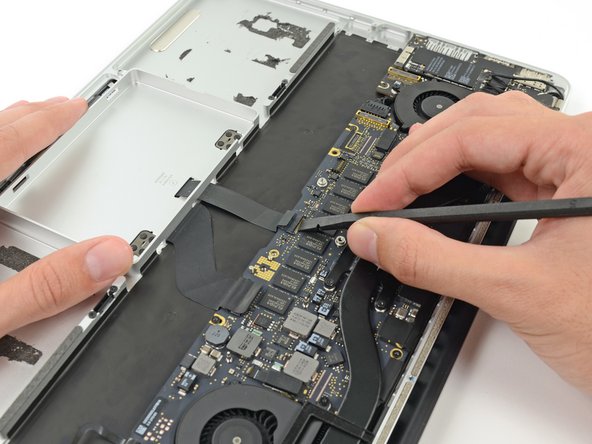
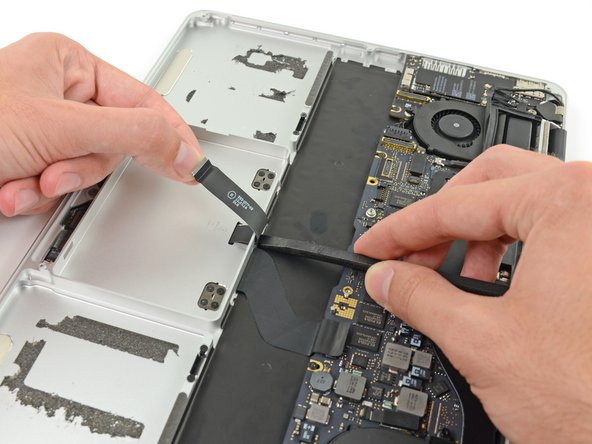
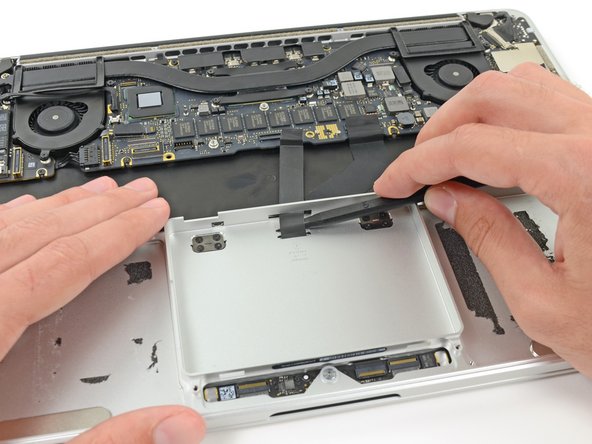
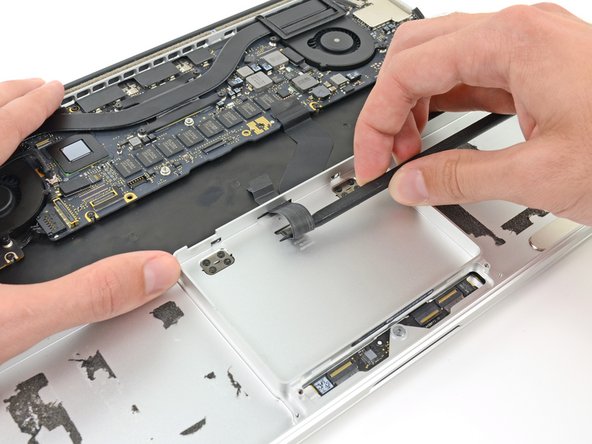
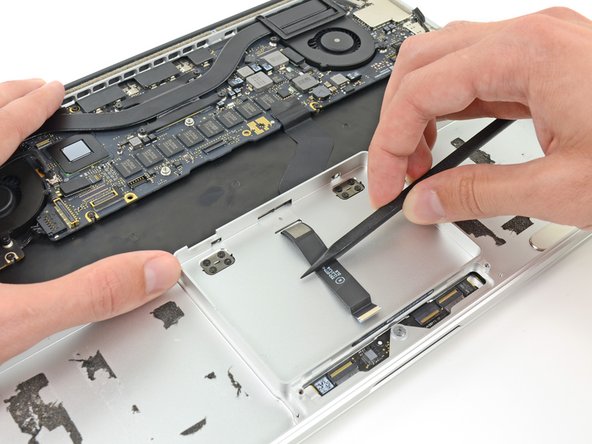
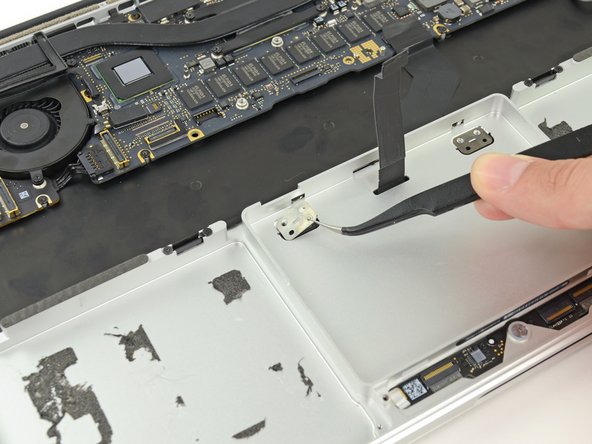
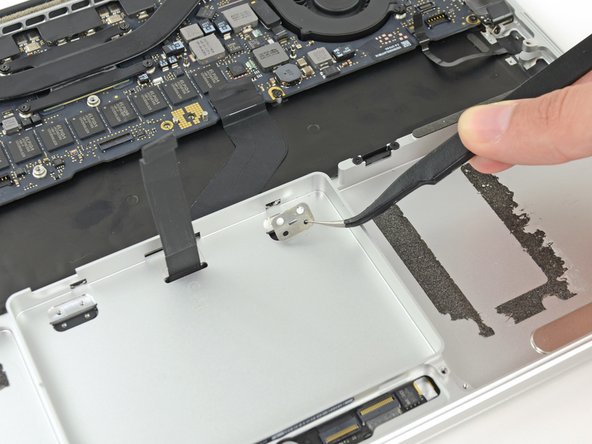
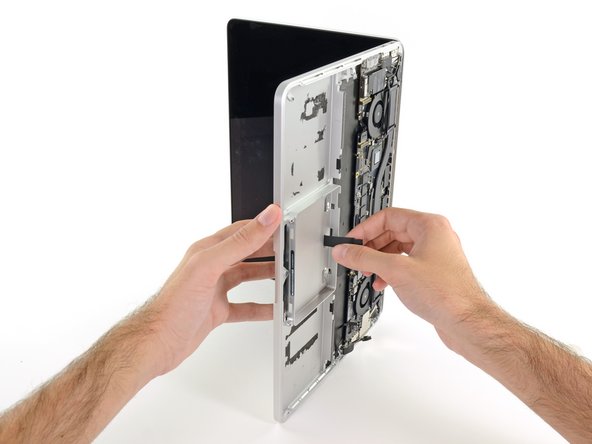
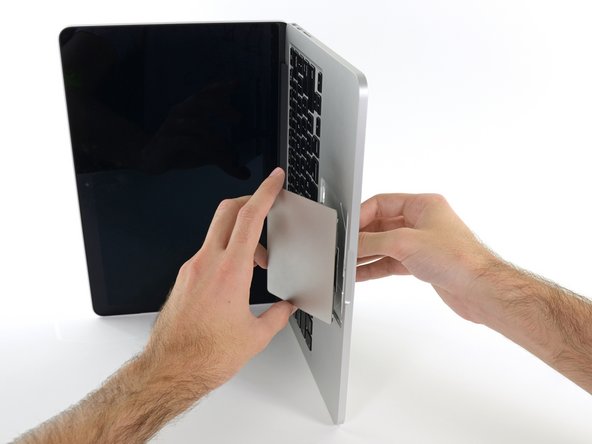
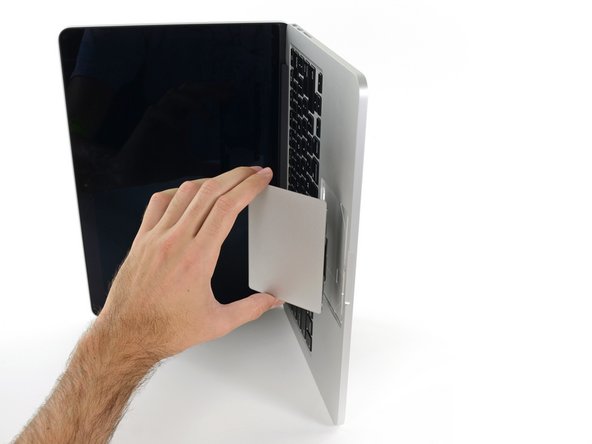
Utiliza el extremo plano de un spudger para levantar la solapa de retención del zócalo ZIF del cable de cinta del trackpad.
It looks like you could skip the entire battery removal procedure if you simply left the trackpad cable in place, disconnected it at the trackpad end, and used the old cable on the new trackpad?
You could try it, but there’s very little slack in that cable. I think you’ll have a hard time disconnecting the trackpad without straining or tearing the cable.
-
-
-
Retira los siguientes tornillos que fijan los soportes del trackpad al trackpad y a la carcasa superior:
-
Cuatro tornillos de 1.9 mm Phillips #000
-
Cuatro tornillos de 1.4 mm Phillips #000
-
Para volver a montar el dispositivo, sigue estas instrucciones en orden inverso.
Para volver a montar el dispositivo, sigue estas instrucciones en orden inverso.
Cancelar: No complete esta guía.
13 personas más completaron esta guía.
Un agradecimiento especial a estos traductores:
100%
¡ Mariana Roca nos está ayudando a reparar el mundo! ¿Quieres contribuir?
Empezar a traducir ›
12 comentarios
Hi!
I have a Macbook Pro Retina 15-Inch Early 2013. Is it a similar procedure for this laptop with a larger screen (15" versus yours 13")?
We've got guides for the 15" Early 2013, unfortunately, removing the battery in the 15" is significantly harder, you can follow the upper case guide to get most of the way and either replace the whole upper case (and get a new battery included), or use this guide to try to get the rest of the way. Best of luck!
I just wanted to say this worked for me, thank you for the walkthrough! My trackpad just suddenly died one day out of the blue. I thought it might be a lose cable, but ordered a replacement just in case. No loose cables, simple swap out did the trick. This walkthrough is very good. Only thing I'd warn the feint of heart is the removal of the batteries can be intense because they are glued in. You really need the right tool to work it free. I think the battery removal took at least 20 minutes alone!
Anyone, thanks again for your help!
Excellent write up. Three suggestions which i uncovered when i followed this procedure:
Step 5 - The silver shouldered screw was a T6 Torx, not a T7. On this basis, I didn't need a T7 Torx screwdriver for this procedure.
Step 15 & 19 - To remove the corner screws (the heads of which aren't immediately visible), you need to carefully remove the covering mesh with tweezers
Step 44 - Reposition of trackpad. I found that when putting the trackpad back in place during reassembly, it was tricky to get it in exactly the right position (perfectly centralised). I found that taking four small pieces of paper and folding them in half helped. I wedged a piece of folded paper in between the four sides of the trackpad and then tightened the screws. Once the screws are tightened, you can simply remove the paper.
This guide wasted a bit of my time! Removing the speakers and the battery are unnecessary. The top piece of the battery can be lifted to reveal the trackpad cable once the screws at the sides are removed.
Agreed. Totally unnecessary and super messy to deal with the battery adhesive just to get to the trackpad. Please update this guide!
Hi I purchased the new trackpad from Ifixit for my early 2013 MBP retina. The included cable is almost 1/2 inch shorter than the original. Did they ship me the wrong part (even though the part number matches what they are selling?)???
Hi Ryan! Sorry to hear about the trouble! Our Support team is here to assist. If you’re still worried about this trackpad working for you, please reach out to them via help.ifixit.com so that they can look into this with you.
As mentioned by just1ed in 2016, it’s not necessary to remove the battery assembly. Simply removing the 6 screws of the upper battery row and then gently lifting forward allows more than enough access to the trackpad signal cable.
Hi, the left click on my trackpad stopped working. Keyboard was still working, after trying all software resets, I thought I should try to probably change the trackpad and was going to order the parts on iFixit, but before that wanted to see if I can open up the laptop and follow the above steps. All went well, however when I tried to remove the retaining flap (step 35 above), the flap came out fully. now even with the trackpad ribbon cable inserted (without the retaining flap), the keyboard is also not working. The questions I have are
1) do I need to retaining flap for any other reason other than to secure the ribbon, will the laptop work even without the retaining flap
2) how do I put the retaining flap back in ?
3) does the keyboard and mouse use the same trackpad ribbon ? why did the keyboard stop working now ?
Appreciate any and all responses . I would like to go ahead and order the parts on ifixit, but need to be clear on what I am doing


















If don’t have one of those neat project mats, then you can use small pieces of flattened blu-tack to hold the screws. If you arrange them in the shape of your mac book cover, and put the screws down methodically, you can get a one-to-one mapping of the screws to the correct screw holes.
Toby Thurston - Contestar
Or you can use an ice tray where you put the screws and the parts in separate bays in the same order as they come in the instructions.
timofej.se -
This is great! I used a small magnetic white board, and wrote on it to identify the parts as I went. This whole process, from the fast shipment to the great instructions to the complete, high quality, tool kit has been great. I’m typing this comment on my resurrected laptop. Thank you! Sue
Susan Greer - Contestar
It would be a good idea if people recorded in the comments which screws go where so that, if someone lost their screw positions, they could recover them from the comments.
Raymond Shpeley - Contestar