Esta versión puede contener ediciones incorrectas. Cambie a la última instantánea verificada.
Qué necesitas
-
-
Retira los siguientes 10 tornillos:
-
Dos tornillos Pentalobe de 5 Puntos de 8 mm
-
Ocho tornillos Pentalobe de 5 Puntos de 2.5 mm
-
-
-
Usa el extremo plano de un spudger para levantar ambos lados cortos del conector de la batería hacia arriba para desconectarlo de su zócalo en la placa lógica.
-
Dobla el cable de la batería un poco lejos de la placa lógica para que el conector no se doble hacia atrás accidentalmente y haga contacto con su zócalo.
-
-
-
Utiliza el extremo plano de un spudger para hacer palanca en los conectores de cable izquierdo y derecho de la placa de E/S para sacarlos de sus respectivos zócalos en la placa de E/S.
-
-
Este paso está sin traducir. Ayuda a traducirlo
-
Use the tip of a spudger to carefully push on each side of the iSight camera cable connector to loosen it out of its socket on the logic board.
-
-
Este paso está sin traducir. Ayuda a traducirlo
-
Peel the iSight camera cable up off the adhesive securing it to the fan.
-
-
-
Este paso está sin traducir. Ayuda a traducirlo
-
Use the tip of a spudger to carefully flip up the retaining flap on the fan cable ZIF socket.
-
-
Este paso está sin traducir. Ayuda a traducirlo
-
Remove the following three screws securing the fan to the upper case:
-
Two 5.5 mm T5 Torx screws
-
One 4.6 mm T5 Torx screw
-
-
Este paso está sin traducir. Ayuda a traducirlo
-
Lift, but do not remove the fan out of its recess in the upper case.
-
Carefully pull the fan ribbon cable out of its socket as you remove the fan from the Air.
-
-
Este paso está sin traducir. Ayuda a traducirlo
-
Remove the following five screws securing the battery to the upper case:
-
Two 5.2 mm T5 Torx screws
-
One 6 mm T5 Torx screw
-
Two 2.6 mm T5 Torx screws
-
-
Este paso está sin traducir. Ayuda a traducirlo
-
Lift the battery from its edge nearest the logic board and remove it from the upper case.
-
-
Este paso está sin traducir. Ayuda a traducirlo
-
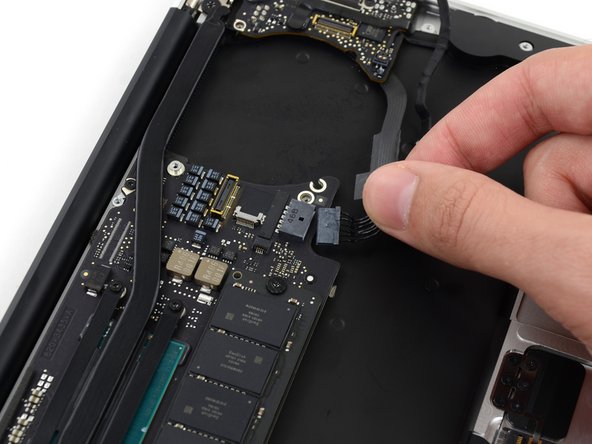
Disconnect the I/O board power cable from the logic board by pulling the cable out of its socket on the logic board.
-
-
Este paso está sin traducir. Ayuda a traducirlo
-
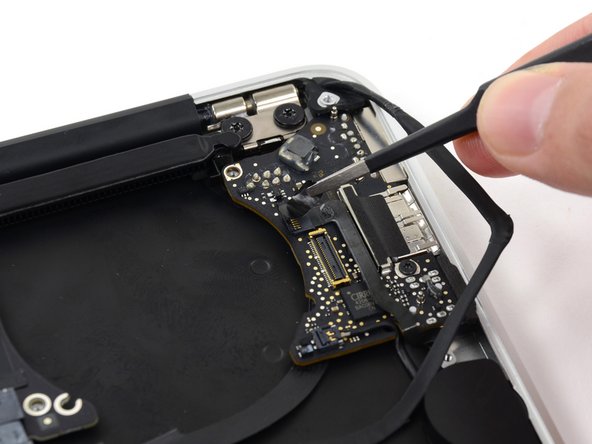
Use the tip of a spudger to carefully flip up the retaining flap on the microphone cable ZIF socket.
-
Pull the microphone ribbon cable straight out of its socket.
-
-
Este paso está sin traducir. Ayuda a traducirlo
-
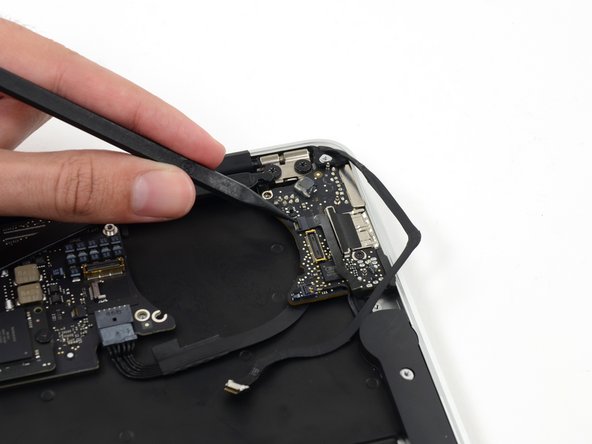
Use the tip of a spudger to pry under the speaker cable near the connector to lift the connector straight up out of its socket.
-
-
Este paso está sin traducir. Ayuda a traducirlo
-
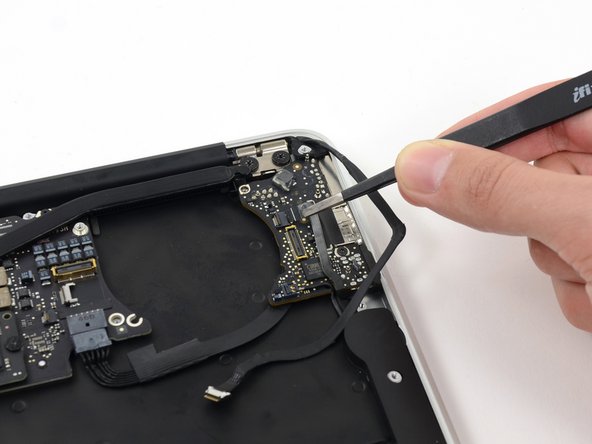
Remove the small rubber gasket from the corner of the upper case nearest the I/O board.
-
-
Este paso está sin traducir. Ayuda a traducirlo
-
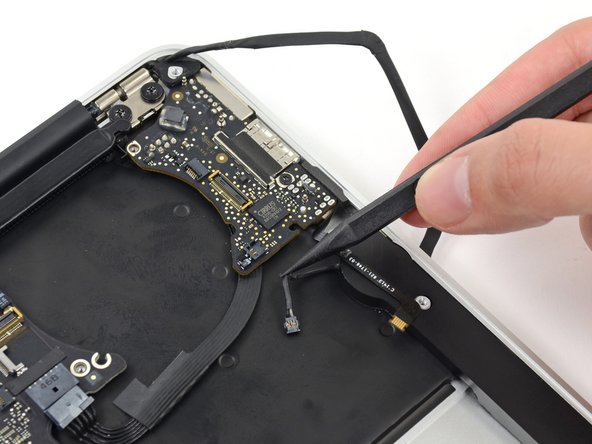
Remove the single 3.6 mm T5 Torx screw securing the I/O board to the upper case.
-
In some models this is a 3.1 mm T5 Torx screw.
-
-
Este paso está sin traducir. Ayuda a traducirlo
-
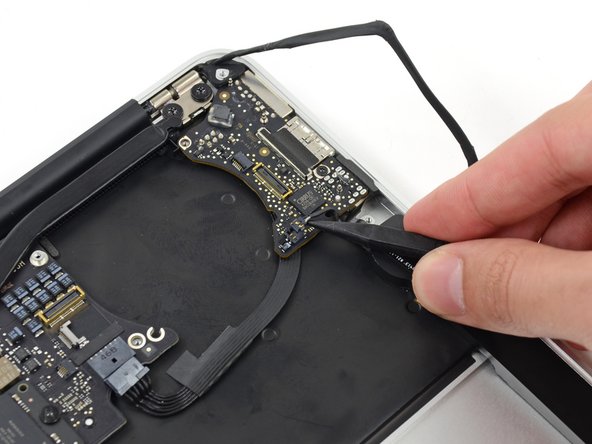
Carefully lift the I/O board by its power cable and pull it away from the edge of the case.
-


Cancelar: No complete esta guía.
21 personas más completaron esta guía.


Un comentario
Great tutorial. I may do this for sure. I get no audio and no microphone on my MacBook air. I took it to Apple and they told me it was hardware and not software. In Settins in Audio, there is no Audio Ouput available and No built in Mic available. Would you imagine this might be what is wrong with my Air?