Esta versión puede contener ediciones incorrectas. Cambie a la última instantánea verificada.
Qué necesitas
-
-
Retira los siguientes 10 tornillos:
-
Dos tornillos Pentalobe de 5 Puntos de 8 mm
-
Ocho tornillos Pentalobe de 5 Puntos de 2.5 mm
-
-
-
Usa el extremo plano de un spudger para hacer palanca en ambos lados cortos del conector de la batería hacia arriba para desconectarlo de su zócalo en la placa lógica.
-
Dobla el cable de la batería ligeramente hacia afuera de la placa lógica para que el conector no entre en contacto accidentalmente con su zócalo.
-
-
-
Retire el único tornillo Torx T5 de 2,9 mm que fija el SSD a la placa lógica.
-
-
-
Este paso está sin traducir. Ayuda a traducirlo
-
Use the flat end of a spudger to pry the I/O board cable up from its socket on the I/O board.
-
-
Este paso está sin traducir. Ayuda a traducirlo
-
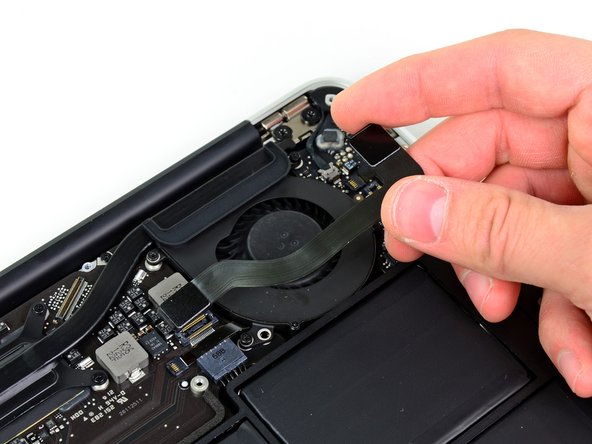
Peel the I/O board cable up from the adhesive securing it to the fan.
-
-
Este paso está sin traducir. Ayuda a traducirlo
-
Use the flat end of a spudger to lift the I/O board connector up and out of its socket on the logic board
-
Remove the I/O board cable.
-
-
Este paso está sin traducir. Ayuda a traducirlo
-
Use the tip of a spudger to carefully flip up the retaining flap on the fan cable ZIF socket.
-
-
Este paso está sin traducir. Ayuda a traducirlo
-
Remove the following three screws securing the fan to the upper case:
-
Two 5.2 mm T5 Torx screws
-
One 3.6 mm T5 Torx screw
-
-
Este paso está sin traducir. Ayuda a traducirlo
-
Lift the fan out of the upper case and carefully pull the fan ribbon cable out of its socket as you remove it from the Air.
-
Cancelar: No complete esta guía.
26 personas más completaron esta guía.
3 comentarios
I did the same. What to do?
EW
I too broke the socket of trying to pry open the retaining flap. Yes there is a warning “Be sure you are prying up on the hinged retaining flap, not the socket itself.” But there needs to be a much better picture/description of how to DO this on step 9. Without a reference on what/where the retaining flap is, there is a big danger of breaking it. Now my computer is toast.


