Saltar al contenido principal

Esta guía ha sufrido modificaciones. Revisa la última versión sin revisar.

Mac Pro Late 2013 AirPort Antenna Array Replacement

Qué necesitas

  1. Mac Pro Late 2013 AirPort Antenna Array Replacement, Outer Case: paso 1, imagen 1 de 2 Mac Pro Late 2013 AirPort Antenna Array Replacement, Outer Case: paso 1, imagen 2 de 2
    • Slide the lock switch to the right, to the unlocked position.

  2. Mac Pro Late 2013 AirPort Antenna Array Replacement: paso 2, imagen 1 de 3 Mac Pro Late 2013 AirPort Antenna Array Replacement: paso 2, imagen 2 de 3 Mac Pro Late 2013 AirPort Antenna Array Replacement: paso 2, imagen 3 de 3
    • Lift the outer case straight up off the Mac Pro.

    • It may help to push down on the center of the fan while lifting the case up.

  3. Mac Pro Late 2013 AirPort Antenna Array Replacement, Fan Assembly: paso 3, imagen 1 de 3 Mac Pro Late 2013 AirPort Antenna Array Replacement, Fan Assembly: paso 3, imagen 2 de 3 Mac Pro Late 2013 AirPort Antenna Array Replacement, Fan Assembly: paso 3, imagen 3 de 3
    • Remove five 5.1 mm T10 Torx screws from around the outer perimeter of the fan assembly.

  4. Mac Pro Late 2013 AirPort Antenna Array Replacement: paso 4, imagen 1 de 2 Mac Pro Late 2013 AirPort Antenna Array Replacement: paso 4, imagen 2 de 2
    • The fan assembly is attached to the rest of the computer by two cables on the IO board side.

    • Tilt the assembly up away from the IO board.

    • Do not try to remove the fan assembly yet, as it is still attached by two cables.

  5. Mac Pro Late 2013 AirPort Antenna Array Replacement: paso 5, imagen 1 de 1
    • While supporting the fan assembly with one hand, loosen the two T8 captive screws in the fan cable bracket.

    • These screws are captive in the Mac Pro. Do not try to remove these screws from your Mac Pro.

  6. Mac Pro Late 2013 AirPort Antenna Array Replacement: paso 6, imagen 1 de 1
    • Use a pair of tweezers to pull the fan cable bracket away from the fan assembly.

  7. Mac Pro Late 2013 AirPort Antenna Array Replacement: paso 7, imagen 1 de 2 Mac Pro Late 2013 AirPort Antenna Array Replacement: paso 7, imagen 2 de 2
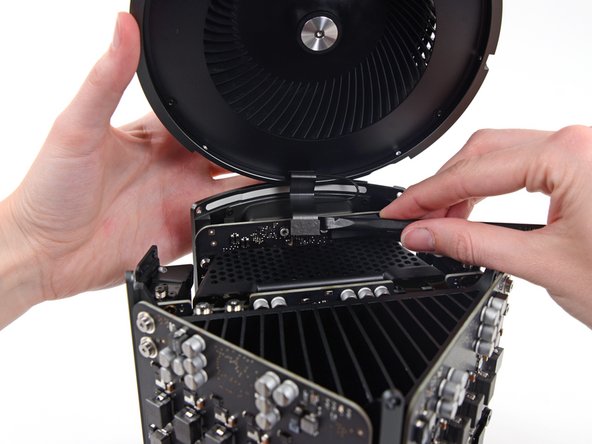
    • Use the flat end of a spudger to disconnect the fan assembly ribbon cable from the IO board.

  8. Mac Pro Late 2013 AirPort Antenna Array Replacement: paso 8, imagen 1 de 1
    • Disconnect the fan assembly antenna cable from the IO board.

    • Remove the fan assembly from the Mac Pro.

  9. Mac Pro Late 2013 AirPort Antenna Array Replacement, Fan Assembly Lid: paso 9, imagen 1 de 3 Mac Pro Late 2013 AirPort Antenna Array Replacement, Fan Assembly Lid: paso 9, imagen 2 de 3 Mac Pro Late 2013 AirPort Antenna Array Replacement, Fan Assembly Lid: paso 9, imagen 3 de 3
    • Use the flat end of a spudger to pry the fan assembly lid up off the fan assembly.

    • Remove the fan assembly lid.

  10. Mac Pro Late 2013 AirPort Antenna Array Replacement, AirPort Board: paso 10, imagen 1 de 1
    • Remove the three 3.7 mm T4 screws securing the metal cover to the AirPort board bay.

  11. Mac Pro Late 2013 AirPort Antenna Array Replacement: paso 11, imagen 1 de 1
    • Lift and remove the metal cover from the AirPort board bay.

  12. Mac Pro Late 2013 AirPort Antenna Array Replacement: paso 12, imagen 1 de 3 Mac Pro Late 2013 AirPort Antenna Array Replacement: paso 12, imagen 2 de 3 Mac Pro Late 2013 AirPort Antenna Array Replacement: paso 12, imagen 3 de 3
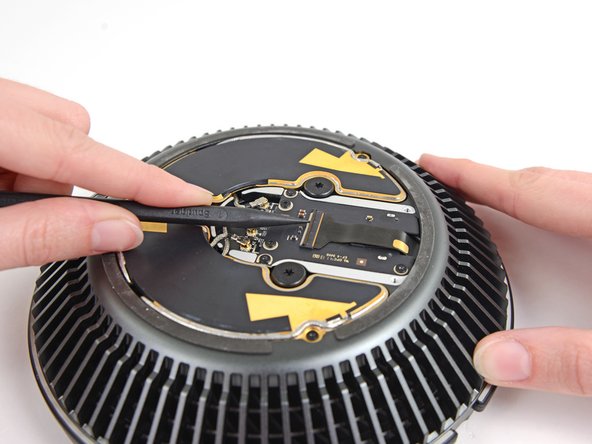
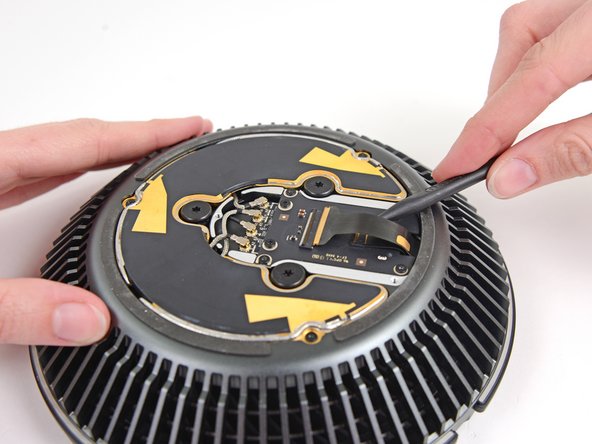
    • Use the tip of a spudger to flip the ZIF retaining tab on the fan assembly ribbon cable connector.

    • Remove the fan assembly ribbon cable from its ZIF socket.

  13. Mac Pro Late 2013 AirPort Antenna Array Replacement: paso 13, imagen 1 de 3 Mac Pro Late 2013 AirPort Antenna Array Replacement: paso 13, imagen 2 de 3 Mac Pro Late 2013 AirPort Antenna Array Replacement: paso 13, imagen 3 de 3
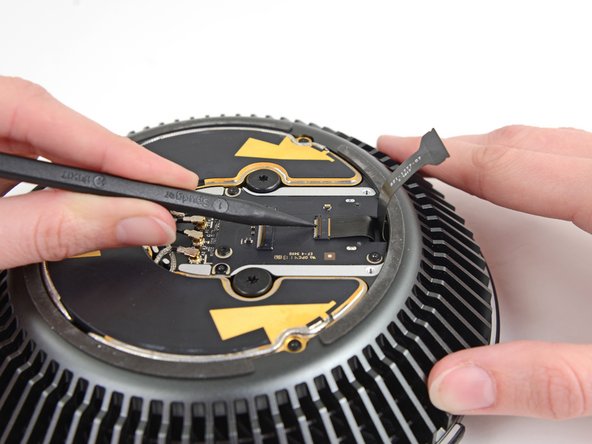
    • Use the tip of a spudger to flip the ZIF retaining tab on the fan ribbon cable.

    • Disconnect the fan ribbon cable.

  14. Mac Pro Late 2013 AirPort Antenna Array Replacement, AirPort Antenna Array: paso 14, imagen 1 de 1
    • Remove the three 3.7 mm T4 screws securing the antenna array to the fan assembly.

  15. Mac Pro Late 2013 AirPort Antenna Array Replacement: paso 15, imagen 1 de 1
    • Remove the AirPort antenna array.

Conclusión

To reassemble your device, follow these instructions in reverse order.

3 personas más completaron esta guía.

Andrew Optimus Goldheart

Miembro Desde 10/17/09

502,749 Reputación

407 Guías creadas

Equipo

iFixit Miembro de iFixit

Staff

135 Miembros

16,732 Guías creadas

2 comentarios

having macpro 2013 bluetooth on issue, where is the bluetooth module locate?

Sanong - Contestar

is bluetooth module part of (inside) airport board?

Sanong - Contestar

Agregar Comentario

Ver Estadísticas:

Ultimas 24 horas: 1

Ultimos 7 días: 9

Ultimos 30 días: 40

Todo El Tiempo: 5,271