Esta versión puede contener ediciones incorrectas. Cambie a la última instantánea verificada.
Qué necesitas
-
Este paso está sin traducir. Ayuda a traducirlo
-
Remove the four rear screws using the Phillips #0 screwdriver from the laptop as shown. The screws are 0.5 inches long.
-
-
Este paso está sin traducir. Ayuda a traducirlo
-
Using the black nylon spudger, carefully remove the rear cover from the laptop.
-
-
-
Este paso está sin traducir. Ayuda a traducirlo
-
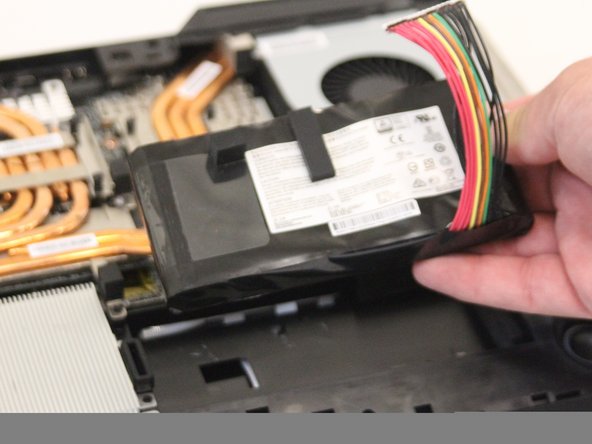
Carefully unplug the battery and remove it from the laptop. This will be held down with adhesive, but can be safely removed once unplugged.
-
-
Este paso está sin traducir. Ayuda a traducirlo
-
Using the Phillips #0 screwdriver, remove each screw from the heatsink and remove it.
-
-
Este paso está sin traducir. Ayuda a traducirlo
-
Using the Phillips #0 screwdriver, remove each screw from the SSD card units, then unplug and remove them. The screws are 0.25 inches long.
-
-
Este paso está sin traducir. Ayuda a traducirlo
-
Remove all screws from the back of the hard drive using the Phillips #0 screwdriver, then lift up and unplug the unit. Screws are 0.15625 inches long.
-


Cancelar: No complete esta guía.
Una persona más ha completado esta guía.
Equipo

Western Carolina University, Team S1-G5, Virtue Fall 2018 Miembro de Western Carolina University, Team S1-G5, Virtue Fall 2018
WCU-VIRTUE-F18S1G5
3 Miembros
5 Guías creadas