Saltar al contenido principal

MSI GT70 MS-1763 RAM Replacement

Qué necesitas

  1. MSI GT70 MS-1763 RAM Replacement, Battery: paso 1, imagen 1 de 2 MSI GT70 MS-1763 RAM Replacement, Battery: paso 1, imagen 2 de 2
    • Power off the laptop and turn it over.

  2. MSI GT70 MS-1763 RAM Replacement: paso 2, imagen 1 de 2 MSI GT70 MS-1763 RAM Replacement: paso 2, imagen 2 de 2
    • Release the safety latches that hold the battery in place. The left latch will stay moved up, while the right side is spring activated and will have to be held.

  3. MSI GT70 MS-1763 RAM Replacement: paso 3, imagen 1 de 2 MSI GT70 MS-1763 RAM Replacement: paso 3, imagen 2 de 2
    • While holding up the left latch, use a Jimmy and slide the old battery out of its compartment.

  4. MSI GT70 MS-1763 RAM Replacement, Hard Drive: paso 4, imagen 1 de 2 MSI GT70 MS-1763 RAM Replacement, Hard Drive: paso 4, imagen 2 de 2
    • Remove all twelve 4 mm Phillips #0 screws from the back of the laptop.

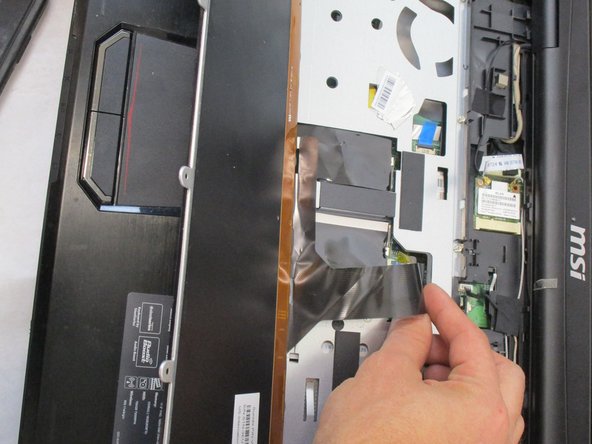
    • Remove the back cover.

  5. MSI GT70 MS-1763 RAM Replacement: paso 5, imagen 1 de 1
    • Remove the rubber spacer holding the hard drive secure.

  6. MSI GT70 MS-1763 RAM Replacement: paso 6, imagen 1 de 2 MSI GT70 MS-1763 RAM Replacement: paso 6, imagen 2 de 2
    • Slide the hard drive to the left, removing it from its bay.

  7. MSI GT70 MS-1763 RAM Replacement, Keyboard: paso 7, imagen 1 de 3 MSI GT70 MS-1763 RAM Replacement, Keyboard: paso 7, imagen 2 de 3 MSI GT70 MS-1763 RAM Replacement, Keyboard: paso 7, imagen 3 de 3
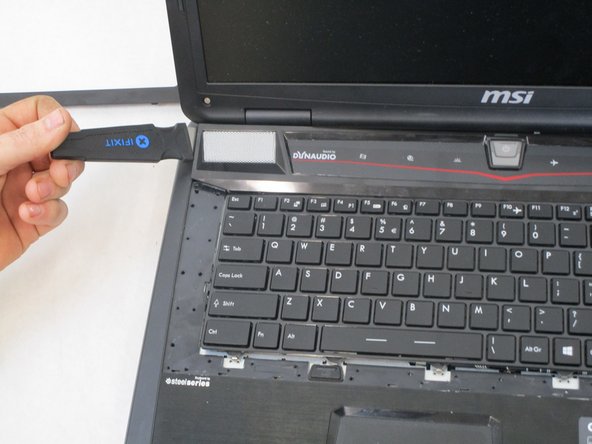
    • Using a Jimmy, remove the outer cover around the keyboard.

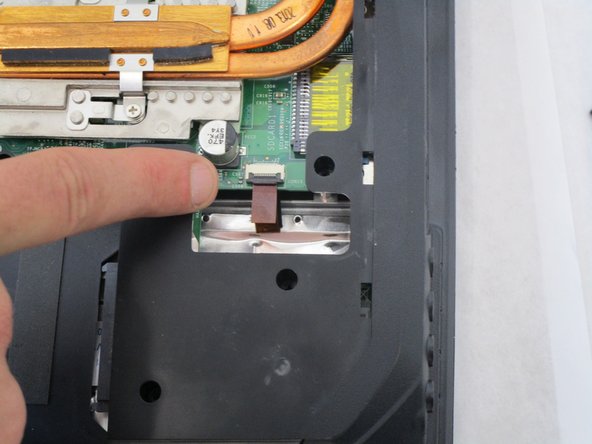
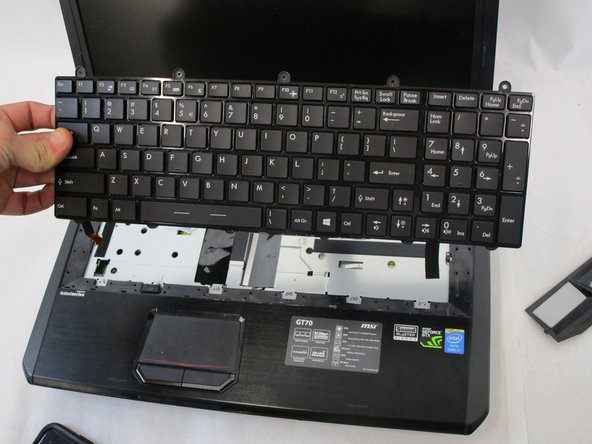
    • Remove the ribbon cable from the ZIF connector on the underside of the top cover.

  8. MSI GT70 MS-1763 RAM Replacement: paso 8, imagen 1 de 2 MSI GT70 MS-1763 RAM Replacement: paso 8, imagen 2 de 2
    • Using a Phillips #0 screwdriver, remove the five 3 mm screws at the top of the keyboard.

  9. MSI GT70 MS-1763 RAM Replacement: paso 9, imagen 1 de 1
    • Flip the keyboard back and disconnect the keyboard cable.

  10. MSI GT70 MS-1763 RAM Replacement: paso 10, imagen 1 de 3 MSI GT70 MS-1763 RAM Replacement: paso 10, imagen 2 de 3 MSI GT70 MS-1763 RAM Replacement: paso 10, imagen 3 de 3
    • Flip the laptop over and disconnect the data cable from the ZIF connector on the bottom right.

    • You can now turn the laptop back over and remove the keyboard.

  11. MSI GT70 MS-1763 RAM Replacement, RAM: paso 11, imagen 1 de 1
    • Pull back the black film, which covers the ram.

  12. MSI GT70 MS-1763 RAM Replacement: paso 12, imagen 1 de 2 MSI GT70 MS-1763 RAM Replacement: paso 12, imagen 2 de 2
    • Pull the safety latches on either side of the RAM away from each other.

    • The RAM should pop up at an angle from the motherboard when it has cleared the latches.

    • Remove the RAM, maintaining the angle at which it rests.

Conclusión

To reassemble your device, follow these instructions in reverse order.

Una persona más ha completado esta guía.

0 comentarios

Agregar Comentario

Ver Estadísticas:

Ultimas 24 horas: 0

Ultimos 7 días: 4

Ultimos 30 días: 25

Todo El Tiempo: 1,497