Esta versión puede contener ediciones incorrectas. Cambie a la última instantánea verificada.
Qué necesitas
-
Este paso está sin traducir. Ayuda a traducirlo
-
Remove the six 1.2mm screws on the bottom plate of the laptop using a JIS #0 screwdriver.
-
-
Este paso está sin traducir. Ayuda a traducirlo
-
Insert the plastic opening tool into the seam on the backplate of the laptop.
-
Pry the back plate up.
-
Slide the plastic opening tool around the laptop's edge slowly until the backplate is completely removed.
-
-
-
Este paso está sin traducir. Ayuda a traducirlo
-
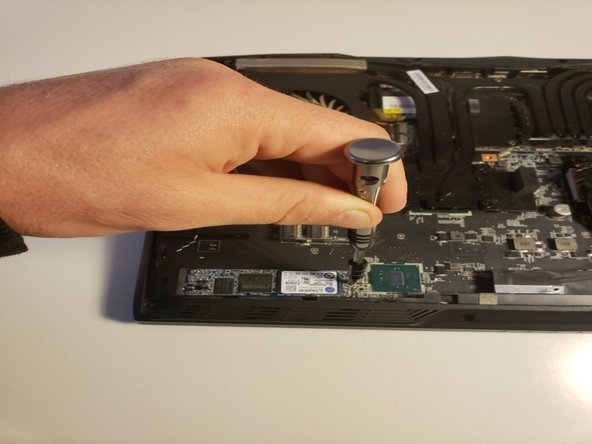
Remove the single 1.2mm screw securing the SSD to the laptop using the JIS #0 screwdriver.
-
-
Este paso está sin traducir. Ayuda a traducirlo
-
Remove the old SSD, then insert and screw in the new one.
-


Cancelar: No complete esta guía.
Una persona más ha completado esta guía.
Equipo

University of North Texas, Team S4-G1, Raign Fall 2018 Miembro de University of North Texas, Team S4-G1, Raign Fall 2018
UNT-RAIGN-F18S4G1
4 Miembros
5 Guías creadas
Un comentario
Isn’t that an M.2 Drive not a GPU? the GPU is in the top right. under the heat pipes.