Saltar al contenido principal

Esta guía ha sufrido modificaciones. Revisa la última versión sin revisar.

MSI GT62VR 6RD Dominator Cooling Fan Replacement

Qué necesitas

  1. MSI GT62VR 6RD Dominator Cooling Fan Replacement, Cooling Fan: paso 1, imagen 1 de 2 MSI GT62VR 6RD Dominator Cooling Fan Replacement, Cooling Fan: paso 1, imagen 2 de 2
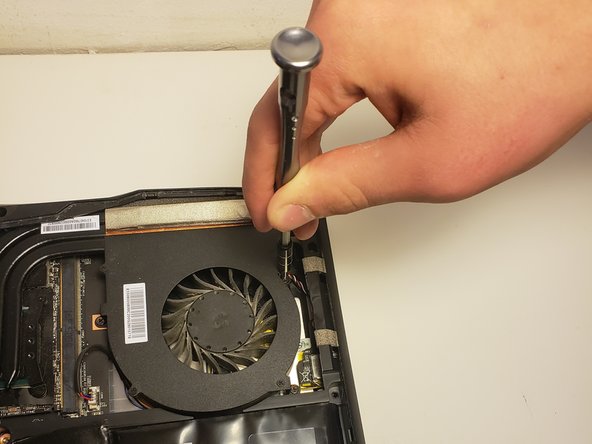
    • Remove the six 1.2mm screws on the bottom plate of the laptop using a JIS #0 screwdriver.

  2. MSI GT62VR 6RD Dominator Cooling Fan Replacement: paso 2, imagen 1 de 3 MSI GT62VR 6RD Dominator Cooling Fan Replacement: paso 2, imagen 2 de 3 MSI GT62VR 6RD Dominator Cooling Fan Replacement: paso 2, imagen 3 de 3
    • Insert the plastic opening tools into the seam on the back plate of the laptop.

    • A popping sound may come from your device while you remove the backplate.

    • Pry the back plate up.

    • Slide the plastic opening tool around the laptop's edge slowly until the backplate is completely removed.

  3. MSI GT62VR 6RD Dominator Cooling Fan Replacement: paso 3, imagen 1 de 2 MSI GT62VR 6RD Dominator Cooling Fan Replacement: paso 3, imagen 2 de 2
    • Remove the three 2.0mm screws using the JIS #0 screwdriver.

  4. MSI GT62VR 6RD Dominator Cooling Fan Replacement: paso 4, imagen 1 de 2 MSI GT62VR 6RD Dominator Cooling Fan Replacement: paso 4, imagen 2 de 2
    • The white plastic clip secures the fan wires to the laptop.

    • Unplug the white clip by grasping it and wiggling it back and forth .

    • Do not pull the clip out by the wires themselves.

Conclusión

To reassemble your device, follow these instructions in reverse order.

Una persona más ha completado esta guía.

0 comentarios

Agregar Comentario

Ver Estadísticas:

Ultimas 24 horas: 0

Ultimos 7 días: 2

Ultimos 30 días: 3

Todo El Tiempo: 1,526