Esta versión puede contener ediciones incorrectas. Cambie a la última instantánea verificada.
Qué necesitas
-
Este paso está sin traducir. Ayuda a traducirlo
-
Remove the eleven 5mm screws with a Phillips #1 screwdriver.
-
Remove the four 2.5mm screws with a Phillips #1 screwdriver.
-
-
Este paso está sin traducir. Ayuda a traducirlo
-
Remove the bottom plate from the laptop. Using a prying tool to slide between the bottom plate and chassis will result in easier removal.
-
-
Este paso está sin traducir. Ayuda a traducirlo
-
Remove the four 2.5mm screws using a Phillips #1 bit.
-
-
Este paso está sin traducir. Ayuda a traducirlo
-
Carefully pry the screen assembly from the chassis on both sides. Use caution as the cable to the screen is located on the right bracket.
-
-
-
Este paso está sin traducir. Ayuda a traducirlo
-
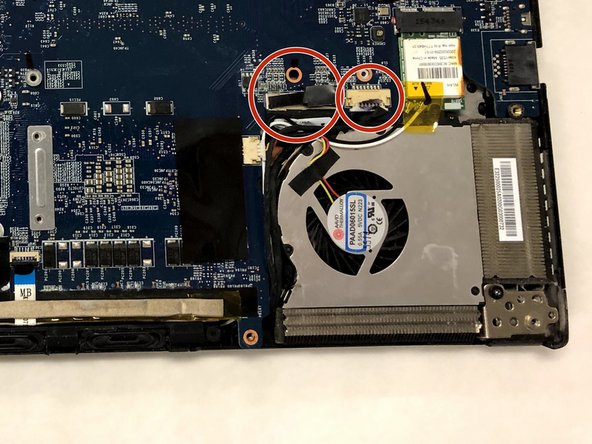
Lay the components out as shown.
-
The rightmost of the two cable connections is located under sticky tape. Remove the tape to access it and unseat from the connection.
-
The other connection is removed by gently pulling up on the black grip tape.
-
-
Este paso está sin traducir. Ayuda a traducirlo
-
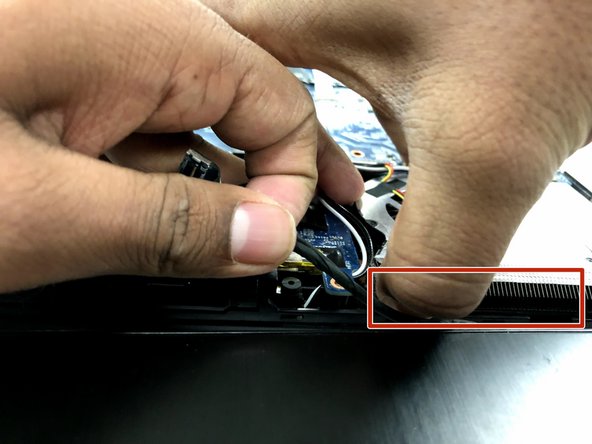
Gently feed both connections under the red, white, and yellow cables from the fan.
-
Note that both cables will meet and form a singular cable.
-
-
Este paso está sin traducir. Ayuda a traducirlo
-
Gently lift up on the back of the fan and remove the routed cable.
-
-
Este paso está sin traducir. Ayuda a traducirlo
-
Using a prying tool, find the seam where the two pieces of screen meet and begin separating them.
-
Use caution, as there is glue and snapping clips holding them together.
-
Work around the perimeter, separating the pieces with the prying tool as you go.
-
-
Este paso está sin traducir. Ayuda a traducirlo
-
Locate the metal bracket the cable is woven through.
-
Unweave the cable from the bracket. This will give you extra length to work with the screen.
-
-
Este paso está sin traducir. Ayuda a traducirlo
-
Remove two 2.5mm screws with a Phillips #1 screwdriver.
-
-
Este paso está sin traducir. Ayuda a traducirlo
-
Remove the screen.
-
Gently remove the yellow tape and then remove the connector.
-
-
Este paso está sin traducir. Ayuda a traducirlo
-
The defective screen is now completely removed and ready to be replaced.
-


Cancelar: No complete esta guía.
2 personas más completaron esta guía.
Equipo

IUPUI, Team S1-G1, Wilson Fall 2018 Miembro de IUPUI, Team S1-G1, Wilson Fall 2018
IUPUI-WILSON-F18S1G1
4 Miembros
1 Guía escrita