Saltar al contenido principal

MSI GP62MVR 6RF Leopard Pro Fans Replacement

Qué necesitas

  1. MSI GP62MVR 6RF Leopard Pro Fans Replacement, Bottom Cover: paso 1, imagen 1 de 2 MSI GP62MVR 6RF Leopard Pro Fans Replacement, Bottom Cover: paso 1, imagen 2 de 2
    • Place the laptop upside down.

    • Remove the sixteen 5.5 mm screws with a Phillips #0 screwdriver.

  2. MSI GP62MVR 6RF Leopard Pro Fans Replacement: paso 2, imagen 1 de 2 MSI GP62MVR 6RF Leopard Pro Fans Replacement: paso 2, imagen 2 de 2
    • Use the Jimmy tool to evenly pry loose the bottom cover.

    • Ensure that all sides are detached from the plastic hinging before attempting to remove the bottom cover.

  3. MSI GP62MVR 6RF Leopard Pro Fans Replacement: paso 3, imagen 1 de 1
    • Remove the back cover.

    • Touching circuitry could damage components or result in personal shock; it is recommended that you now wear latex gloves to prevent both issues.

  4. MSI GP62MVR 6RF Leopard Pro Fans Replacement, Fans: paso 4, imagen 1 de 2 MSI GP62MVR 6RF Leopard Pro Fans Replacement, Fans: paso 4, imagen 2 de 2
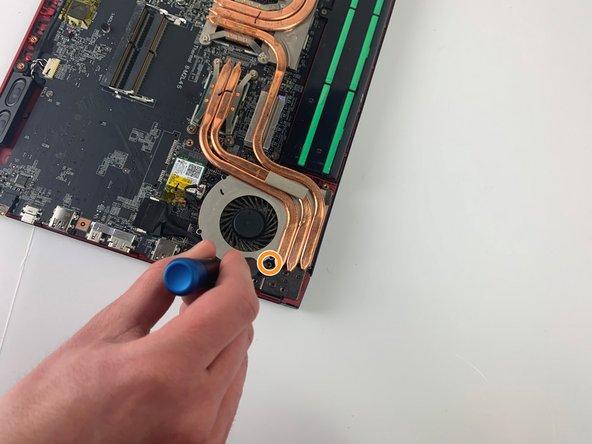
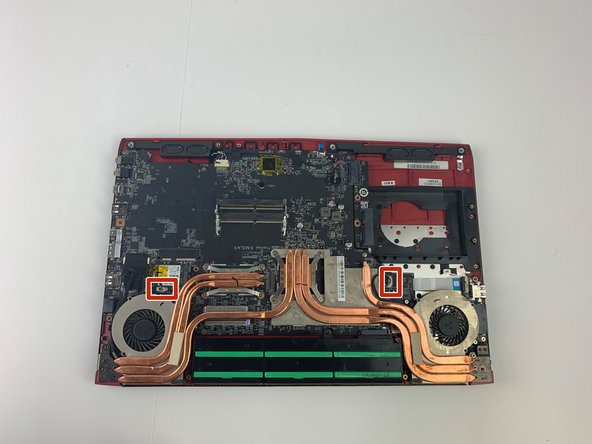
    • Remove the eight 4.5 mm screws that hold the heat sink to the motherboard with a Phillips #0 screwdriver.

    • Remove the four 4.5 mm screws holding the fan in place also using a Phillips #0 screwdriver.

    • Watch for the screw hidden under the wires highlighted in the second picture.

  5. MSI GP62MVR 6RF Leopard Pro Fans Replacement: paso 5, imagen 1 de 2 MSI GP62MVR 6RF Leopard Pro Fans Replacement: paso 5, imagen 2 de 2
    • Disconnect both power cables for the fans.

    • Make sure to pinch the power cables. It may require a bit of force.

  6. MSI GP62MVR 6RF Leopard Pro Fans Replacement: paso 6, imagen 1 de 3 MSI GP62MVR 6RF Leopard Pro Fans Replacement: paso 6, imagen 2 de 3 MSI GP62MVR 6RF Leopard Pro Fans Replacement: paso 6, imagen 3 de 3
    • Using the Jimmy tool, remove the adhesive pads securing the fans to the board.

  7. MSI GP62MVR 6RF Leopard Pro Fans Replacement: paso 7, imagen 1 de 1
    • Remove the black adhesive.

  8. MSI GP62MVR 6RF Leopard Pro Fans Replacement: paso 8, imagen 1 de 1
    • Separate the heat sink from the tab on the side holding the fan in place.

  9. MSI GP62MVR 6RF Leopard Pro Fans Replacement: paso 9, imagen 1 de 1
    • Remove the three 3.5 mm screws on each fan holding the fan to the heat sink using a Phillips #0 screwdriver.

Conclusión

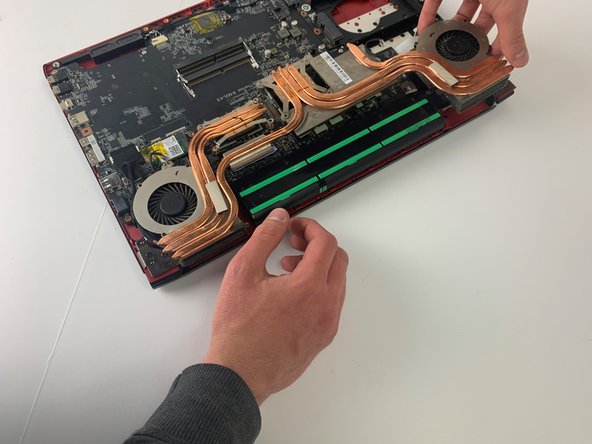
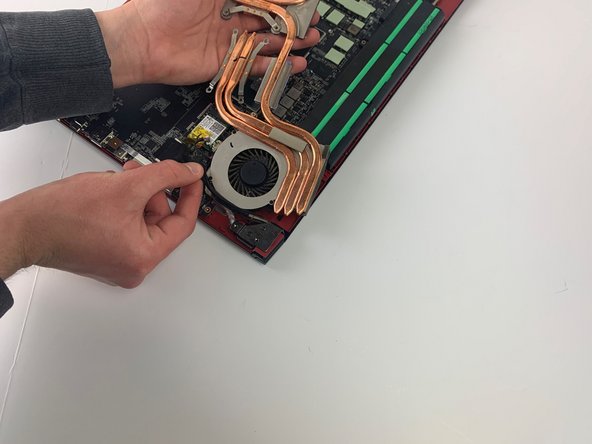
To reassemble your device, follow these instructions in reverse order.

0 comentarios

Agregar Comentario

Ver Estadísticas:

Ultimas 24 horas: 1

Ultimos 7 días: 9

Ultimos 30 días: 23

Todo El Tiempo: 1,204