Saltar al contenido principal

Esta guía ha sufrido modificaciones. Revisa la última versión sin revisar.

MSI GP60 2PE Leopard Hard Drive Replacement

Qué necesitas

  1. MSI GP60 2PE Leopard Hard Drive Replacement, Battery: paso 1, imagen 1 de 1
    • Flip MSI GP60 2PE Leopard, so that the back is facing up.

  2. MSI GP60 2PE Leopard Hard Drive Replacement: paso 2, imagen 1 de 1
    • Find the unlock tab located on the upper right side of the device, then slide it to the right.

  3. MSI GP60 2PE Leopard Hard Drive Replacement: paso 3, imagen 1 de 3 MSI GP60 2PE Leopard Hard Drive Replacement: paso 3, imagen 2 de 3 MSI GP60 2PE Leopard Hard Drive Replacement: paso 3, imagen 3 de 3
    • Slide and hold the release tab on the left side of the battery, so that you can remove the battery.

  4. MSI GP60 2PE Leopard Hard Drive Replacement: paso 4, imagen 1 de 3 MSI GP60 2PE Leopard Hard Drive Replacement: paso 4, imagen 2 de 3 MSI GP60 2PE Leopard Hard Drive Replacement: paso 4, imagen 3 de 3
    • While holding the release tab, remove the battery slowly.

  5. MSI GP60 2PE Leopard Hard Drive Replacement, Back Panel: paso 5, imagen 1 de 1
    • Flip the device over so the back is facing up.

  6. MSI GP60 2PE Leopard Hard Drive Replacement: paso 6, imagen 1 de 2 MSI GP60 2PE Leopard Hard Drive Replacement: paso 6, imagen 2 de 2
    • Remove the four 5mm screws from the back of the device using a Phillips #00 screwdriver.

    • There is a screw located under the battery; lift the battery up to access it.

  7. MSI GP60 2PE Leopard Hard Drive Replacement: paso 7, imagen 1 de 2 MSI GP60 2PE Leopard Hard Drive Replacement: paso 7, imagen 2 de 2
    • Once all four screws are removed, lift the back off.

  8. MSI GP60 2PE Leopard Hard Drive Replacement, Hard Drive: paso 8, imagen 1 de 1
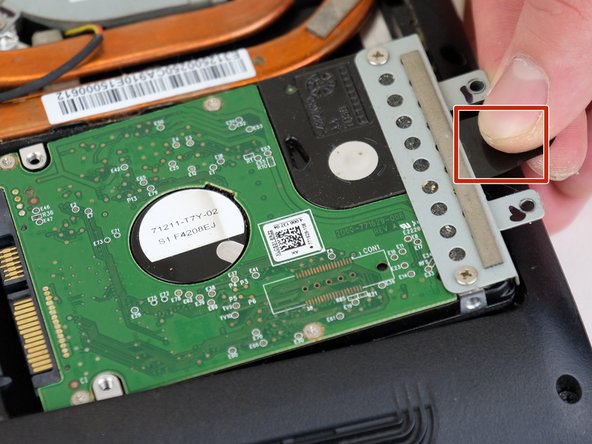
    • Remove the two 5 mm black screws on the right hand side with a Phillips #0 screwdriver.

  9. MSI GP60 2PE Leopard Hard Drive Replacement: paso 9, imagen 1 de 3 MSI GP60 2PE Leopard Hard Drive Replacement: paso 9, imagen 2 de 3 MSI GP60 2PE Leopard Hard Drive Replacement: paso 9, imagen 3 de 3
    • Lift the hard drive, then remove from the device. There is a black strip of plastic attached to make the process easier.

Conclusión

To reassemble your device, follow these instructions in reverse order.

3 personas más completaron esta guía.

0 comentarios

Agregar Comentario

Ver Estadísticas:

Ultimas 24 horas: 0

Ultimos 7 días: 5

Ultimos 30 días: 18

Todo El Tiempo: 1,381