Esta versión puede contener ediciones incorrectas. Cambie a la última instantánea verificada.
Qué necesitas
-
Este paso está sin traducir. Ayuda a traducirlo
-
With the laptop closed and upside down, unscrew the nineteen 5.5mm Phillips #1 screws that keep the back cover in place.
-
-
Este paso está sin traducir. Ayuda a traducirlo
-
Use a Phillips screwdriver to remove the three screws along the edge of the optical drive bay.
-
-
-
Este paso está sin traducir. Ayuda a traducirlo
-
Using your fingers, gently loosen the edges of all four sides of the back cover.
-
Gently pull off the back cover.
-
-
Este paso está sin traducir. Ayuda a traducirlo
-
Unscrew the single 5.5mm Phillips #1 screw keeping the battery secure.
-
-
Este paso está sin traducir. Ayuda a traducirlo
-
Grab the battery with your fingers and gently pull it up and away from the rest of the laptop.
-
-
Este paso está sin traducir. Ayuda a traducirlo
-
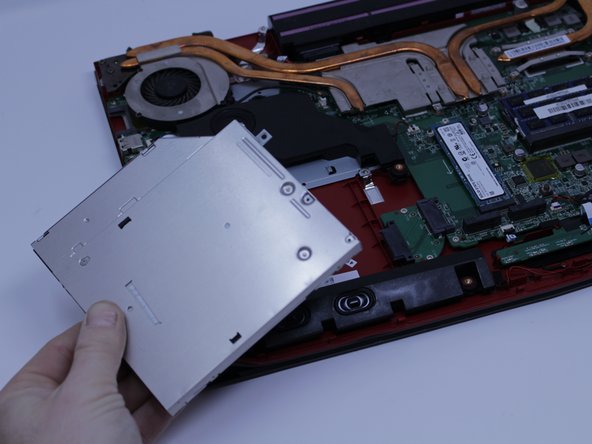
Carefully slide the Optical Drive off of the SATA connector.
-
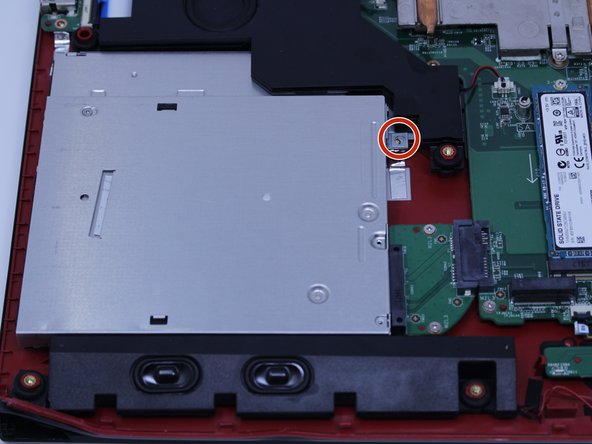
The red marker shows the location for where the retaining screw comes through the back panel to hold the Optical Drive.
-


Cancelar: No complete esta guía.
Una persona más ha completado esta guía.
Equipo

Central Washington University, Team S1-G2, Pengilly Fall 2017 Miembro de Central Washington University, Team S1-G2, Pengilly Fall 2017
CWU-PENGILLY-F17S1G2
4 Miembros
4 Guías creadas
2 comentarios
So you don’t have power running through it while working on it.