Introducción
Asegúrate de que esté apagado y de que se haya quitado la batería antes de intentar este reemplazo.
Qué necesitas
-
-
La tapa del compartimento de las pilas se encuentra en la parte superior del ratón. La costura que atraviesa horizontalmente el mouse es la parte superior de la cubierta.
-
Hay un botón para abrir la cubierta. Se encuentra en la parte inferior del ratón. es posible que debas presionar con fuerza este botón para abrir la cubierta.
-
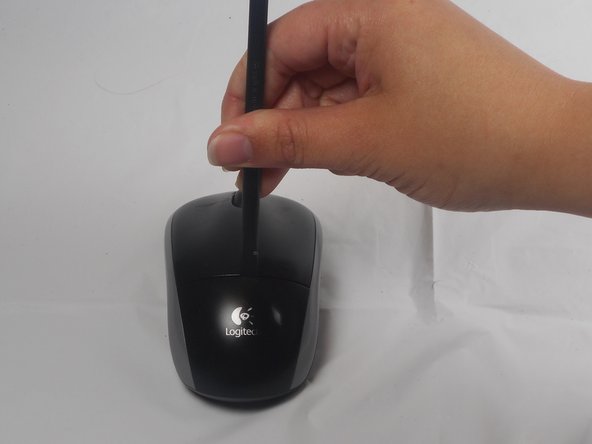
Si el botón no funciona, deberás hacer palanca para quitar la tapa. Puedes usar sus uñas o una herramienta de palanca para hacer esto, como se ve en la tercera imagen.
-
-
-
Recuerda insertar la batería nueva en la misma orientación que la anterior. El extremo positivo (más) debe estar de espaldas a los botones.
After replacing battery light goes on then off. I tried it twice. Do I need a new part.
After replacing battery the remote green light goes on then off. I tried it twice
What do u mean reverse order?
The laser light did not go on
Thank you this worked nicely
Thanks for this!
-
-
-
-
Usa tu uña para quitar con cuidado las dos pegatinas antideslizantes del extremo grueso (sin botón) de la parte inferior del mouse para revelar dos tornillos de cabeza Philips. Quítalos, luego suelta la cubierta inferior. Ojo al polvo. Quita los botones; ambos están unidos por un tornillo Phillips de 0,5 mm. en el centro de la cubierta superior.
-
-
-
El botón ahora solo está unido por un pequeño voladizo cerca del frente. Necesitarás usar la herramienta de palanca para empujar la placa del botón fuera de este voladizo como se muestra.
-
La placa del botón debe poder retirarse por completo en este punto.
-
-
-
Utiliza la herramienta de palanca para quitar la rueda de desplazamiento. La rueda se mantiene en su lugar mediante dos clavijas que se adhieren al soporte de plástico.
-


Para volver a armar tu dispositivo, sigue estas instrucciones en orden inverso.
Para volver a armar tu dispositivo, sigue estas instrucciones en orden inverso.
Cancelar: No complete esta guía.
9 personas más completaron esta guía.
Un agradecimiento especial a estos traductores:
100%

¡ Francisco Javier Saiz Esteban nos está ayudando a reparar el mundo! ¿Quieres contribuir?
Empezar a traducir ›

Equipo

USF Tampa, Team 1-1, Watkins Winter 2015 Miembro de USF Tampa, Team 1-1, Watkins Winter 2015
USFT-WATKINS-W15S1G1
4 Miembros
28 Guías creadas
6 comentarios
glad I was able to find this info on disassembly. Gave it a good cleaning and works better than it did before. Had the Phillips screwdriver. and used another small screwdriver and a small pocket knife to pry with. Be gentle - doesn’t look like it would take much force to break those plastic bits.
Thanks! Mouse wheel windows were blocked by lint.
Very useful. Cleaned coffee out of mouse wheel spokes/windows and off of chipboard. Works better than before. Thanks!
Probably the BROWN stuff wasn’t coffee, I too cleaned the spokes/windows. the brown stuff is oil from out hands which lands on scroll wheel, then by heat gets transferred to the spokes. touch a finger on the mirror, the fingerprint on the mirror is because of OIL on hands. it is the same oil in that mouse wheel spokes.
There is a spring here connected to the wheel. Seems to be the thing to give tactical feedback when scrolling. It fell out when I took out the wheel not 100% how to put it back
If the 2 main (left/right) microswitches are failing - 1) re-melt the solder joints adding a tiny bit of fresh lead solder - this will get rid of dry solder joints and 2) clean the microswitches (logitech brand). You disasemble them by gently prying the latches on the long sides - small carpet knife is useful. There is a tiny white/semi-translucent bit of plastic - the push button , don’t lose it. Once the mechanism, spring and tiny ball contact are exposed, you can clean the contacts (rear of the microswitch) - I recommend spraying a bit with contact spray first (not the WD40 lubricant type!), then cut a 3-4mm wide and 3-4cm long stripe of sand paper (1000 grit) and clean both sides of ball contact, then spray the contact spray again. You can also take the spring/blade off and clean the recess where the blade is mounted against and touches the top switch pin. Careful with assembly of the blade - the top and middle pins have recesses where the blade and the blade spring should sit. Fiddly but easily doable.
The battery lid lifts up from the back. It does not slide back.
Bob Peters - Contestar
U need to keep clean…& battery compartment needs gently pried off. Make sure to put back lid cover, pushing down on black prong..OR will not make contact.
cconradmoore - Contestar
Thanks to u, i succeeded
aresa0519 - Contestar