Introducción
If your device isn’t properly loading or is slow to load files, the SSD may be corrupt. Follow these instructions to replace the SSD in your Lenovo Yoga 710-11ISK.
Qué necesitas
-
-
Make sure back panel is facing up.
-
Remove eleven 5mm screws with the T5 Torx Screwdriver.
-
-
-
-
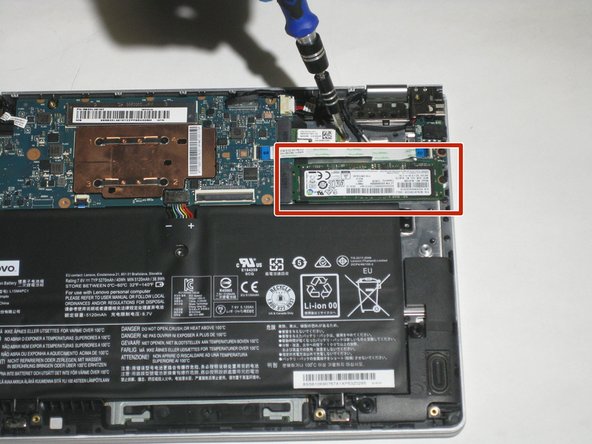
Use a Phillips #00 screwdriver to remove the single 3 mm screw on the right of the SSD.
-


Casi Terminas!
To reassemble your device, follow these instructions in reverse order.
Conclusión
To reassemble your device, follow these instructions in reverse order.
Equipo

The Citadel Military College of South Carolina, Team S2-G19, Eggleston Spring 2021 Miembro de The Citadel Military College of South Carolina, Team S2-G19, Eggleston Spring 2021
CMCSC-EGGLESTON-S21S2G19
3 Miembros
3 Guías creadas