Introducción
Top cover cracked at the hinges? Broken touch-screen? You want to change from touch to non-touch or the other way round?
Replace your display assembly!
You will need a working display assembly, which could be hard to come by. I took it from an old working T440s I bought for 170€.
Optional: In this guide we will also cover how to loosen the hinges to take stress from the cover.
(Old laptop sponsored by my dear friend Mohammad and my father :D)
Qué necesitas
-
-
Take out the external battery (or the cover if you have no external battery)
-
Take out all 8 screws
-
Carefully start prying the back cover off by inserting, sliding and turning the pick. I used the plastic picks just to make sure I didn't break anything.
-
Then lift the cover off towards yourself
-
-
-
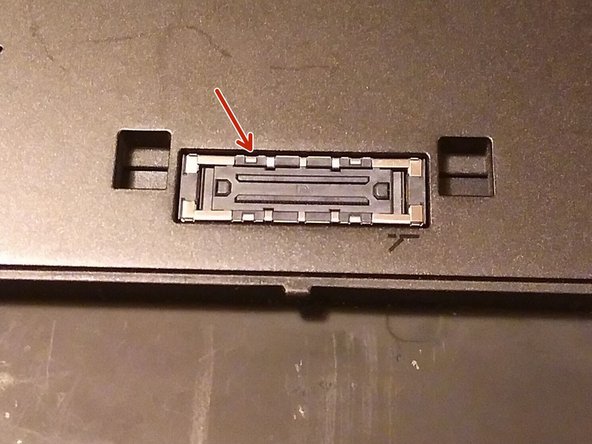
Take the prying tool and carefully lift the metal clip on the flat connector above the right hinge.
-
Now pull it out towards you
-
Finally disconnect all antenna cables found (2 or 4, depending on your specs)
-
Disconnect them by either prying them off with the plastic tool or pulling upwards carefully from the cable itself.
-
Now carefully pull them out of the slit with a tweezer (the prying tool is too sharp and could damage the cable coating).
-
-
-
Now take out these 2 screws and take of the metal cover
-
Then pull upwards on the blue flap to disconnect the cable.
-
-
-
First take out all 5 screws on the hinges.
-
Then slightly (10-15 cm) open the laptop from the back (while still upside down) and close it again. This will disconnect the hinges
-
How fold the hinges outward so we can take off the display assembly.
-
-
-
-
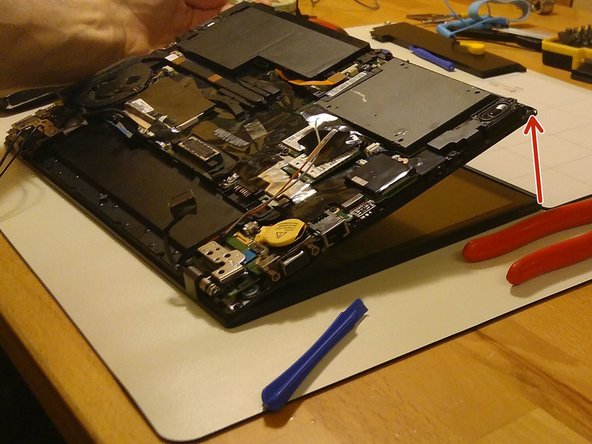
Now the cables and hinges are out of the way you can just disconnect the laptop from its lid by pushing it away from you sliding over the display (see picture).
-
Now separate them and place the new display assembly below just where the old one was.
-
-
-
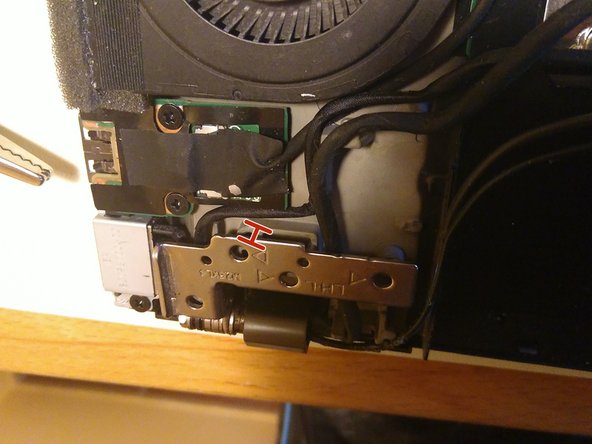
We will want to turn the nut on one end of the hinge.
-
Push the hinge completely open, so it's out of the way.
-
Then take the pliers and turn the last nut slowly counterclockwise (1/6 to 2/6 of a turn should suffice)
-
Do the same with the other hinge
-
If you later notice your hinges are too weak to sustain the lid (or still too tight) just work your way back to this step and tighten/loosen them accordingly.
-
-
-
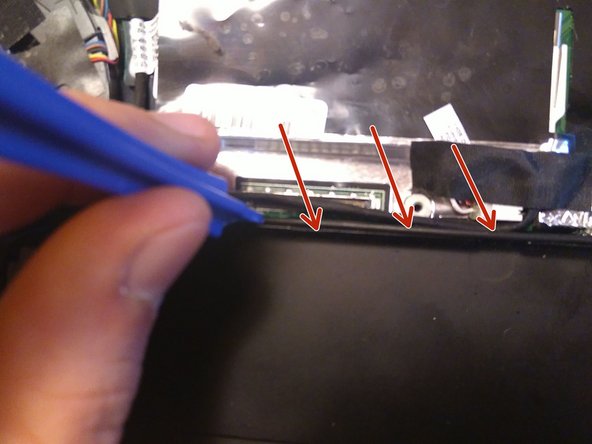
Put the antenna cables back into the latches:
-
start with the black cable
-
then fit the blue cable which should block them in place
-
(push sideways with the opening tool)
-
Then push them down into the slit next to the display adapter (push with the flat top side of the opening tool)
-
Now reconnect all the cables disconnected in steps 2 and 3
-
(for the antenna cables it helps to hold them in place with the tweezers and then push them into their socket with the flat side of an opening tool)
-
-
-
Flip the hinges back onto the laptop, but they still won't fit
-
Now lift the laptop like when you disconnected the hinges while it's lifted, push the hinges in place.
-
Then screw them back on. (only the holes with the triangle next to them had screws)
-
-
-
Now open the laptop slightly and hit the power button as seen in the picture.
-
If it lights up, hold it until it turns off again. Skip to step 11.
-
If it doesn't light up continue with step 10.
-
-
-
First try just disconnecting and reconnecting the internal battery. Then try turning the laptop on as in the last step.
-
If it's still not working, disconnect both the internal and the CMOS battery and hit both marked buttons. Then reconnect both batteries.
-
(in this case the date will have reset and on the next startup the BIOS will complain about it. You can either set it manually in the bios or boot up the OS which takes care of setting date and time for you)
-
-
-
Now put back cover back on and screw it tight.
-
If the cover doesn't fit tightly at the docking-station port, make sure the parts left of it under the black tape or the CMOS battery don't protrude.
-


Congratulations to your new display and lid cover!
Congratulations to your new display and lid cover!