Saltar al contenido principal

Lenovo ThinkPad X100e Keyboard Replacement

Qué necesitas

  1. Lenovo ThinkPad X100e Keyboard Replacement, Keyboard: paso 1, imagen 1 de 2 Lenovo ThinkPad X100e Keyboard Replacement, Keyboard: paso 1, imagen 2 de 2
    • Remove battery by flipping the laptop over and pressing the two tabs inward and place aside

    • For detailed instructions on how to remove a battery, please view the (battery replacement link).

  2. Lenovo ThinkPad X100e Keyboard Replacement: paso 2, imagen 1 de 1
    • Using a magnetic screwdriver fit with a PH0 bit, unscrew the first 7 screws on the back of the device the screws should be bound to the panel.

    • Pry up the back panel and set it aside with the battery.

  3. Lenovo ThinkPad X100e Keyboard Replacement: paso 3, imagen 1 de 2 Lenovo ThinkPad X100e Keyboard Replacement: paso 3, imagen 2 de 2
    Herramienta utilizada en este paso:
    Magnetic Project Mat
    $19.95
    Comprar
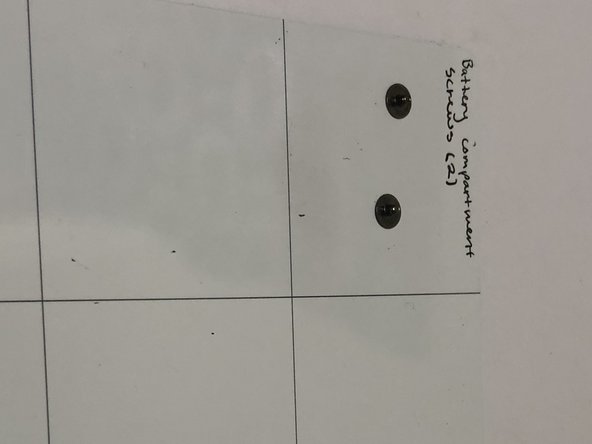
    • Remove the two retaining screws where the battery is located. Set the two screws aside on the magnetic mat and label one square “battery compartment screws (2)” like so.

  4. Lenovo ThinkPad X100e Keyboard Replacement: paso 4, imagen 1 de 3 Lenovo ThinkPad X100e Keyboard Replacement: paso 4, imagen 2 de 3 Lenovo ThinkPad X100e Keyboard Replacement: paso 4, imagen 3 de 3
    • Turn the device over and open the cover.

    • Using the prying tool, pry the keyboard up from the top left side of the keyboard then work your way all the way around the keyboard until it is only attached by two ribbon wires.

  5. Lenovo ThinkPad X100e Keyboard Replacement: paso 5, imagen 1 de 2 Lenovo ThinkPad X100e Keyboard Replacement: paso 5, imagen 2 de 2
    • using the pryer, pull the little black tab above the blue ribbon up, now you should be able to pull the wires straight out and fully remove your keyboard.

  6. Lenovo ThinkPad X100e Keyboard Replacement: paso 6, imagen 1 de 1
    • Get your replacement keyboard or reinstall your keyboard to see if it was just a faulty connection in the device.

Conclusión

To reassemble your device, follow these instructions in reverse order.

Una persona más ha completado esta guía.

0 comentarios

Agregar Comentario

Ver Estadísticas:

Ultimas 24 horas: 0

Ultimos 7 días: 4

Ultimos 30 días: 18

Todo El Tiempo: 991