Introducción
This is a how-to guide on how to swap out the trackpad assembly in your Thinkpad X1 Carbon Gen 9.
Note: I've already done this repair once, which is why the sticker you need to peel up looks ripped in the photos. For your machine, unless it's already been repaired before, will have an intact sticker. The sticker is quite annoying to peel up. Be gentle though.
Qué necesitas
-
-
Power down your machine completely before opening your device.
-
Flip the device over and locate the five (5) screws on the bottom chassis.
-
Unscrew these five (5) screws. NOTE: These are captive screws and will not come out. Using a spudger or similar gentle pry tool, remove the bottom lid.
-
-
-
Remove the battery by locating the six (6) screws circled in red.
-
NOTE: There are no cables connecting the battery to the motherboard. The battery is seated in it's socket and held in place using gravity and screws.
-
Once the six (6) screws have been removed, gently life the battery out of the case and set it aside.
-
-
-
-
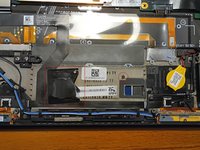
Remove the visible screw encircled in the photo.
-
To find and remove the next screw, Gently peel up the black tape covering the trackpad data cable boxed in red.
-
Once peeled up, undo the screw show in the second photo encircled in red.
-
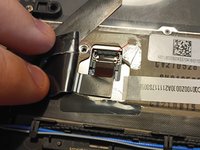
Flip up the black plastic tab on the trackpad data cable using a spudger.
-
-
-
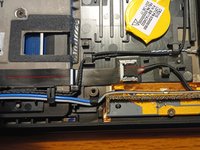
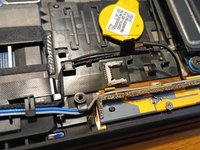
Underneath the data cable, you will find the two remaining screws. Remove them to unseat the trackpad assembly from the chassis.
-
You can now open the lid and the trackpad will be loose. You can take this time to swap it for a new trackpad assembly.
-
Preform these steps in reverse to put everything back together.
-


To reassemble your device, follow these instructions in reverse order.
To reassemble your device, follow these instructions in reverse order.
Cancelar: No complete esta guía.
Una persona más ha completado esta guía.