Introducción
Si necesitas reemplazar la pantalla LCD de tu Lenovo ThinkPad T480, sigue esta guía. La pantalla LCD o pantalla de cristal líquido es un tipo de pantalla plana. Utiliza una película de cristal líquido entre placas de vidrio que, cuando se aplica voltaje, sus propiedades ópticas cambian y las imágenes se muestran u ocultan.
Si se produce un daño o falla, es posible que notes que faltan píxeles, el color podría estar apagado o la pantalla podría romperse si se cae o sufre una caída.
Antes de iniciar esta reparación, asegúrate de desactivar la batería interna, apaga el dispositivo y desenchúfalo del cable de carga.
Qué necesitas
-
-
Voltea la computadora portátil para que se vea la parte inferior del dispositivo.
-
-
-
Con el destornillador Phillips n.º 1, afloja los seis tornillos cautivos.
-
-
-
Inserta la herramienta de apertura de plástico azul en el espacio entre la carcasa inferior y el chasis.
-
Desliza la herramienta de apertura alrededor del perímetro de la carcasa para liberar los clips que sujetan la carcasa y el chasis juntos.
-
Si parece que la parte del compartimento de la batería de la tapa trasera no está suelta, puede que estos clips estén sujetando la tapa al portátil. Utiliza tu herramienta de apertura para hacer palanca en los clips y vuelve a intentar quitar la tapa.
-
Retira la caja trasera.
I found a tough spudger (or even better a plectrum) is best here as the clips, although easy to separate, hold the case firmly leaving a tight gap which a soft spudger may fail to enter.
Hi Benjamin, thanks for the tip!
-
-
-
Con el destornillador Phillips n.º 1, quita los dos tornillos de 4,6 mm que sujetan la batería interna al marco.
-
-
-
-
Con el destornillador Phillips n.º 1, quita dos tornillos de 4,3 mm de cada bisagra (cuatro en total).
These screws were tricky for me. Be careful not to strip. I had success with a Phillips #2 and needed to apply a decent amount of vertical force into the screw before turning.
-
-
-
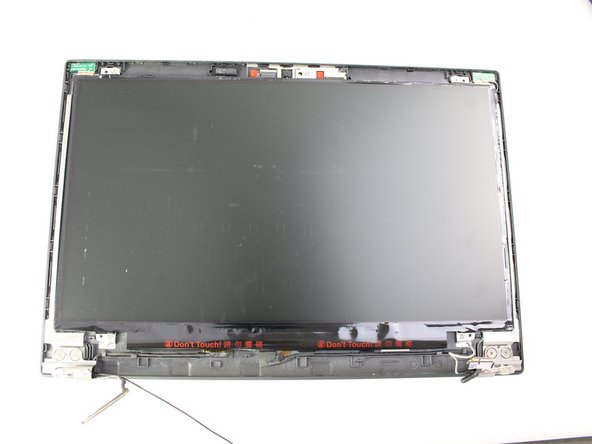
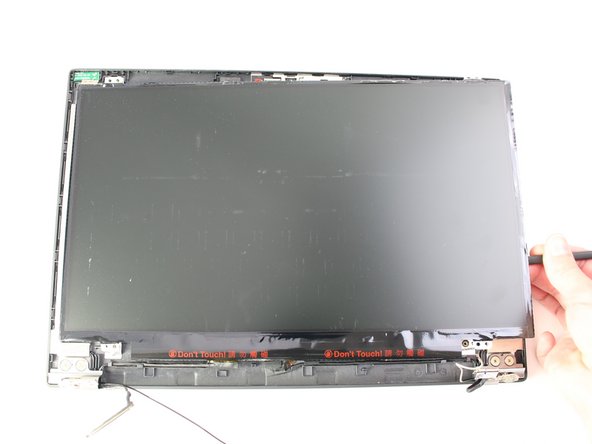
Usa el spudger de metal para crear un espacio entre el bisel y la tapa y con cuidado deshaz los clips alrededor del perímetro del bisel.
-
-
-
Retira los cuatro tornillos Phillips n.º 1 de 3,0 mm de las cuatro esquinas de la pantalla LCD.
-
Levántalo con el spudger y dale la vuelta suavemente hacia ti.
-


Para volver a armar tu dispositivo, sigue los pasos anteriores en orden inverso.
Lleva tus desechos electrónicos a un R2 o e-Stewards reciclador certificado.
¿La reparación no salió según lo planeado? Prueba algunas soluciones de problemas básicos, o solicita ayuda a nuestra comunidad de Respuestas.
Cancelar: No complete esta guía.
3 personas más completaron esta guía.
Un agradecimiento especial a estos traductores:
100%

¡ Francisco Javier Saiz Esteban nos está ayudando a reparar el mundo! ¿Quieres contribuir?
Empezar a traducir ›


10 comentarios
If the internal battery is disabled why do you need to remove it?
Hi Dan, if you disconnect the internal battery from the motherboard, (Step 12), you should be fine. We just want to make sure that there is no power to the system and the step to remove the battery is included as a precaution. Thanks!
@sarahw thank you but my question was more about why do you need to physically disconnect the battery if it is already disabled in BIOS?
Hi Dan, the software disconnection is a stopgap to ensure nothing goes wrong while the device is being opened, but the only way to 100% ensure that the motherboard won't accidentally draw power and short a connection is to physically disconnect the battery.
I'm on Batnert on this. Sarah just making everything a hassle when it can be done in under 30 minutes even for the meticulous person. Its like showing people how to cook an instant noodles but instead of showing them the 2 minutes in hot water guide, you're telling people to cut some meat, veggies, mushroom, couple of onion, fried it all a little bit & use some salt or some other seasoning for taste without even telling the person that you can just boiled it in hot water but it might not taste that great without the other ingredients guide. I can just say to follow Batnert but I am following Sarah steps in explaining, so...
Hi Openterminal and Batnert, thank you both for the suggestions. I am sorry I didn't address this sooner. I will work on updating the guide to eliminate the steps you suggested.
You really don't need to disassemble the whole upper lid just to get to the LCD. All you really need is disable the internal battery and then take a spudger to the bezel. The lower part is a bit annoying and might require a bit more force and something like a credit card (there also actually are two more plastic clips to take care of). Then it's just 4 screws and the connector. Still very helpful!
Thanks Jan! I appreciate the tip and info.