Saltar al contenido principal

Lenovo ThinkPad T460 LCD Panel Replacement

Qué necesitas

  1. Lenovo ThinkPad T460 LCD Panel Replacement, External Battery: paso 1, imagen 1 de 3 Lenovo ThinkPad T460 LCD Panel Replacement, External Battery: paso 1, imagen 2 de 3 Lenovo ThinkPad T460 LCD Panel Replacement, External Battery: paso 1, imagen 3 de 3
    • Before you begin this guide, make sure to disable the internal battery, power down your device, and disconnect from any external power sources.

    • Place the laptop so that the bottom is facing upwards.

    • Slide the latch on the left side of the battery to the left until it clicks in place.

  2. Lenovo ThinkPad T460 LCD Panel Replacement: paso 2, imagen 1 de 3 Lenovo ThinkPad T460 LCD Panel Replacement: paso 2, imagen 2 de 3 Lenovo ThinkPad T460 LCD Panel Replacement: paso 2, imagen 3 de 3
    • Slide the latch on the right side of the battery to the right and hold it in place with your thumb.

    • Use your other hand to slide the battery towards the back of the laptop.

    • Lift the battery up and away from the laptop.

  3. Lenovo ThinkPad T460 LCD Panel Replacement, Bottom Cover: paso 3, imagen 1 de 2 Lenovo ThinkPad T460 LCD Panel Replacement, Bottom Cover: paso 3, imagen 2 de 2
    • Loosen the eight captive screws in the bottom cover using a Phillips #1 screwdriver.

  4. Lenovo ThinkPad T460 LCD Panel Replacement: paso 4, imagen 1 de 3 Lenovo ThinkPad T460 LCD Panel Replacement: paso 4, imagen 2 de 3 Lenovo ThinkPad T460 LCD Panel Replacement: paso 4, imagen 3 de 3
    • Insert the flat end of a spudger in between the bottom cover and the rest of the laptop, starting in the lower left corner.

    • Pry the lower left corner of the bottom cover up by a few millimeters.

    • Slide the spudger along the bottom of the laptop to release the clips until you reach the lower right corner.

    • You may hear some snapping noises as the clips are released.

  5. Lenovo ThinkPad T460 LCD Panel Replacement: paso 5, imagen 1 de 2 Lenovo ThinkPad T460 LCD Panel Replacement: paso 5, imagen 2 de 2
    • Slide the spudger along the right and top sides of the bottom cover to release the clips.

    • You may hear some snapping noises as the clips are released.

    • Potential for device damage: If the clips do not release easily, check to ensure that the captive screws are fully loosened. Forcing the clips to detach can crack the bottom cover.

  6. Lenovo ThinkPad T460 LCD Panel Replacement: paso 6, imagen 1 de 2 Lenovo ThinkPad T460 LCD Panel Replacement: paso 6, imagen 2 de 2
    • Use the spudger to pry the upper left corner up by a few millimeters.

    • Pry up the sections of the bottom cover with printed logos of the ports.

    • Potential for device damage: Prying inside the ports themselves can damage your laptop. Be sure to only pry up on the sections of the cover that extend past the ports.

  7. Lenovo ThinkPad T460 LCD Panel Replacement: paso 7, imagen 1 de 2 Lenovo ThinkPad T460 LCD Panel Replacement: paso 7, imagen 2 de 2
    • Use the spudger to pry up the bottom cover in the lower portion of the external battery compartment by a few millimeters.

  8. Lenovo ThinkPad T460 LCD Panel Replacement: paso 8, imagen 1 de 3 Lenovo ThinkPad T460 LCD Panel Replacement: paso 8, imagen 2 de 3 Lenovo ThinkPad T460 LCD Panel Replacement: paso 8, imagen 3 de 3
    • Use both hands to lift the bottom cover up and away from the laptop.

  9. Lenovo ThinkPad T460 LCD Panel Replacement, LCD Assembly: paso 9, imagen 1 de 1
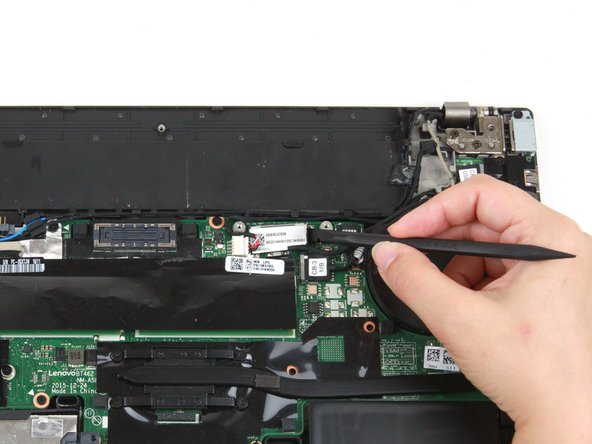
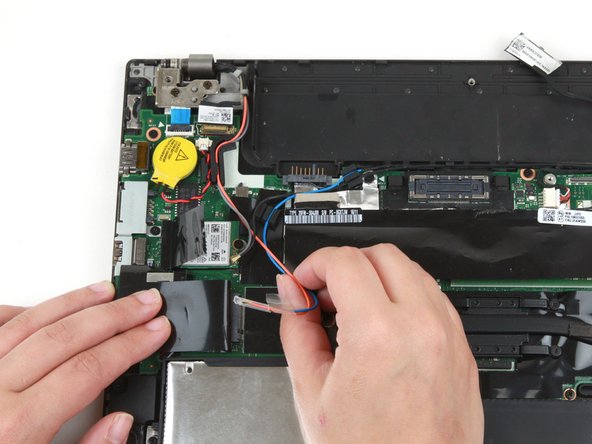
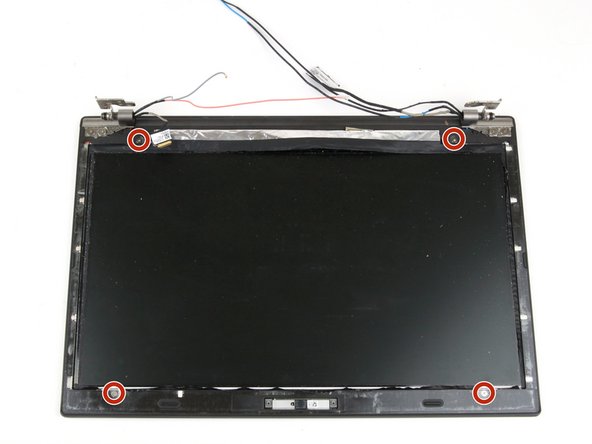
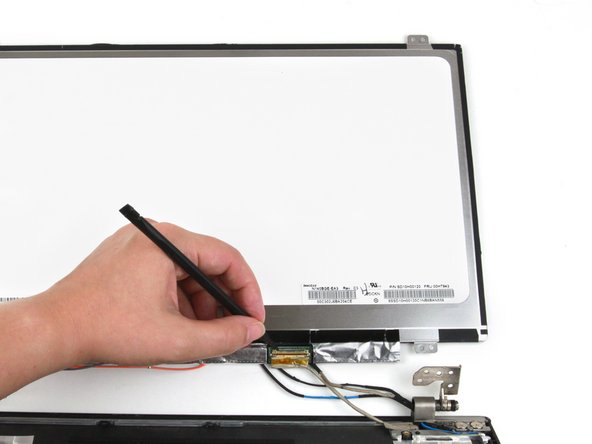
    • Remove the two 3.7 mm screws from the LCD cable bracket using a Phillips #1 screwdriver.

  10. Lenovo ThinkPad T460 LCD Panel Replacement: paso 10, imagen 1 de 3 Lenovo ThinkPad T460 LCD Panel Replacement: paso 10, imagen 2 de 3 Lenovo ThinkPad T460 LCD Panel Replacement: paso 10, imagen 3 de 3
    • Use a pair of tweezers to lift the LCD cable bracket away from the motherboard.

  11. Lenovo ThinkPad T460 LCD Panel Replacement: paso 11, imagen 1 de 2 Lenovo ThinkPad T460 LCD Panel Replacement: paso 11, imagen 2 de 2
    • Use the flat end of a spudger to disconnect the flat-topped LCD cable connector.

  12. Lenovo ThinkPad T460 LCD Panel Replacement: paso 12, imagen 1 de 2 Lenovo ThinkPad T460 LCD Panel Replacement: paso 12, imagen 2 de 2
    • Use your fingers to remove the cable from its slots.

  13. Lenovo ThinkPad T460 LCD Panel Replacement: paso 13, imagen 1 de 2 Lenovo ThinkPad T460 LCD Panel Replacement: paso 13, imagen 2 de 2
    • Use the pointed end of a spudger to lift up the metal clip on the camera/microphone cable.

  14. Lenovo ThinkPad T460 LCD Panel Replacement: paso 14, imagen 1 de 2 Lenovo ThinkPad T460 LCD Panel Replacement: paso 14, imagen 2 de 2
    • Use the flat end of a spudger to detach the camera/microphone cable connector from its socket.

  15. Lenovo ThinkPad T460 LCD Panel Replacement: paso 15, imagen 1 de 2 Lenovo ThinkPad T460 LCD Panel Replacement: paso 15, imagen 2 de 2
    • Use the flat end of a spudger to disconnect the black and gray coaxial cables from the Wi-Fi card.

    • When reassembling, reattach the gray wire on the top and the black wire on the bottom.

  16. Lenovo ThinkPad T460 LCD Panel Replacement: paso 16, imagen 1 de 2 Lenovo ThinkPad T460 LCD Panel Replacement: paso 16, imagen 2 de 2
    • If your laptop has a WWAN card, disconnect the red and blue coaxial cables using the flat end of a spudger.

    • If your laptop does not have a WWAN card, remove the tape holding the red and blue coaxial cables in place.

  17. Lenovo ThinkPad T460 LCD Panel Replacement: paso 17, imagen 1 de 2 Lenovo ThinkPad T460 LCD Panel Replacement: paso 17, imagen 2 de 2
    • Use your fingers to remove the gray and red coaxial cables from their slots along the motherboard.

  18. Lenovo ThinkPad T460 LCD Panel Replacement: paso 18, imagen 1 de 3 Lenovo ThinkPad T460 LCD Panel Replacement: paso 18, imagen 2 de 3 Lenovo ThinkPad T460 LCD Panel Replacement: paso 18, imagen 3 de 3
    • Use your fingers to remove the blue and black coaxial cables from their slots along the top of the motherboard.

  19. Lenovo ThinkPad T460 LCD Panel Replacement: paso 19, imagen 1 de 2 Lenovo ThinkPad T460 LCD Panel Replacement: paso 19, imagen 2 de 2
    • Remove the four 4.7 mm screws from the hinges using a Phillips #1 screwdriver.

  20. Lenovo ThinkPad T460 LCD Panel Replacement: paso 20, imagen 1 de 3 Lenovo ThinkPad T460 LCD Panel Replacement: paso 20, imagen 2 de 3 Lenovo ThinkPad T460 LCD Panel Replacement: paso 20, imagen 3 de 3
    • Lift the bottom of the laptop up by a few inches to rotate the two upper hinges.

    • Place the bottom of the laptop back down.

  21. Lenovo ThinkPad T460 LCD Panel Replacement: paso 21, imagen 1 de 2 Lenovo ThinkPad T460 LCD Panel Replacement: paso 21, imagen 2 de 2
    • Use both of your hands to lift the bottom of the laptop away from the LCD assembly.

  22. Lenovo ThinkPad T460 LCD Panel Replacement, LCD Bezel Assembly: paso 22, imagen 1 de 3 Lenovo ThinkPad T460 LCD Panel Replacement, LCD Bezel Assembly: paso 22, imagen 2 de 3 Lenovo ThinkPad T460 LCD Panel Replacement, LCD Bezel Assembly: paso 22, imagen 3 de 3
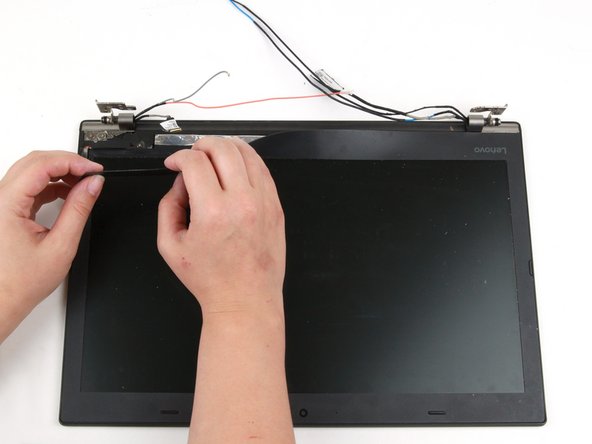
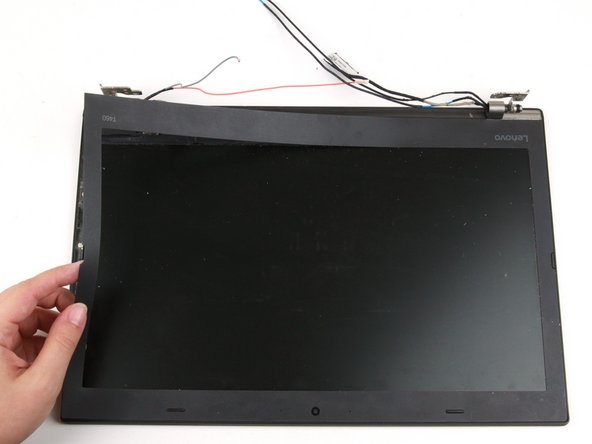
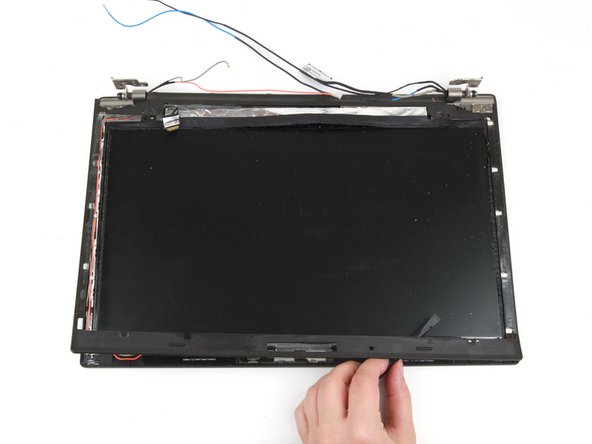
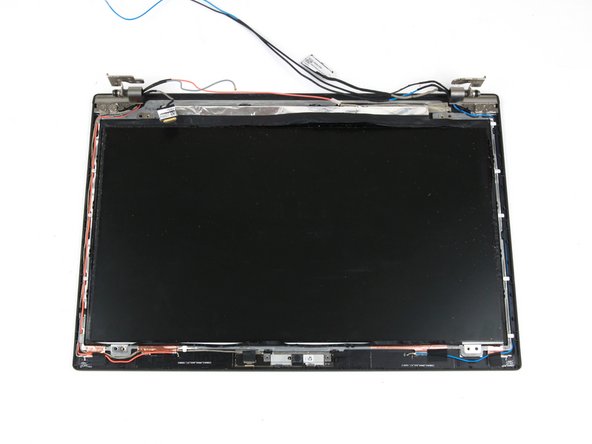
    • Use your hands to peel up the thin LCD bezel sheet from the rest of the display, starting in the area between the hinges.

    • Use your hands to continue peeling the bezel sheet away from the left side of the laptop.

  23. Lenovo ThinkPad T460 LCD Panel Replacement: paso 23, imagen 1 de 3 Lenovo ThinkPad T460 LCD Panel Replacement: paso 23, imagen 2 de 3 Lenovo ThinkPad T460 LCD Panel Replacement: paso 23, imagen 3 de 3
    • Use your hands to continue peeling the bezel sheet away from the bottom and right sides of the laptop.

    • Use both hands to lift the LCD bezel sheet up and away from the laptop.

    • When reassembling, you may have to reapply adhesive beneath the LCD bezel sheet.

  24. Lenovo ThinkPad T460 LCD Panel Replacement: paso 24, imagen 1 de 2 Lenovo ThinkPad T460 LCD Panel Replacement: paso 24, imagen 2 de 2
    • Remove four 3.3 mm screws from the LCD bezel using a Phillips #1 screwdriver.

  25. Lenovo ThinkPad T460 LCD Panel Replacement: paso 25, imagen 1 de 3 Lenovo ThinkPad T460 LCD Panel Replacement: paso 25, imagen 2 de 3 Lenovo ThinkPad T460 LCD Panel Replacement: paso 25, imagen 3 de 3
    • Use the flat end of a spudger to create a gap between the bezel and the display, starting in the upper left corner.

    • Continue to use the spudger around the left side, bottom, and right side of the laptop to detach the clips securing the bezel to the display.

    • You may hear loud snaps when detaching the clips; this is normal.

  26. Lenovo ThinkPad T460 LCD Panel Replacement: paso 26, imagen 1 de 2 Lenovo ThinkPad T460 LCD Panel Replacement: paso 26, imagen 2 de 2
    • Use both hands to lift the bezel up and away from the display assembly.

  27. Lenovo ThinkPad T460 LCD Panel Replacement, LCD Panel: paso 27, imagen 1 de 3 Lenovo ThinkPad T460 LCD Panel Replacement, LCD Panel: paso 27, imagen 2 de 3 Lenovo ThinkPad T460 LCD Panel Replacement, LCD Panel: paso 27, imagen 3 de 3
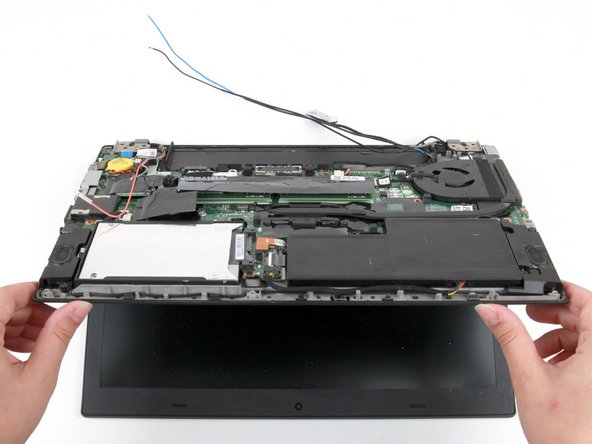
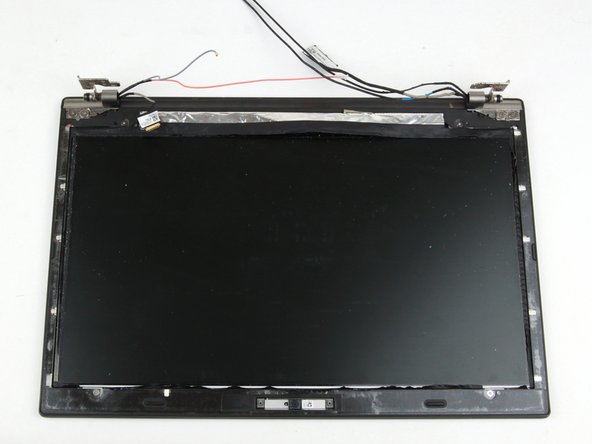
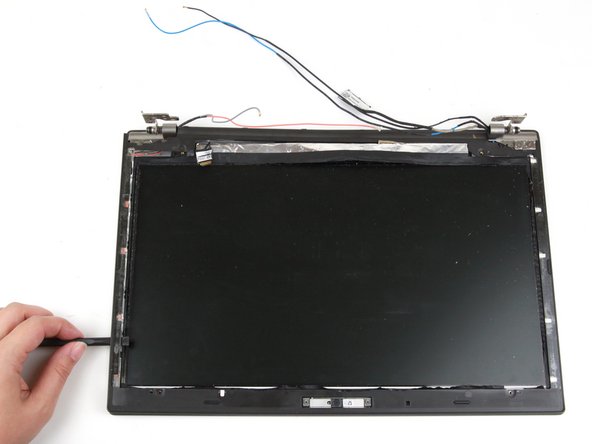
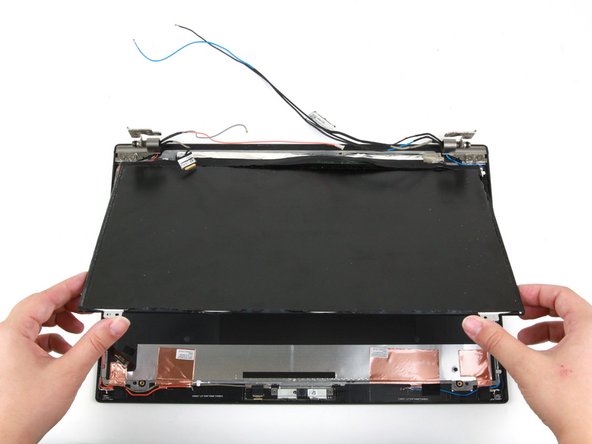
    • Use both hands to lift the bottom corners of the display panel

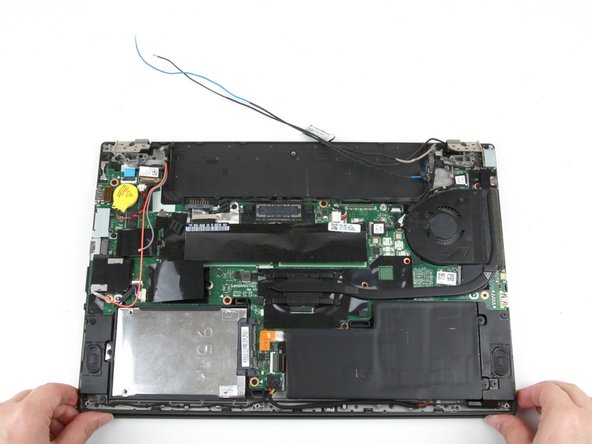
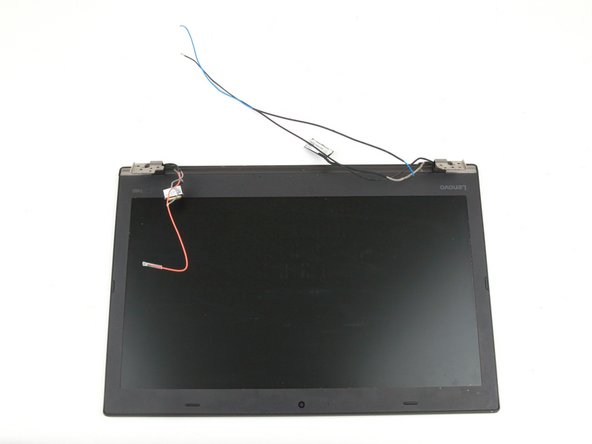
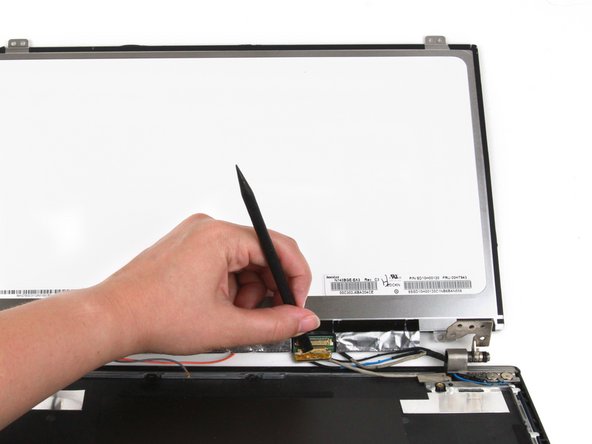
    • Gently flip the display panel over.

    • Potential for device damage: The display cable is still connecting the display panel to the rest of the display assembly, so be sure to flip the display panel over with caution.

  28. Lenovo ThinkPad T460 LCD Panel Replacement: paso 28, imagen 1 de 2 Lenovo ThinkPad T460 LCD Panel Replacement: paso 28, imagen 2 de 2
    • Use the pointed end of a spudger to flip up the metal bar securing the connector.

  29. Lenovo ThinkPad T460 LCD Panel Replacement: paso 29, imagen 1 de 2 Lenovo ThinkPad T460 LCD Panel Replacement: paso 29, imagen 2 de 2
    • Use the flat end of a spudger to disconnect the display cable from its socket.

  30. Lenovo ThinkPad T460 LCD Panel Replacement: paso 30, imagen 1 de 2 Lenovo ThinkPad T460 LCD Panel Replacement: paso 30, imagen 2 de 2
    • Use your hands to remove the display panel from the rest of the display assembly.

Conclusión

To reassemble your device, follow these instructions in reverse order.

Take your e-waste to an R2 or e-Stewards certified recycler.

Repair didn’t go as planned? Try some basic troubleshooting, or ask our Answers community for help.

Kristen Gismondi

Miembro Desde 11/12/14

81,591 Reputación

200 Guías creadas

Equipo

iFixit Miembro de iFixit

Staff

135 Miembros

16,718 Guías creadas

Un comentario

which screws do I need to buy if the ones at the lcd screens are missing? the text says its 3.3mm but is there any certain other description for it?

anyanyany - Contestar

Agregar Comentario

Ver Estadísticas:

Ultimas 24 horas: 0

Ultimos 7 días: 17

Ultimos 30 días: 78

Todo El Tiempo: 1,945