Esta versión puede contener ediciones incorrectas. Cambiar a la última instantánea verificada.
Qué necesitas
-
Este paso está sin traducir. Ayuda a traducirlo
-
Use a screwdriver to remove the six 5.0mm Phillips screws from the bottom housing of the Chromebook.
-
-
Este paso está sin traducir. Ayuda a traducirlo
-
Use a plastic opening tool to pry off the four rubber pegs from the bottom housing.
-
-
Este paso está sin traducir. Ayuda a traducirlo
-
Use a screwdriver to remove the four 5.0mm Phillips screws located under the rubber soles.
-
-
Este paso está sin traducir. Ayuda a traducirlo
-
Flip the laptop over and open the screen.
-
Gently pry the keyboard and trackpad panel away from the bottom housing using a plastic opening tool.
-
-
Este paso está sin traducir. Ayuda a traducirlo
-
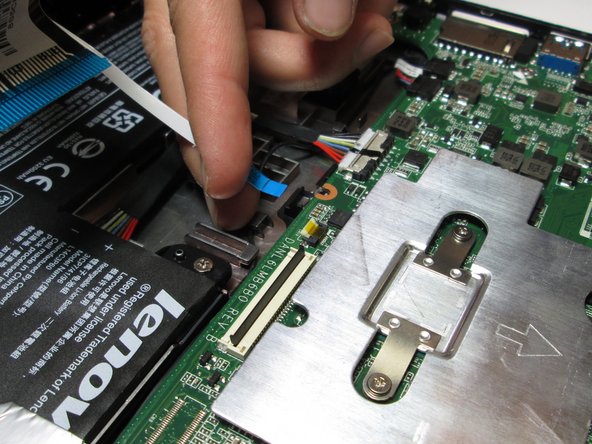
Disconnect the keyboard ribbon cable by lifting the ZIF connector lock with a plastic opening tool or fingernail and gently pulling the ribbon cable straight out of its socket.
-
-
-
Este paso está sin traducir. Ayuda a traducirlo
-
Disconnect the trackpad ribbon cable by lifting the ZIF connector lock with a small prying tool or fingernail and gently pulling the ribbon cable straight out of its socket.
-
-
Este paso está sin traducir. Ayuda a traducirlo
-
Remove the keyboard and trackpad panel away from the device.
-
-
Este paso está sin traducir. Ayuda a traducirlo
-
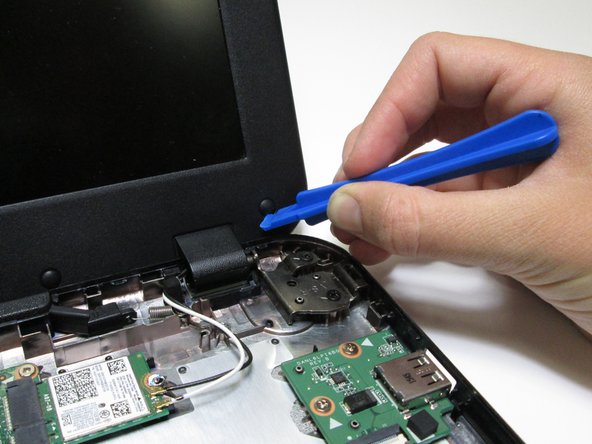
Carefully pry off the six small rubber pads around the screen with a plastic opening tool to expose the screws.
-
-
Este paso está sin traducir. Ayuda a traducirlo
-
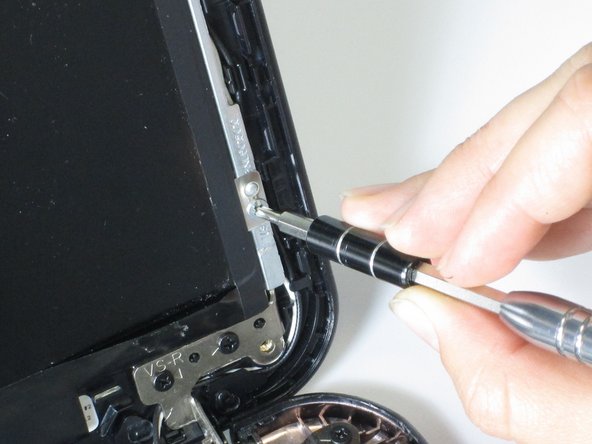
Remove the six 4.0mm Phillips screws that are underneath the rubber pads with a screwdriver.
-
-
Este paso está sin traducir. Ayuda a traducirlo
-
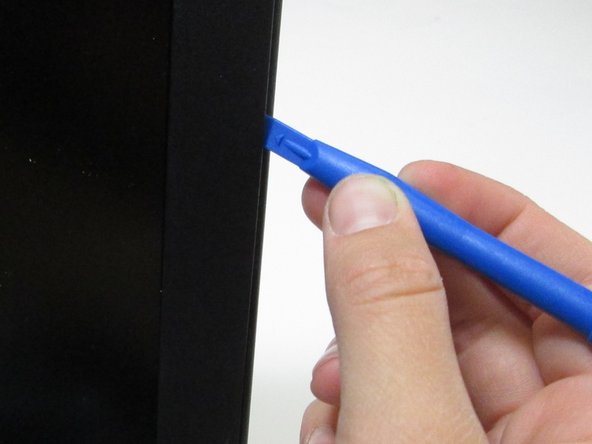
Use a plastic opening tool to carefully pry the thin plastic frame away from the screen.
-
-
Este paso está sin traducir. Ayuda a traducirlo
-
Remove the four 3.0mm Phillips screws symmetrically placed on either side of the screen.
-
-
Este paso está sin traducir. Ayuda a traducirlo
-
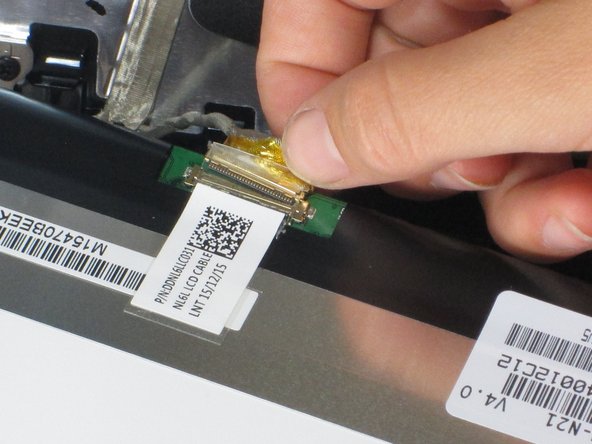
Pull the cable connecting the motherboard to the screen straight out from the back of the screen.
-


Cancelar: No complete esta guía.
5 personas más completaron esta guía.
Equipo

Cal Poly, Team S21-G2, Livingston Spring 2017 Miembro de Cal Poly, Team S21-G2, Livingston Spring 2017
CPSU-LIVINGSTON-S17S21G2
4 Miembros
12 Guías creadas