Saltar al contenido principal

Lenovo IdeaPad U410 Solid State Drive Replacement

Qué necesitas

  1. Lenovo IdeaPad U410 Solid State Drive  Replacement, Bottom Cover: paso 1, imagen 1 de 2 Lenovo IdeaPad U410 Solid State Drive  Replacement, Bottom Cover: paso 1, imagen 2 de 2
    • Using the metal spudger, remove all the rubber squares on the bottom of the laptop.

  2. Lenovo IdeaPad U410 Solid State Drive  Replacement: paso 2, imagen 1 de 3 Lenovo IdeaPad U410 Solid State Drive  Replacement: paso 2, imagen 2 de 3 Lenovo IdeaPad U410 Solid State Drive  Replacement: paso 2, imagen 3 de 3
    • Remove the three 6 mm Phillips #1 screws holding the panel on the laptop.

    • Pry the panel from the laptop using your hands or the metal spudger if necessary.

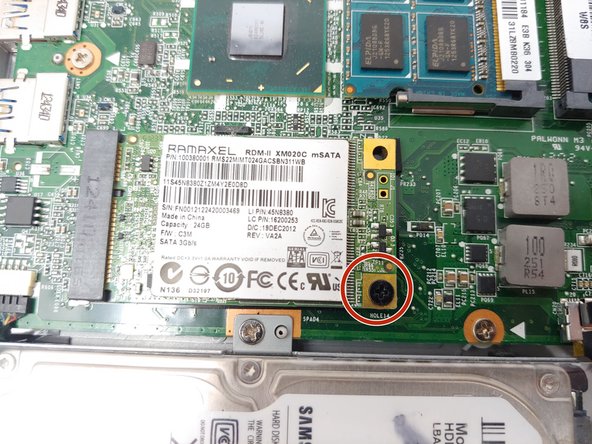
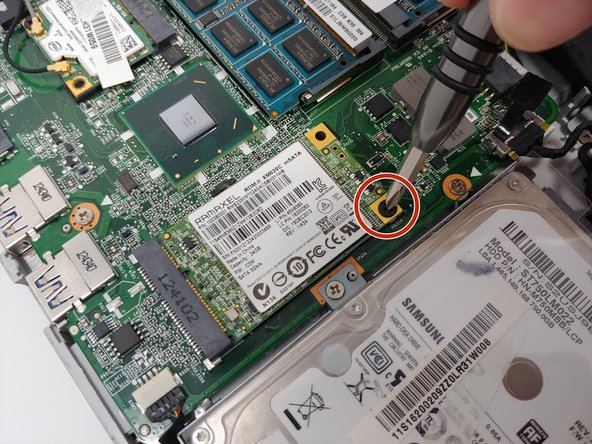
  3. Lenovo IdeaPad U410 Solid State Drive  Replacement, Solid State Drive: paso 3, imagen 1 de 3 Lenovo IdeaPad U410 Solid State Drive  Replacement, Solid State Drive: paso 3, imagen 2 de 3 Lenovo IdeaPad U410 Solid State Drive  Replacement, Solid State Drive: paso 3, imagen 3 de 3
    • Make sure your laptop is powered off.

    • Use a Phillips #1 screwdriver to remove the 3 mm screw holding the SSD in place.

  4. Lenovo IdeaPad U410 Solid State Drive  Replacement: paso 4, imagen 1 de 1
    • Grab the SSD and pull it out from the mSATA slot.

Conclusión

To reassemble your device, follow these instructions in reverse order.

Una persona más ha completado esta guía.

0 comentarios

Agregar Comentario

Ver Estadísticas:

Ultimas 24 horas: 0

Ultimos 7 días: 3

Ultimos 30 días: 4

Todo El Tiempo: 674